
Cleaning a blue crab may seem intimidating at first, especially if you're used to buying pre-cooked or pre-picked crab meat. But once you know the process, it becomes second nature—and the reward is fresh, flavorful seafood that’s far superior to anything store-bought. Whether you’ve just returned from a successful crabbing trip or picked up live crabs from the market, knowing how to clean them properly ensures both safety and taste. This guide walks you through every stage—from selecting live crabs to final rinse—with precision and care.
Why Cleaning Blue Crabs Matters
Cleaning blue crabs before cooking isn’t just about presentation—it’s essential for food safety and flavor. Live crabs carry bacteria in their digestive tracts and gills, which can taint the meat if not removed. Additionally, removing the non-edible parts allows seasonings and spices to penetrate more deeply during cooking, enhancing the overall taste. Properly cleaned crabs also cook more evenly and are easier to eat once boiled or steamed.
“Cleaning your crabs before boiling isn’t optional if you want clean, sweet meat. Skipping this step risks off-flavors and potential contamination.” — Chef Marcus Rainer, Coastal Seafood Specialist
What You’ll Need: Tools and Setup
Before handling any live crabs, gather the right tools. Having everything ready streamlines the process and keeps you safe from pinches.
- Live blue crabs (preferably chilled to slow movement)
- Heavy-duty gloves (kitchen or gardening)
- Sharp chef’s knife or crab shears
- Stiff brush (like a vegetable or grill brush)
- Large bowl or bucket of cold water
- Cutting board with a non-slip base
- Trash bag or container for waste
Step-by-Step Guide to Cleaning a Blue Crab
Follow this sequence carefully. Each step builds on the last, ensuring thorough cleaning while preserving the integrity of the edible meat.
- Inspect and Sort
Check each crab for vitality. Discard any with missing claws, foul odor, or signs of decomposition. Only clean live or recently killed crabs. - Remove the Apron
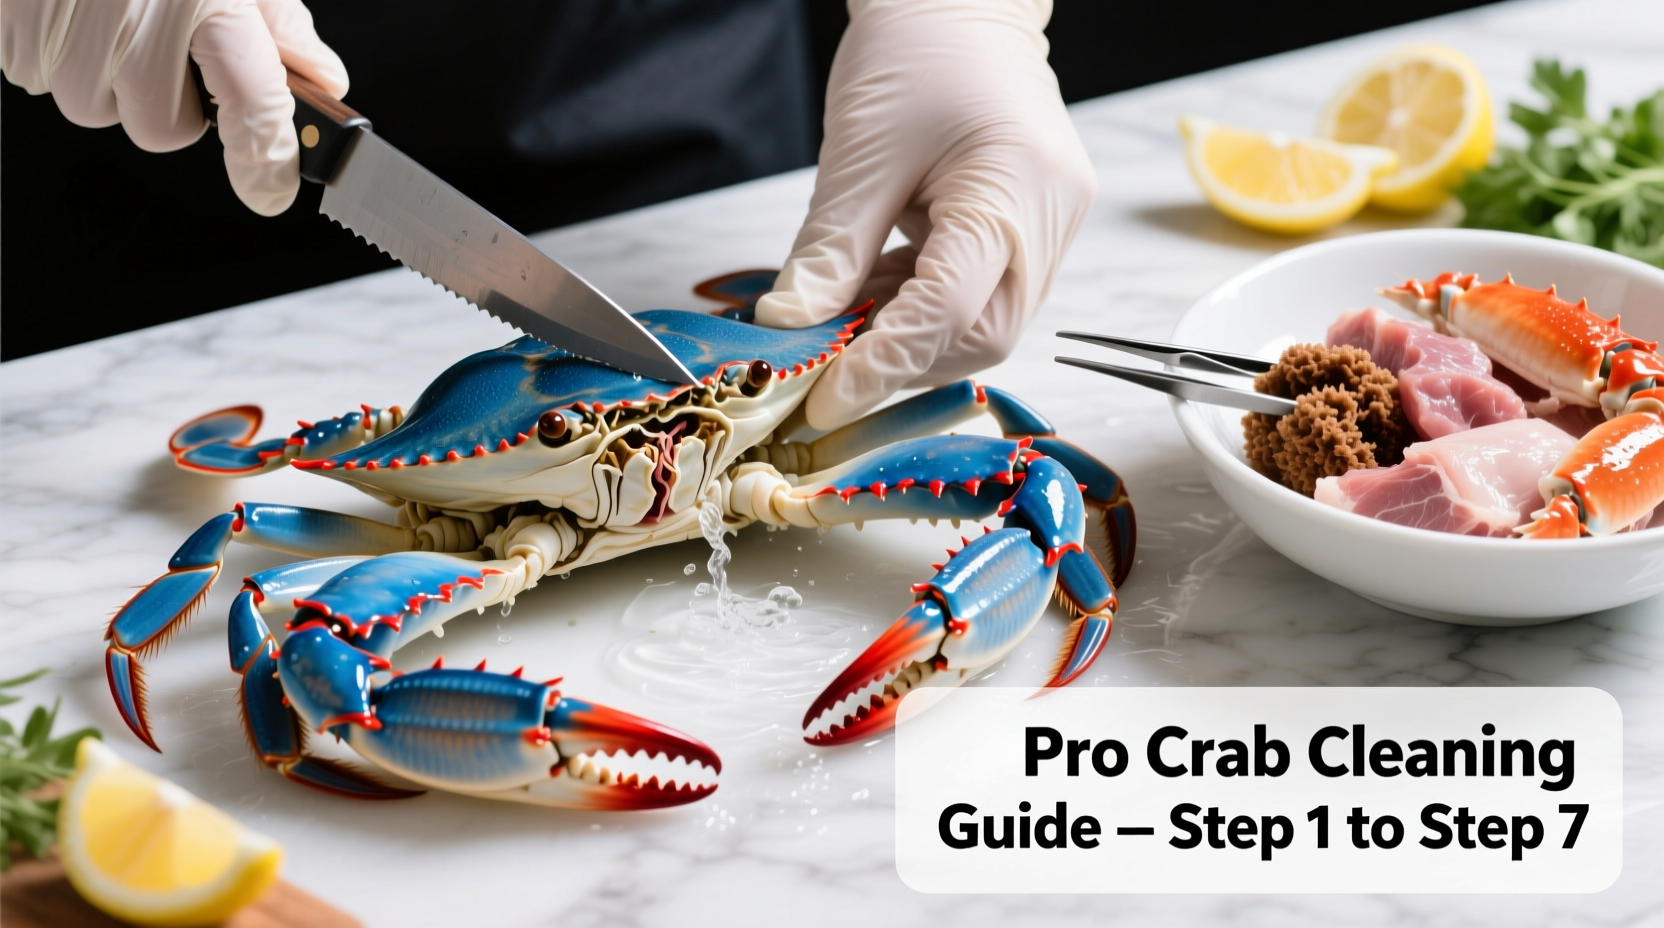
Flip the crab belly-up. Locate the triangular flap (apron) on the underside. Lift it gently and use your thumb or a knife tip to pop it open. Pull it away completely—this exposes the internal cavity. - Break Open the Shell
Insert your thumbs into the crevice where the apron was attached. Push upward firmly along the center line of the belly plate. The top shell should separate and lift off easily. Set it aside if you plan to use it for stock later. - Remove the Gills (Dead Man’s Fingers)
On either side of the body, you’ll see feathery, grayish structures—these are the gills. They filter impurities and are not edible. Pinch them between your fingers and pull them out cleanly. Repeat on both sides. - Clean the Mustard (Hepatopancreas) – Optional
The yellow-green substance in the center is the hepatopancreas, often called “mustard.” Some enjoy its rich flavor; others discard it due to potential toxin accumulation. Use a spoon or knife to scrape it out if desired. - Rinse Thoroughly
Hold the crab under cold running water or submerge it in a bowl. Scrub the inside cavities with a stiff brush to remove any remaining debris, sand, or viscera. Rinse until the water runs clear. - Cut Into Quarters (Optional for Cooking)
For faster cooking or stuffing, cut the cleaned body into quarters using a sharp knife. Cut through the center and then halve each side. Pat dry before seasoning.
Do’s and Don’ts of Crab Cleaning
| Do’s | Don’ts |
|---|---|
| Chill crabs before cleaning to reduce movement | Handle live crabs bare-handed |
| Use gloves and a firm grip when flipping or opening | Wash crabs after cooking—this spreads bacteria |
| Remove gills and apron completely | Eat the gills or uncleaned internal organs |
| Rinse under cold water after cleaning | Soak crabs for long periods—meat can absorb water and lose flavor |
| Cook immediately after cleaning for best results | Clean crabs too far in advance—refrigerate only if necessary (up to 2 hours) |
Real Example: A Weekend Crab Feast in Maryland
Jamie, a home cook from Annapolis, used to buy pre-cooked crabs for her annual summer crab boil. Last year, she decided to try cleaning them herself after catching a bushel on the Chesapeake Bay. Armed with gloves and a YouTube tutorial, she followed the steps above. She chilled the crabs first, which made all the difference in control. After removing the aprons and gills, she rinsed each one thoroughly and tossed them into a seasoned pot of boiling water. Her guests noticed the cleaner taste immediately. “The meat was sweeter, less briny,” she said. “And knowing exactly what went into them gave me peace of mind.”
Pro Tips for Better Results
Frequently Asked Questions
Can I clean dead crabs?
No. Never clean or cook crabs that have been dead for more than an hour unless they were immediately iced. Dead crabs begin decomposing rapidly, releasing enzymes and bacteria that make the meat unsafe to eat.
Is the yellow mustard part safe to eat?
It’s edible but controversial. The hepatopancreas filters toxins, so if crabs come from polluted waters, it may contain contaminants. In clean environments, many consider it a delicacy. When in doubt, discard it.
Do I need to clean crabs before boiling?
Yes. Cleaning removes gills, digestive tract, and debris that can harbor bacteria and affect flavor. Boiling dirty crabs cooks those impurities into the meat, resulting in a muddy or bitter taste.
Final Checklist: Are You Ready to Clean Like a Pro?
- ☑ Live, healthy crabs selected and chilled
- ☑ Gloves, knife, brush, and cutting board ready
- ☑ Apron removed from each crab
- ☑ Top shell cracked open and lifted off
- ☑ Gills fully extracted from both sides
- ☑ Mustard removed (if preferred)
- ☑ Interior scrubbed and rinsed clean
- ☑ Crabs cooked promptly or kept cold for short-term storage
Master the Process, Elevate Your Seafood Game
Cleaning a blue crab isn’t just a chore—it’s the foundation of a great seafood experience. Once you’ve done it a few times, the process takes just minutes and gives you complete control over quality and flavor. From backyard boils to gourmet stuffed crabs, starting with a properly cleaned crab makes all the difference. Don’t let the pinchers intimidate you. With the right tools and technique, anyone can handle this task confidently and skillfully.


 浙公网安备
33010002000092号
浙公网安备
33010002000092号 浙B2-20120091-4
Comments
No comments yet. Why don't you start the discussion?