
Creating handmade accessories offers a rewarding blend of creativity, mindfulness, and practicality. Among the most charming and accessible projects is the woven tassel ball keychain—a delicate sphere of interwoven threads that transforms basic yarn into a tactile, eye-catching accent. Unlike mass-produced trinkets, a handcrafted tassel ball carries personality and intention. With just a few tools and some patience, you can make one at home, even as a beginner. This guide walks you through every stage, from selecting materials to finishing with a secure clasp.
Gathering Your Materials and Tools
The foundation of a successful tassel ball lies in thoughtful material selection. While this craft uses minimal supplies, each component affects the final look and durability. Choose items based on texture, color harmony, and structural integrity.
Here’s what you’ll need:
- Yarn or embroidery floss: Embroidery floss works best for tight, detailed weaving due to its smooth texture and wide color range. Cotton or silk threads add luster; wool gives volume but may fuzz.
- Cardboard or foam disc: For creating uniform tassels. A 3-inch diameter circle with a center cutout works well.
- Scissors: Sharp, precision-bladed scissors ensure clean cuts without fraying.
- Keyring or metal split ring: 25–30mm size fits most keys and bags.
- Tapestry needle: Large-eyed and blunt-tipped, ideal for threading yarn without snagging.
- Glue (optional): Fabric glue or clear-drying craft glue to secure knots if needed.
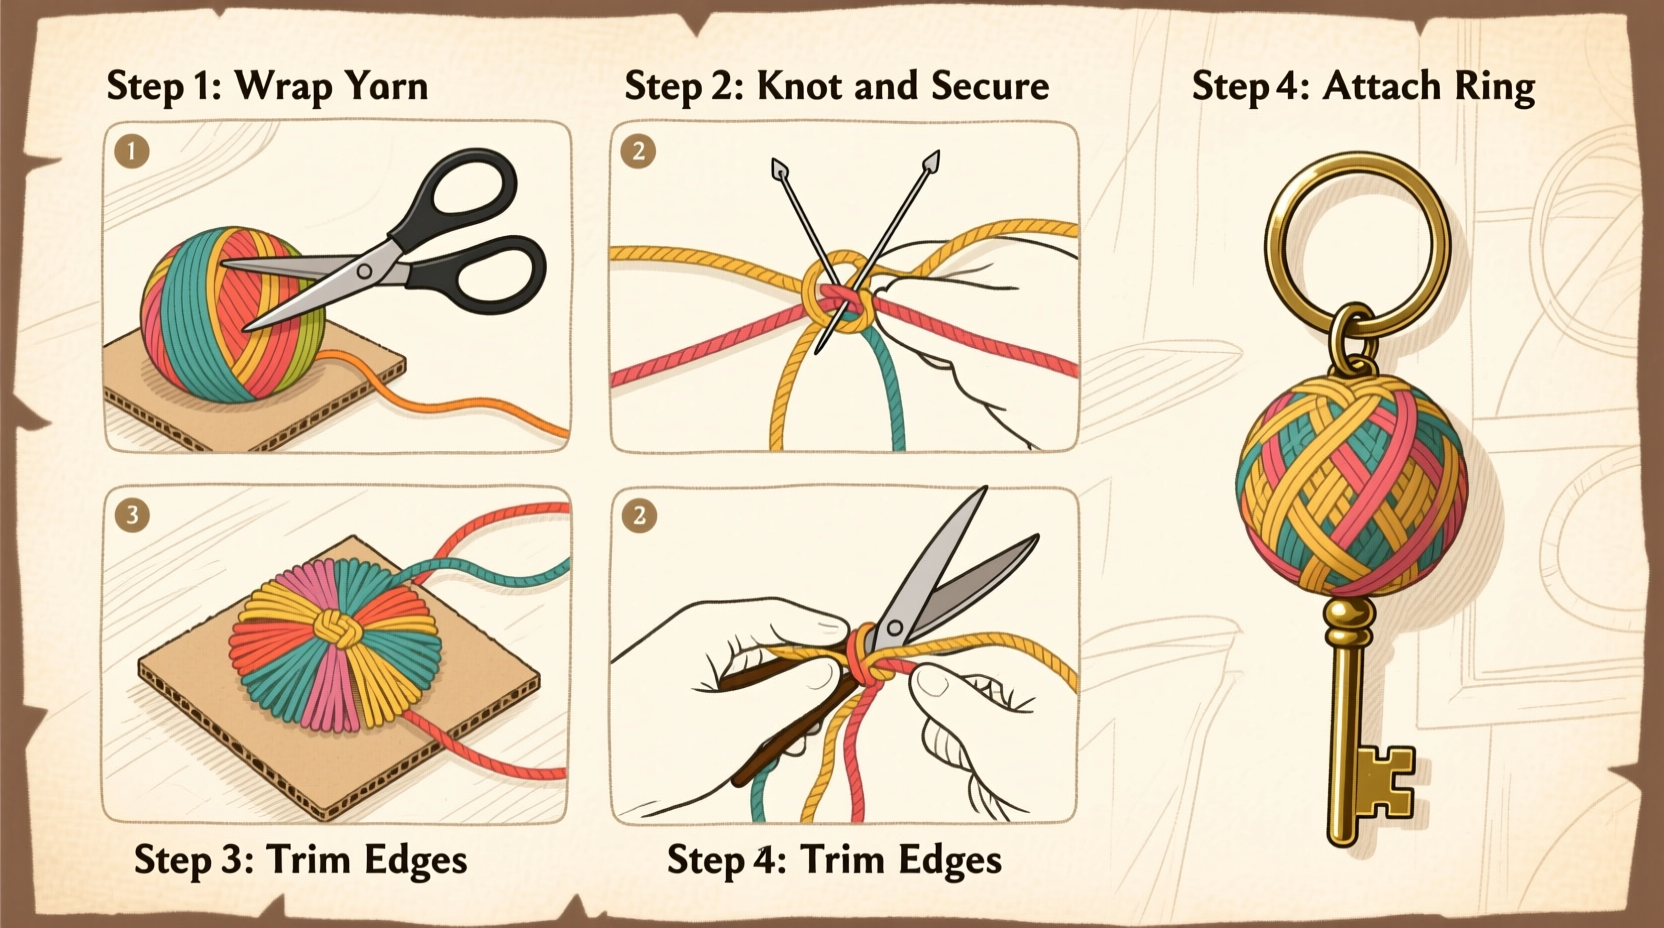
Creating the Tassels: Precision and Consistency
The tassel ball is built from multiple individual tassels wrapped and knotted around a central core. Uniformity in tassel size ensures a symmetrical, professional finish.
- Cut a piece of cardboard into a ring shape—about 3 inches in outer diameter with a 1-inch hole in the center.
- Hold the cardboard steady and wrap your chosen thread tightly around it 50–70 times, depending on desired fullness.
- Carefully slide the looped yarn off the cardboard, keeping it intact.
- Take a separate 6-inch strand of thread and tie it tightly around the top third of the loops, securing them into a bundle.
- Cut the bottom loops open to create a fluffy tassel.
- Trim the ends evenly to form a clean, rounded shape.
Repeat this process to make 12–15 identical tassels. The number depends on yarn thickness—thinner floss requires more tassels for full coverage.
Assembling the Tassel Ball: Weaving Technique
This stage transforms loose tassels into a cohesive sphere through a method similar to macramé netting. The goal is to weave strands through adjacent tassels, gradually closing the gaps into a round shape.
Follow this sequence:
- Lay six tassels flat in a circular pattern, their tied tops overlapping slightly at the center. Secure them together with a strong overhand knot using a double strand of thread.
- Begin weaving: Take the tail from one tassel and pass it under the base of the next tassel clockwise. Pull through and knot gently to hold.
- Continue this under-and-over pattern around the ring, creating a basket-weave band that draws the tassels inward.
- Add additional layers by placing new tassels between existing ones and repeating the weaving process.
- With each layer, pull the weave tighter to encourage the form to dome into a half-sphere.
- Join the second hemisphere the same way, then sew both halves together along their open edges using a whipstitch with embroidery floss.
For added structure, insert a small cotton stuffing ball or crumpled tissue paper inside before closing the final seam. This helps maintain a plump, even shape.
“Weaving isn’t just about technique—it’s about rhythm. Let your hands find a pace, and the symmetry will follow.” — Lila Chen, Textile Artist & Craft Instructor
Finishing Touches and Attachment
A polished finish elevates your tassel ball from craft project to cherished accessory. Attention to detail ensures longevity and visual appeal.
| Step | Action | Purpose |
|---|---|---|
| 1 | Trim stray ends evenly | Creates a neat, spherical silhouette |
| 2 | Apply a dab of fabric glue to the central knot | Prevents unraveling with daily use |
| 3 | Thread a tapestry needle with strong floss | For attaching the keyring securely |
| 4 | Sew through the top knot 3–4 times | Reinforces load-bearing point |
| 5 | Attach keyring and lock with a final knot | Enables functional use |
Once the keyring is attached, gently fluff the tassels outward with your fingers. Rotate the ball to check for balance and adjust any uneven sections.
Common Challenges and How to Solve Them
Even experienced crafters encounter hiccups. Recognizing issues early prevents frustration and wasted effort.
- Problem: Tassels are too sparse.
Solution: Increase the number of wraps per tassel or use thicker yarn. Alternatively, add more tassels during assembly. - Problem: The ball appears lopsided.
Solution: Check tension consistency during weaving. Loosen or retie stitches to redistribute volume evenly. - Problem: Knots keep slipping.
Solution: Use non-slip thread like mercerized cotton. Apply a tiny amount of fabric glue to critical junctions.
Real Example: Maya’s First Tassel Ball
Maya, a college student exploring fiber arts, attempted her first tassel ball using leftover yarn from a sweater project. She initially used only eight tassels, resulting in a loose, irregular shape. After reviewing tutorial notes, she remade it with twelve tassels and applied consistent weaving tension. She incorporated navy and gold threads to match her school colors and added a silver keyring. The finished piece became a favorite gift for her roommate—and inspired Maya to start a mini craft business selling custom keychains at campus markets.
Frequently Asked Questions
Can I wash a woven tassel ball?
Hand washing is possible, but not recommended regularly. If necessary, spot-clean with a damp cloth and mild soap. Lay flat to dry away from direct heat. Frequent washing may loosen knots and fade colors.
What kind of thread lasts longest?
Embroidery floss made from 100% cotton or rayon holds up best. Synthetic blends resist moisture but may slip more easily. Silk offers elegance but requires careful handling.
How long does it take to make one?
For beginners, expect 1.5 to 2.5 hours, including prep and finishing. With practice, the process can be completed in under an hour.
Final Checklist Before You Begin
- ✔ Gather all materials: yarn, scissors, cardboard, needle, keyring
- ✔ Cut and prepare at least 12 uniform tassels
- ✔ Test knot strength with a pull test
- ✔ Plan color scheme or pattern layout
- ✔ Set up a clean, well-lit workspace
- ✔ Allow time for slow, focused work—rushing leads to mistakes
Making It Yours
The beauty of the tassel ball keychain lies not only in its appearance but in the personal meaning it carries. Whether you choose soft pastels for a gift, bold tones for self-expression, or earthy neutrals for minimalist style, each ball becomes a signature piece. These keychains also make heartfelt presents—handmade with attention, they convey care in a way store-bought items rarely do.
Once you master the basics, experiment with variations: try different knot patterns, incorporate beads into the weave, or create mini versions for zipper pulls. The technique opens doors to broader fiber art exploration, from wall hangings to jewelry.


 浙公网安备
33010002000092号
浙公网安备
33010002000092号 浙B2-20120091-4
Comments
No comments yet. Why don't you start the discussion?