
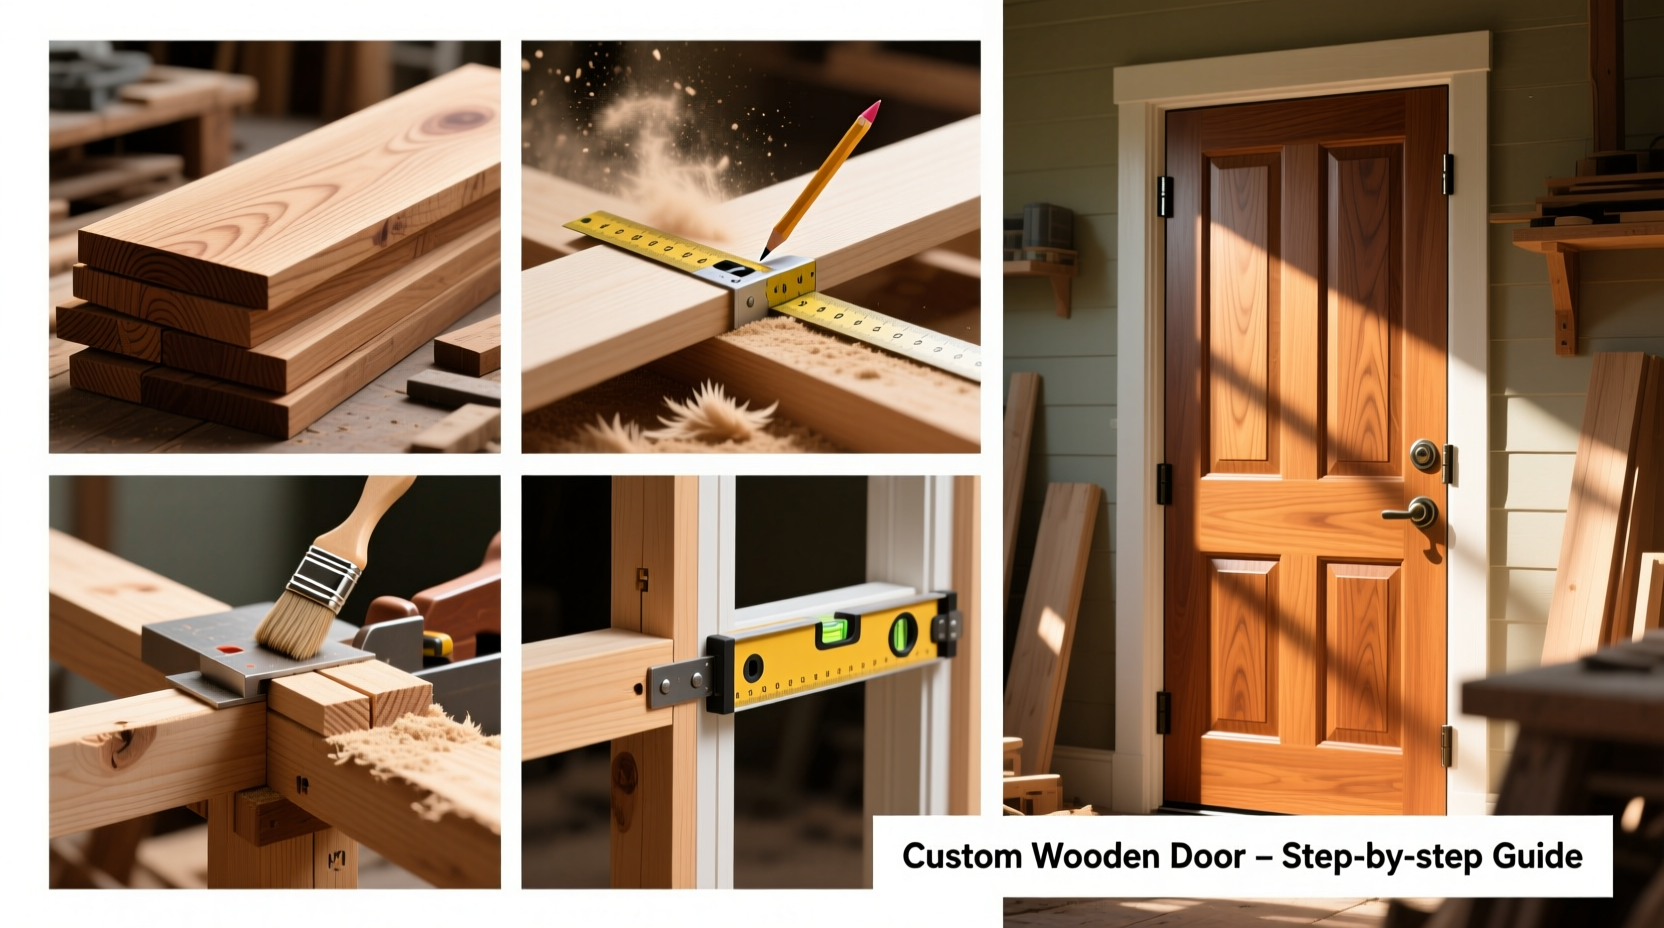
Replacing or installing a new entryway doesn’t have to mean choosing from mass-produced options. A custom wooden door adds character, improves insulation, and enhances curb appeal with unmatched craftsmanship. While the idea of building one from scratch may seem daunting, it’s entirely achievable with the right tools, materials, and approach. This comprehensive guide walks you through every stage—from planning dimensions to applying the final protective coat—so you can create a durable, beautiful door tailored to your home.
1. Planning and Design Considerations
Before touching any wood, define the purpose, style, and structural requirements of your door. Is it for exterior use, requiring weather resistance? Or an interior statement piece showcasing joinery and grain? Measure the rough opening in your frame precisely, adding ½ inch to height and width to allow for shimming and clearance. Standard exterior doors are typically 36 inches wide and 80 inches tall, but custom sizes demand exact measurements.
Sketch your design on paper or using basic CAD software. Decide whether you want a solid panel, raised panel, or louvered configuration. For exterior applications, consider a five-panel traditional design with stiles (vertical members), rails (horizontal), and center panels that allow for wood movement due to humidity changes.
2. Materials and Tools Checklist
Selecting quality lumber is critical. Choose kiln-dried boards with minimal warping and straight grain. Avoid knots near joint areas. For a standard 1¾-inch thick door, glue up multiple boards to achieve full thickness or source pre-laminated stock.
“Wood moves. Always account for seasonal expansion and contraction, especially across the grain.” — Daniel Reyes, Master Cabinetmaker
Essential Tools You’ll Need:
- Tape measure and framing square
- Table saw or circular saw
- Jointer and planer (for milling boards)
- Biscuit joiner or pocket hole jig
- Clamps (bar or pipe, at least six)
- Orbital sander (80–220 grit)
- Drill/driver and Forstner bits (for hardware holes)
- Wood glue (water-resistant for exterior use)
- Chisels and mallet (for hinge mortising)
Materials List:
- Hardwood boards (quantity depends on size)
- Wood glue (Titebond III recommended for outdoor use)
- Sanding supplies
- Finish (oil-based polyurethane, varnish, or exterior-grade stain)
- Hinges, handle, lockset, weatherstripping
3. Step-by-Step Construction Process
Follow this timeline-based workflow to build your door efficiently and accurately.
- Milling the Lumber: Flatten and square edges using a jointer. Plane boards to uniform thickness. Cut all pieces slightly oversized for final trimming after assembly.
- Cutting Stiles and Rails: Cut two vertical stiles to full door height. Cut top, bottom, and middle rails to width minus twice the stile thickness (e.g., for 36” door with 3” stiles: 30” rail).
- Joinery Preparation: Use mortise-and-tenon, cope-and-stick, or biscuit joints. Biscuit joints are beginner-friendly. Cut slots in mating edges, apply glue, insert biscuits, and clamp.
- Panel Fitting: Panels should “float” within grooves cut into stiles and rails to accommodate wood movement. Groove the inside edges (~¼” deep x ½” wide). Cut panels ¼” smaller than the opening in width/height to allow expansion.
- Dry Assembly: Assemble without glue to check alignment and gaps. Adjust as needed before final glue-up.
- Glue-Up and Clamping: Apply even bead of glue to joints. Insert panels. Clamp assembly tightly using cauls to prevent bowing. Wipe excess glue immediately. Let cure 24 hours.
- Sanding and Trimming: After curing, unclamp and sand smooth. Trim edges flush using a hand plane or belt sander. Check for flatness with a straightedge.
- Hardware Installation: Mark and chisel hinge mortises. Drill bore hole and latch cutout for lockset. Install hinges, knob, and strike plate.
- Finishing: Sand progressively from 80 to 220 grit. Wipe clean. Apply three coats of exterior-grade finish, sanding lightly between coats.
4. Common Pitfalls and Best Practices
Avoid these frequent mistakes to ensure long-term durability and proper function.
| Do | Don’t |
|---|---|
| Allow space for wood expansion in panel grooves | Glue panels directly to frame |
| Use water-resistant glue for exterior doors | Use indoor-only adhesives outdoors |
| Hang door only after finish has fully cured (7+ days) | Install immediately after finishing |
| Apply finish to all surfaces, including edges and top/bottom | Leave end grain unfinished |
| Check plumb and level during installation | Assume frame is perfectly square |
5. Real-World Example: The Heritage Cottage Project
In Portland, Oregon, homeowner Maria Lin rebuilt her 1920s bungalow’s front entrance after decades of ill-fitting replacements. She opted for a custom white oak door with a classic four-panel design to match the home’s original aesthetic. Using reclaimed flooring for character and sustainability, she milled each component herself, incorporating subtle chamfers on stiles for shadow lines. After a month of meticulous work—including two failed finish attempts due to Portland’s damp climate—she achieved a rich, satin-luster door that now serves as the focal point of her home’s façade. Her advice? “Test your finish on scrap first, and don’t rush the drying phase. Moisture trapped under varnish will bubble and peel within months.”
Frequently Asked Questions
How long does it take to build a custom wooden door?
Allow 40–60 hours over 2–3 weeks. Milling and cutting take 8–10 hours, glue-up and clamping about 4 hours (plus 24-hour cure), finishing spans several days with drying time, and hardware/installation requires 4–6 hours. Factor in learning curve if you're new to joinery.
Can I build a wooden door without power tools?
Yes, but it demands significant skill and time. Hand tools like a jack plane, rip saw, chisels, and winding sticks can shape and assemble a door. However, precision suffers without a table saw or jointer, increasing risk of misalignment and poor sealing. Power tools drastically improve accuracy and efficiency.
What’s the best finish for an exterior wooden door?
An oil-modified polyurethane or spar urethane offers excellent UV and moisture resistance. Spar varnish is traditionally used on boats and handles temperature swings better. Apply three thin coats, and re-coat every 2–3 years depending on sun exposure.
Final Steps and Long-Term Care
Once installed, maintain your door with seasonal inspections. Clean annually with mild soap and water. Reapply topcoat when water no longer beads on the surface. Check hinges and hardware tightness twice a year. In humid climates, ensure airflow around the door to prevent swelling; in dry regions, avoid direct heater blasts indoors.
A handmade wooden door isn’t just functional—it’s a legacy piece. Each mark of craftsmanship tells a story of patience and intention. Whether replacing a worn entry or enhancing a renovation, taking control of the process empowers you to create something truly unique.


 浙公网安备
33010002000092号
浙公网安备
33010002000092号 浙B2-20120091-4
Comments
No comments yet. Why don't you start the discussion?