
Cargo nets are essential tools in camping, boating, military operations, and even home organization. A well-made net can secure gear, prevent shifting loads, and endure harsh conditions. While commercial options exist, crafting your own from high-quality rope gives you full control over size, strength, and durability. This guide walks through the entire process—from material selection to final knotting—using time-tested rope techniques that ensure reliability and resilience.
Selecting the Right Rope and Tools
The foundation of any durable cargo net is the choice of rope. Not all ropes are suited for load-bearing applications or exposure to moisture, UV light, or abrasion. Consider these factors when selecting materials:
- Material: Polypropylene, nylon, or polyester are ideal. Nylon offers excellent strength and elasticity; polyester resists UV degradation; polypropylene floats and resists water absorption.
- Diameter: Use rope between 4mm and 6mm (3/16” to 1/4”) for balance between grip, flexibility, and load capacity.
- Length: Estimate based on desired net dimensions. As a rule, plan for at least 3–4 times the total area perimeter in rope length due to knotting and grid spacing.
You’ll also need basic tools:
- Measuring tape
- Scissors or a sharp knife (for cutting rope)
- Lighter or heat source (to seal synthetic rope ends)
- Frame or jig (wooden frame, hooks, or clamps to hold work in place)
- Gloves (optional, for hand protection during tensioning)
Designing the Net Structure
Before tying a single knot, decide on the net’s purpose and dimensions. Will it carry light camping gear or heavy equipment? Is it meant to stretch across a truck bed or hang vertically?
A standard square-mesh cargo net works best for most applications. Mesh size typically ranges from 6” to 12” per side. Smaller meshes offer more support but use more rope and reduce airflow.
Use this formula to estimate required rope length:
| Metric | Formula | Example (1m x 1m net, 10cm mesh) |
|---|---|---|
| Number of vertical strands | (Width / mesh size) + 1 | (100cm / 10cm) + 1 = 11 strands |
| Number of horizontal rows | (Height / mesh size) + 1 | (100cm / 10cm) + 1 = 11 rows |
| Total rope length | (Vertical strands × height) + (Horizontal rows × width) | (11 × 1m) + (11 × 1m) = 22 meters |
Add 10–15% extra for knots and errors. Always round up.
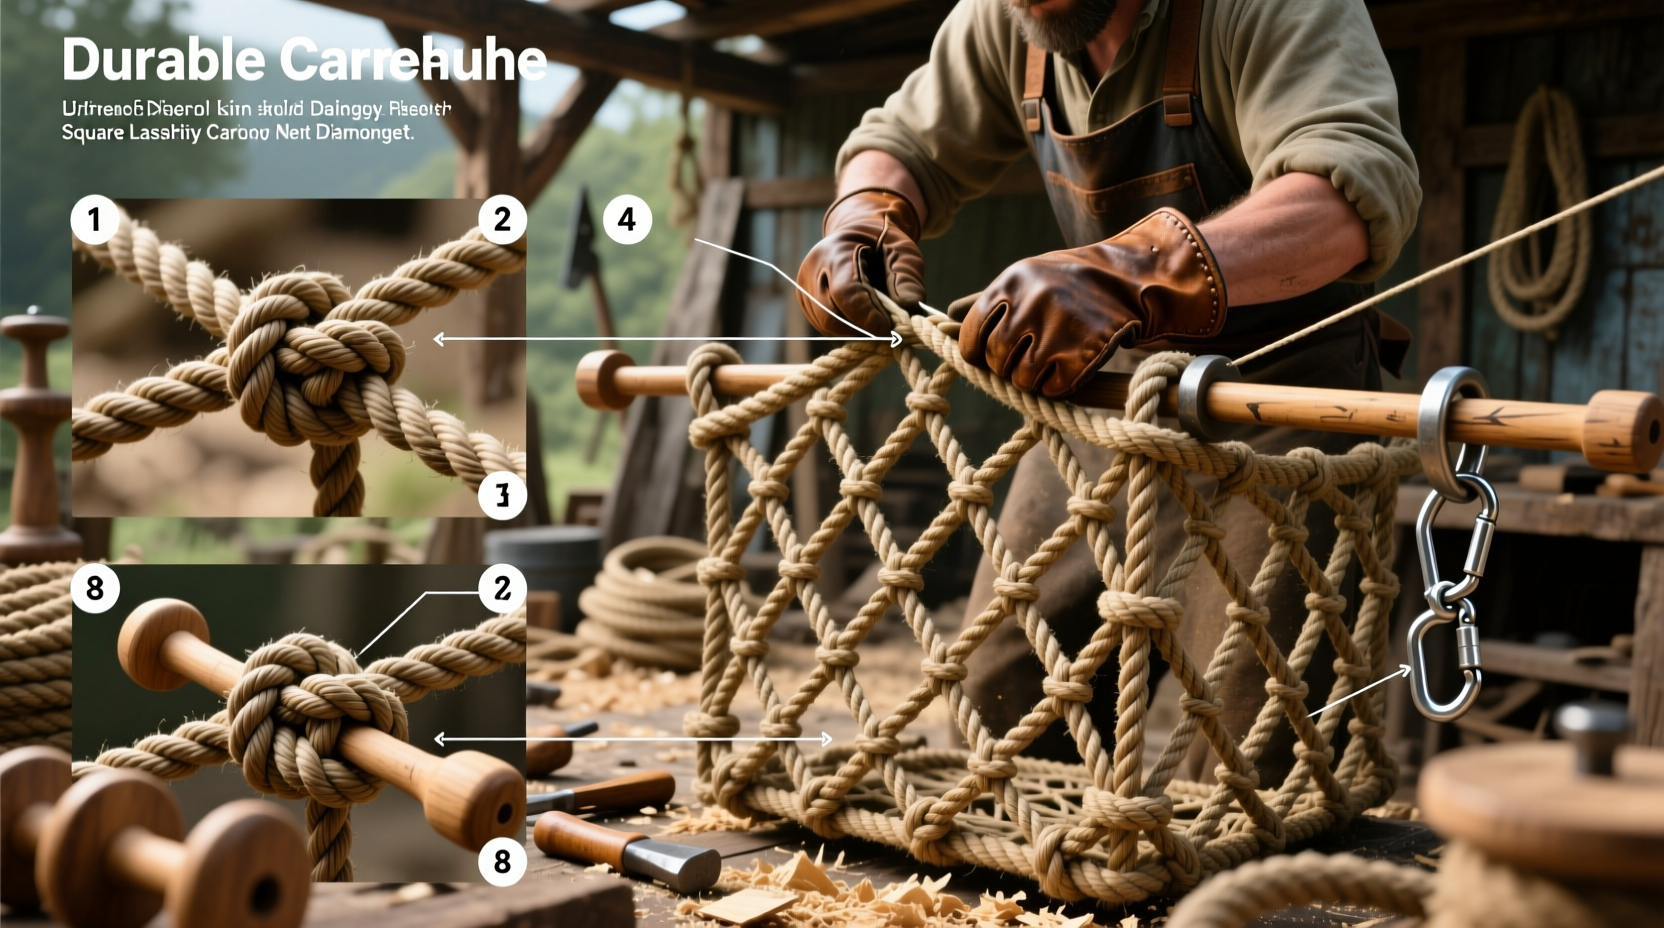
Step-by-Step Construction Process
Follow this sequence to build a strong, evenly tensioned cargo net:
- Prepare the Frame: Set up a rectangular jig with adjustable pegs or nails spaced according to your mesh size. Ensure corners are square and edges taut.
- Install Vertical Lines: Cut equal-length strands and tie them vertically across the frame using clove hitches or round turns at top and bottom. Space them evenly. These are your \"warp\" lines.
- Begin Weaving Horizontal Rows: Take a long continuous rope and weave it horizontally through the vertical strands, creating loops with half-hitch knots or sheet bends at each intersection.
- Secure Each Intersection: At every crossing point, tie a double half-hitch or bowline loop to lock the joint. Maintain consistent tension to avoid sagging.
- Repeat Row by Row: Work from bottom to top, ensuring each new row aligns precisely with the one below. Rotate direction if needed to reduce twisting.
- Finish the Edges: After completing the grid, reinforce the outer perimeter with a lashing or whip stitch using a separate cord to prevent unraveling.
- Remove from Frame: Carefully cut loose from the jig, inspect all knots, and trim excess rope ends. Seal synthetic ends with a flame to prevent fraying.
Knot Selection and Strength Testing
The integrity of your cargo net depends heavily on the reliability of each knot. Choose knots known for strength and resistance to slipping:
- Double Half-Hitch: Excellent for securing running lines to standing parts; easy to tie and inspect.
- Bowline: Forms a non-slipping loop at intersections; retains up to 70% of rope strength.
- Sheet Bend: Ideal for joining two ropes of different thicknesses securely.
- Clove Hitch: Useful for temporary anchoring to the frame during construction.
“Knot efficiency matters more than rope rating. A poorly tied knot can reduce line strength by over 50%.” — Captain Rafael Mendez, Maritime Rigging Instructor
After assembly, perform a load test:
- Suspend the net securely.
- Apply incremental weight (start with 25% of expected max load).
- Observe for slippage, deformation, or weak points.
- Retie any compromised joints before full deployment.
Real-World Application: Marine Gear Storage
Consider Mark, a recreational sailor preparing his 32-foot cruiser for a coastal voyage. He needed a custom-sized net to secure deck bags and life jackets in rough seas. Off-the-shelf nets were either too small or lacked attachment points.
Using 5mm braided polyester rope and a 90cm x 60cm wooden jig with 15cm mesh spacing, he constructed a reinforced cargo net over two evenings. He used double half-hitches throughout and added grommets at each corner for snap hook attachments. During a storm with 25-knot winds, the net held firm—no gear shifted or fell overboard.
This example shows how a tailored, handcrafted solution outperforms generic alternatives when built with proper technique and attention to detail.
Maintenance and Longevity Tips
A durable cargo net requires care after use:
- Rinse with fresh water after saltwater exposure.
- Air dry completely before storage to prevent mildew.
- Inspect knots and fibers monthly for wear or UV damage.
- Store loosely coiled in a ventilated bag away from direct sunlight.
With regular maintenance, a well-made net can last 5–7 years even in demanding environments.
Frequently Asked Questions
Can I make a cargo net with natural fiber rope?
Yes, manila or hemp can be used, but they absorb water, degrade faster in UV light, and lose strength when wet. Synthetic ropes are strongly recommended for durability and safety.
How do I repair a torn cargo net?
Isolate the damaged section. Untie and reweave broken strands using the same knot pattern. Splice in new rope if necessary, securing with seizing or whipping.
What’s the strongest knot for connecting rope to a metal ring?
The bowline is widely preferred because it forms a fixed loop that won’t slip under load and is easy to untie after stress. For critical applications, back it up with a stopper knot.
Conclusion
Crafting a durable cargo net isn't just about tying knots—it's about understanding load distribution, material behavior, and structural integrity. By following precise measurements, choosing resilient rope, and applying reliable knotting techniques, you create a tool that performs under pressure and lasts for years. Whether you're outfitting a boat, organizing a garage, or preparing for an expedition, a handmade cargo net offers unmatched customization and strength.


 浙公网安备
33010002000092号
浙公网安备
33010002000092号 浙B2-20120091-4
Comments
No comments yet. Why don't you start the discussion?