
Creating your own dog leash from climbing rope isn’t just a satisfying DIY project—it’s a smart investment in durability, safety, and customization. Climbing rope is engineered to withstand extreme forces, making it ideal for dogs that pull, hike, or explore rugged terrain. With tensile strength often exceeding 5,000 pounds, dynamic or static climbing rope offers peace of mind while maintaining flexibility and comfort in hand. This guide walks you through selecting materials, assembling components, and finishing a professional-grade leash that reflects your dog’s personality and your craftsmanship.
Selecting the Right Materials
The foundation of a reliable homemade leash lies in material quality. Not all ropes are suitable, even if they appear thick or rugged. Focus on static climbing rope rather than dynamic. While dynamic rope stretches under load (ideal for absorbing fall impact), static rope has minimal elongation—critical for predictable control during walks.
Choose a diameter between 9mm and 11mm. Thinner than 9mm may lack grip and long-term resilience; thicker than 11mm can be cumbersome to handle. Nylon is preferred over polyester for its abrasion resistance and slight elasticity, which cushions sudden tugs without compromising structural integrity.
In addition to rope, gather these essential components:
- Brass or marine-grade stainless steel carabiner (locking type recommended)
- Heavy-duty metal loop or O-ring (3/8” to 1/2” diameter)
- Lighter or soldering tool for sealing ends
- Measuring tape
- Sharp utility knife or cord cutter
- Leather strip or rubber grip (optional, for comfort)
Step-by-Step Assembly Process
Follow this timeline to build a 4-foot standard walking leash. Adjust measurements as needed for longer trail leashes (typically 6 feet).
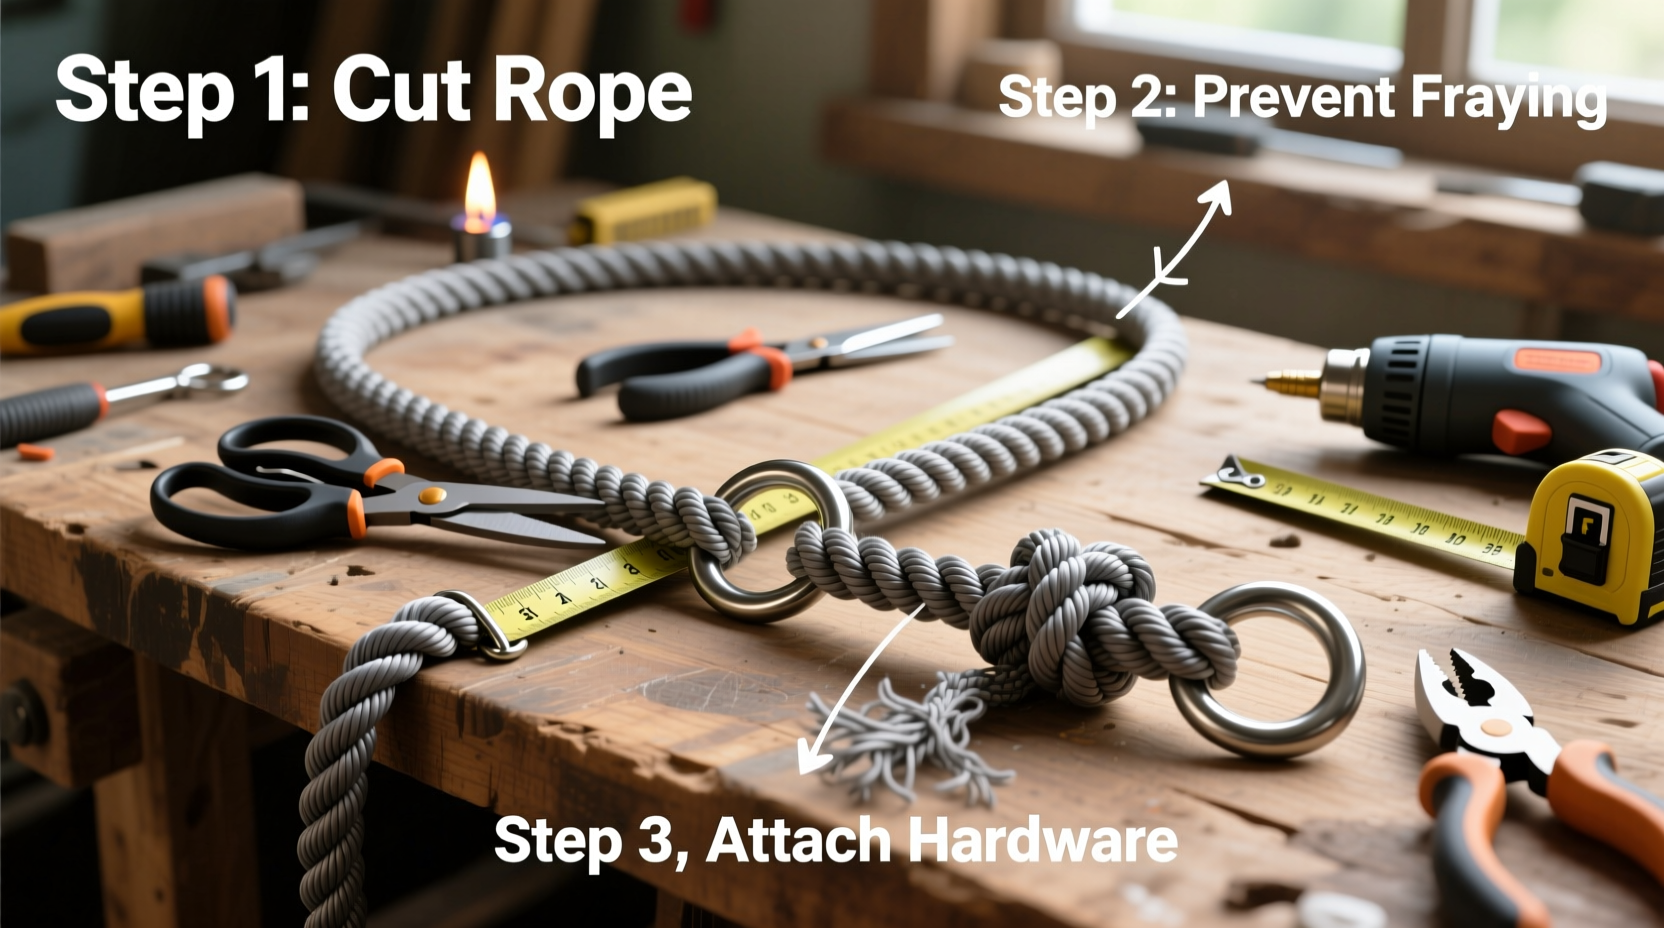
- Cut the Rope: Measure and cut a 5-foot length of climbing rope. The extra foot accounts for knots and handles. Use a straight edge and sharp blade for a clean cut.
- Seal the Cut End: Immediately after cutting, pass the end through a flame briefly until the fibers melt slightly. Pull through quickly to avoid burning. This prevents fraying and strengthens the tip.
- Create the Handle Loop: Fold one end of the rope back 12 inches to form a loop. Secure it using a double fisherman’s knot or a braided splice for maximum hold. Ensure the knot is tight and seated firmly against the loop base.
- Attach the Clip End: Thread the opposite end through the metal O-ring, then back alongside itself to form a secure eye splice. Tie off with an anchor hitch or use heat to fuse the rope around the ring. Attach the locking carabiner to the O-ring.
- Final Seal and Test: Inspect both ends for loose strands. Reheat any rough edges. Apply moderate tension to test joint integrity before first use.
For added comfort, wrap the handle section with paracord or attach a padded leather sleeve. Avoid glues or tapes—they degrade under UV exposure and moisture.
Do’s and Don’ts: Building a Safe, Long-Lasting Leash
| Action | Recommendation | Rationale |
|---|---|---|
| Use static climbing rope | ✅ Do | Maintains shape under load; no bounce or stretch during use |
| Expose to constant sunlight | ❌ Don’t | UV rays degrade nylon over time, weakening fibers |
| Inspect monthly for wear | ✅ Do | Catch internal core damage early—especially near knots |
| Wash with bleach-based cleaners | ❌ Don’t | Chemicals erode synthetic fibers and reduce tensile strength |
| Add reflective stitching (optional) | ✅ Do | Improves visibility during evening walks |
Real Example: From Concept to Trail Test
Jamie, an avid hiker in Colorado, built her first climbing rope leash for her 70-pound Australian Shepherd mix, Kai. Frustrated by broken nylon leashes during mountain scrambles, she sourced a retired 10.5mm static rope from a climbing gym. Following the steps above, she crafted a 4-foot leash with a reinforced leather-wrapped handle and marine-grade hardware.
Over eight months of regular use—including rocky trails, river crossings, and snow hikes—the leash showed only surface abrasion. No internal slippage or knot failure occurred. “It feels more secure than anything I’ve bought,” Jamie said. “And when we’re out, people always ask where I got it.” Her design now serves as a template for a small side business crafting custom leashes for fellow outdoor pet owners.
Expert Insight on Material Safety
“Climbing rope undergoes rigorous testing for load distribution and sheath durability. When repurposed correctly, it’s among the safest materials for high-stress pet gear.” — Dr. Lena Torres, Materials Engineer and Pet Product Safety Consultant
Torres emphasizes inspecting the rope’s history before use. Avoid ropes with documented falls, chemical exposure, or prolonged damp storage. Even minor core damage invisible to the eye can compromise performance.
Checklist: Before You Use Your Homemade Leash
Ensure every component meets safety standards with this verification list:
- ☑ Rope is static, not dynamic, and within 9–11mm diameter
- ☑ All knots are seated tightly and fused at contact points
- ☑ Carabiner locks securely and opens smoothly
- ☑ No fraying, discoloration, or soft spots along the length
- ☑ Hardware shows no signs of corrosion or deformation
- ☑ Leash tested under controlled tension (e.g., anchored pull)
Frequently Asked Questions
Can I use dynamic climbing rope for a dog leash?
No. Dynamic rope is designed to stretch under impact, which creates unpredictable slack during walks. This delay in response can be dangerous if your dog lunges suddenly. Always opt for low-stretch static rope.
How long should a climbing rope leash last?
With proper care, expect 2–5 years of regular use. Lifespan depends on frequency of use, exposure to elements, and maintenance. Retire the leash if you notice core damage, stiff sections, or difficulty untying knots due to internal wear.
Is it safe to make a hands-free leash from climbing rope?
Yes, but modify the design carefully. For a waist belt version, use a wider, padded backing and ensure the rope attachment points distribute force across the hips—not the spine. Never wrap climbing rope directly around your body without padding.
Conclusion: Craft Confidence with Every Walk
Building a dog leash from climbing rope merges practicality with personal expression. Beyond saving money, you gain full control over materials, length, grip, and aesthetics—knowing exactly what your dog is tethered to. Each knot tied is a commitment to safety; each seal fused, a mark of durability. Whether you're navigating city sidewalks or alpine ridges, a well-made rope leash becomes a trusted companion.


 浙公网安备
33010002000092号
浙公网安备
33010002000092号 浙B2-20120091-4
Comments
No comments yet. Why don't you start the discussion?