
Creating handmade accessories adds a personal touch to everyday items, and few projects are as charming as a glossy bowknot bear keychain. Combining soft plush fabric, vibrant ribbons, and a touch of sealant for shine, this DIY craft results in a durable, eye-catching accessory. Whether you're making it as a thoughtful gift or a cheerful addition to your keys, the process is both relaxing and rewarding. With attention to detail and a few essential tools, anyone can complete this project in under two hours.
Gathering Your Materials and Tools
The success of any craft begins with preparation. Assembling all necessary supplies beforehand ensures a smooth workflow and prevents interruptions. The materials required for the glossy bowknot bear keychain are affordable and widely available at craft stores or online retailers.
- Faux suede or felt fabric (in brown or beige for the bear body)
- Satin ribbon (½ inch wide, in a contrasting color like red, pink, or navy)
- Fiberfill stuffing
- Keychain ring (metal, 25–30mm)
- Needle and strong thread (or sewing machine)
- Hot glue gun and glue sticks
- Scissors (fabric scissors recommended)
- Pencil or fabric marker
- Mod Podge Gloss or clear acrylic sealer spray
- Small black beads or embroidery floss (for eyes)
- Pins or clips (to hold fabric while sewing)
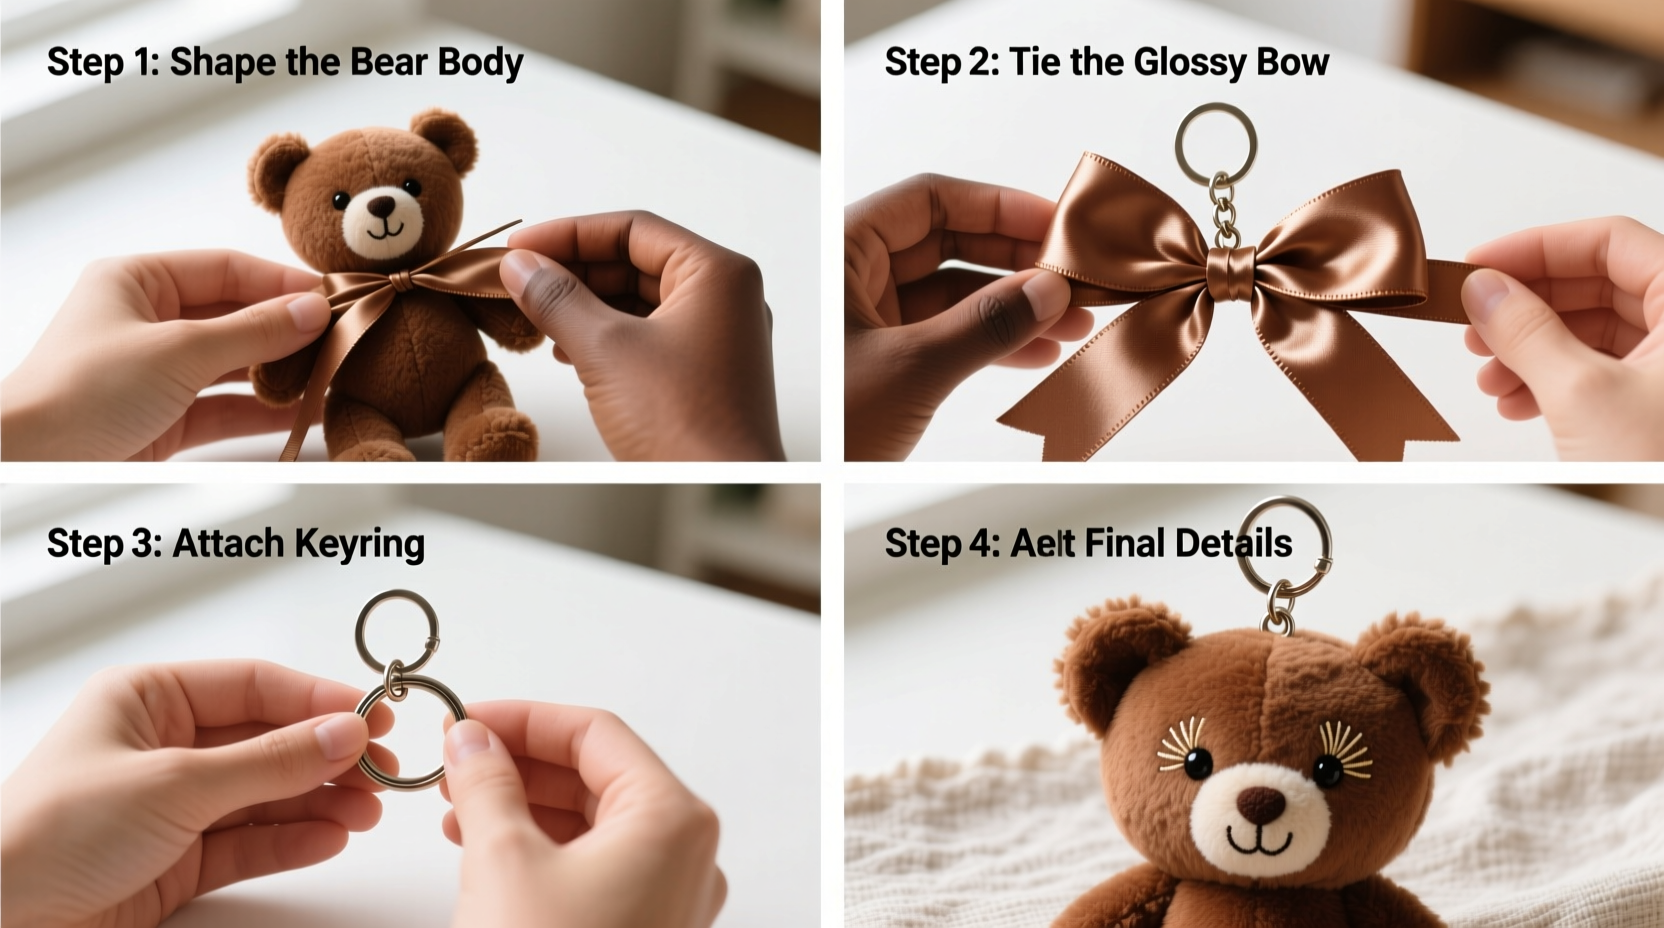
Constructing the Bear Body
The bear forms the centerpiece of the keychain and should be symmetrical and neatly stitched. Begin by folding your fabric in half, right sides together, to ensure mirror-image pieces.
- Draw a simple bear silhouette—about 2 inches tall—on the fabric using a pencil. Include rounded ears, a small snout, and a gentle curve for the body.
- Cut out the shape through both layers, resulting in two identical bear pieces.
- Pins the pieces together, aligning edges carefully.
- Sew around the perimeter using a tight backstitch or a sewing machine on a close zigzag setting. Leave a 1.5-inch gap at the bottom for turning and stuffing.
- Clip curves gently near the ears and snout to reduce bulk when turned right side out.
- Turn the bear right side out using a blunt tool like a chopstick or knitting needle.
- Stuff lightly with fiberfill, focusing on even distribution without overstuffing.
- Hand-stitch the opening closed using a ladder stitch for an invisible finish.
“Precision in cutting and stitching transforms a simple fabric shape into a character with charm.” — Lila Tran, Soft Sculpture Artist
Creating the Glossy Bowknot
The bowknot adds elegance and contrast to the rustic bear. A satin ribbon provides natural sheen, but sealing it enhances durability and water resistance.
- Cut a 12-inch length of ribbon.
- Form a loop in the center, crossing the ends over each other to create a basic bow.
- Wrap a small strip of leftover fabric or thin wire around the center where the loops meet to secure the knot.
- Tie off the wrap tightly and trim excess.
- Adjust the loops and tails evenly, trimming the ends at a slight angle for a polished look.
- Apply a light, even coat of Mod Podge Gloss to the entire bow using a small brush. Let dry completely (about 20 minutes), then apply a second coat for maximum shine.
Assembling the Keychain
Now that both components are ready, it’s time to bring them together into a functional and decorative piece.
- Position the bowknot centered behind the bear’s neck, just below the head.
- Secure it firmly with hot glue, applying adhesive under the wrapped center of the bow. Hold in place for 30 seconds until set.
- Attach the keychain ring: Open the metal ring slightly using pliers, slide it through the top of the bear’s head (between the ears), then close securely.
- For added durability, reinforce the attachment point with a drop of fabric glue inside the seam before closing.
- Finally, add facial details. Glue on two small black beads for eyes, or use embroidery floss to stitch tiny French knots.
| Component | Attachment Method | Drying Time |
|---|---|---|
| Bear Body | Hand-sewing + ladder stitch | Immediate |
| Bowknot | Hot glue + sealant coating | 20–30 min per coat |
| Keychain Ring | Mechanical (interlocked) | Instant |
| Facial Details | Glue or embroidery | 5–10 min |
Finishing Touches and Longevity Tips
A glossy finish not only looks professional but also protects the bow from fraying and moisture. For outdoor or daily use, consider spraying the entire keychain (except the metal ring) with a clear acrylic sealer after assembly.
- Avoid submerging the keychain in water—even sealed fabric can absorb moisture over time.
- Store unused keychains in a breathable cotton pouch to prevent dust buildup.
- If the bow loses luster, reapply one thin coat of gloss medium and let cure fully.
- Keep away from direct sunlight to prevent fading of fabric and ribbon dyes.
Mini Case Study: Sarah’s Gift Project
Sarah, a high school art teacher, wanted personalized end-of-year gifts for her students. She crafted 24 bowknot bear keychains using different ribbon colors to match each student’s favorite hue. By preparing templates and pre-cutting fabric, she completed the batch over three evenings. Students cherished the unique tokens, and several parents later requested kits to make their own. Sarah noted that the glossy finish made the bows stand out in photos and gave the impression of store-bought quality.
Frequently Asked Questions
Can I machine-wash the keychain?
No. Despite sealing, water can weaken glue bonds and damage stuffing. Clean gently with a damp cloth if needed.
What if I don’t have Mod Podge? Can I use nail polish?
Clear nail polish can work in a pinch, but it may yellow over time and is less flexible. A dedicated fabric glaze or spray sealer is preferable for longevity and clarity.
Is this suitable for children to make?
With supervision, yes. Replace the hot glue gun with fabric-safe white glue for younger crafters, and pre-cut shapes to minimize risk. Sewing can be done by hand with large-eye needles.
Checklist: Crafting Your Glossy Bowknot Bear Keychain
- ☐ Gather all materials and tools
- ☐ Cut two bear body pieces from fabric
- ☐ Sew and stuff the bear body
- ☐ Create and seal the satin ribbon bow
- ☐ Attach the bow to the bear with glue
- ☐ Secure the keychain ring at the top
- ☐ Add eyes and facial details
- ☐ Apply final sealant coat (optional)
- ☐ Allow full drying time before use
Conclusion
The glossy bowknot bear keychain blends whimsy and craftsmanship into a compact, meaningful object. More than just a functional item, it carries the warmth of handmade effort and attention to detail. Whether you’re creating one for yourself or dozens as heartfelt gifts, the process fosters creativity and mindfulness. Each stitch, bow, and shimmering coat of gloss reflects care—and that’s something no mass-produced item can replicate.


 浙公网安备
33010002000092号
浙公网安备
33010002000092号 浙B2-20120091-4
Comments
No comments yet. Why don't you start the discussion?