
The world of Lilo & Stitch is rich with charm, humor, and the spirit of ‘ohana—family. Whether you're planning a birthday party, a movie night, or simply want to add a touch of intergalactic whimsy to your living space, a Lilo & Stitch themed display can instantly transform any room into a tropical paradise infused with alien mischief. With thoughtful planning and creative execution, this DIY project becomes more than just decoration—it becomes an experience. This guide walks you through every stage, from concept to completion, ensuring your display captures the heart and humor of one of Disney’s most beloved duos.
1. Define Your Display Purpose and Space
Before gathering supplies, determine where and why you’re creating your display. Is it for a child’s birthday? A themed dorm room? A seasonal holiday twist on your living room? The purpose shapes the scale, tone, and elements included.
Small spaces like shelves or tabletops work well for minimalist tributes—a few figures, a mini surfboard, and a “This is my family” sign. Larger areas such as a dining room wall or backyard patio allow for immersive setups with lighting, sound, and interactive zones.
Measure the space and sketch a rough layout. Consider traffic flow if guests will interact with the display. For outdoor setups, check weather resistance of materials and plan for shade or shelter.
2. Gather Essential Theme Elements
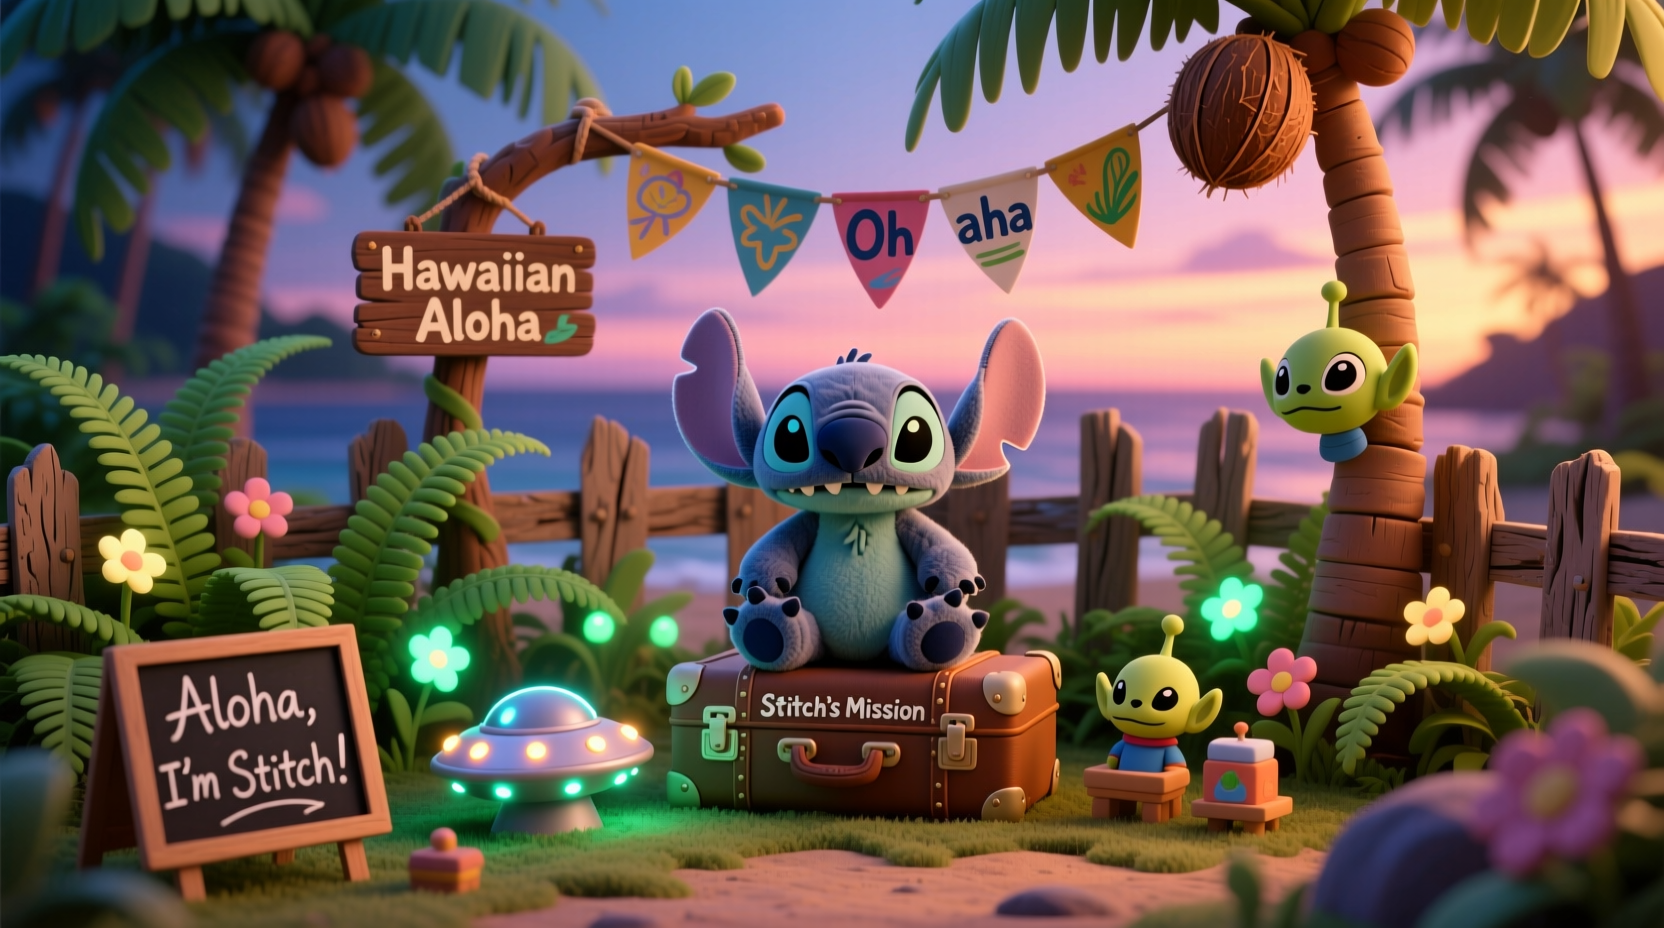
The magic of a Lilo & Stitch display lies in its iconic symbols: Hawaiian culture, experimental creatures, tiki motifs, and heartfelt messages about family. Focus on these core components:
- Color Palette: Deep ocean blues, vibrant tropical greens, sunset oranges, and sandy beiges.
- Characters: Lilo, Stitch, Nani, Jumba, Pleakley, and Experiment 626 variants.
- Props: Surfboards, ukuleles, alien gadgets, fishhooks (symbolic), and hula skirts.
- Typography: Hand-painted signs with quotes like “Ohana means family,” “I found my people,” or “Blast off!”
- Natural Touches: Artificial palm leaves, seashells, smooth stones, and faux sand bases.
Source items from craft stores, online retailers, or repurpose household objects. A wooden board painted blue can become an ocean backdrop; cardboard tubes wrapped in brown paper turn into tiki torches.
Do’s and Don’ts for Material Selection
| Do | Avoid |
|---|---|
| Use washable markers on fabric for custom aloha shirts | Overloading small spaces with cluttered props |
| Incorporate soft lighting (string lights, LED candles) | Using direct sunlight-exposed adhesives that may melt |
| Label experiment jars with numbered tags | Replicating copyrighted logos exactly |
| Add audio clips of Stitch saying “Meega nala kweesta” | Forgetting fire safety near flammable decorations |
3. Build the Display in Stages
A successful display unfolds logically. Follow this timeline to keep your project manageable and stress-free.
- Week 1: Finalize theme scope, sketch layout, and create a shopping list.
- Week 2: Purchase or gather materials. Begin constructing backdrops and signage.
- Week 3: Assemble major structures—tiki stands, surfboard displays, creature cages.
- Week 4: Arrange all pieces in place. Test lighting, sound, and stability.
- Day Before Event: Add final touches like confetti, scents (coconut oil diffuser), and character placements.
Start with the background. Hang a blue-to-orange ombré fabric or paper gradient to mimic a Kauai sunset. Attach cloud cutouts or flying Experiment pods using thin fishing line for a floating effect. In front, layer in foreground elements: a mini beach scene with toy turtles, Stitch footprints in sand, and a cardboard Elvis standee.
4. Real-Life Example: Emma’s Birthday Backyard Setup
Emma, age 7, wanted a “Stitch takeover” for her birthday. Her parents transformed their backyard into a rescue mission zone. They built a cardboard spaceship crash site using silver foil and blinking LEDs. Around it, they placed labeled “Experiment Containment Pods” (clear plastic balls with toy animals inside) and a registration desk where kids “adopted” creatures.
A chalkboard sign read: “Welcome to Kauai Intergalactic HQ.” Guests received temporary tattoos of Stitch and Hawaiian leis. A Bluetooth speaker played the Lilo & Stitch soundtrack on loop. The centerpiece was a life-sized Stitch cutout “surfing” on a real mini-surfboard propped up with sandbags.
The result? A fully immersive environment that kept children engaged for hours. Parents noted how the thematic consistency—from invitations to favors—elevated the experience beyond typical party decor.
5. Expert Insight: Thematic Cohesion Matters
“The best themed displays don’t just show characters—they tell a story. Let viewers feel like they’ve stepped into another world.” — Maya Tran, Event Designer & Immersive Experience Curator
Tran emphasizes narrative continuity. Instead of random placement, arrange scenes: Lilo taking photos with her camera, Stitch causing chaos in a mock kitchen, or a “Galactic Council” meeting with Jumba and Pleakley figures. Mini storytelling stations invite interaction and photo opportunities.
Essential Checklist for a Complete Display
- Choose a focal point (e.g., Stitch in a spaceship or Lilo hula dancing)
- Create at least three themed zones (entrance, activity center, photo spot)
- Include tactile elements (soft toys, textured sand, musical buttons)
- Ensure all electronics are safely wired and grounded
- Add personalized touches (names on lab coats, custom experiment numbers)
- Test setup one full day before event or final installation
6. Frequently Asked Questions
Can I make this display budget-friendly?
Absolutely. Focus on creativity over cost. Use printed images mounted on cardboard instead of official merchandise. Make “alien goo” from green-dyed rice or gelatin. Borrow items from friends or use existing toys. Many schools and libraries lend projector kits for themed nights.
How do I keep the display safe around young children?
Avoid small detachable parts, sharp edges, or unstable structures. Secure tall props with hidden weights. Keep cords taped down and out of walkways. If using fog machines or lights, ensure they’re certified for indoor use and supervised at all times.
Can I reuse parts of the display later?
Yes. Store flat components like backdrops and signs in portfolios. Disassemble 3D builds carefully for future use. Consider rotating themes annually—this year’s “Experiment Lab” could become next year’s “Alien Science Fair.”
Bring the Ohana Together
A Lilo & Stitch themed display isn’t just about aesthetics—it’s a celebration of belonging, adventure, and joyful chaos. By thoughtfully combining color, narrative, and interactive design, you create more than decoration. You build a moment where imagination takes over, and everyone, no matter their age, feels a little more like part of the ohana.


 浙公网安备
33010002000092号
浙公网安备
33010002000092号 浙B2-20120091-4
Comments
No comments yet. Why don't you start the discussion?