
Crafting a pearl bracelet with a gold plated clasp is more than a creative endeavor—it’s an expression of elegance and personal style. Pearls have long symbolized grace and refinement, while gold adds warmth and luxury. When combined thoughtfully, they create a timeless accessory suitable for both casual wear and formal occasions. This guide walks you through every stage of the process, from selecting high-quality materials to assembling a durable, beautiful piece that reflects craftsmanship and attention to detail.
Selecting the Right Materials
The foundation of any fine jewelry piece lies in its components. For a pearl bracelet with a gold plated clasp, choosing premium materials ensures longevity, visual appeal, and comfort on the wrist.
- Pearls: Opt for genuine freshwater or Akoya pearls between 6mm and 8mm in diameter. Uniform size and smooth luster are key indicators of quality.
- Stringing Material: Use 0.5mm to 0.7mm flexible beading wire (such as Soft-Flex or Accu-Flex) for durability, or silk thread if you prefer a traditional look (though it requires more maintenance).
- Clasp: A gold plated lobster claw or toggle clasp offers secure closure. Ensure plating is thick (at least 0.5 microns) to resist tarnishing.
- Spacer Beads: Small gold plated beads (2–3mm) can be used between pearls to enhance design and reduce friction.
- Crimps and Crimp Covers: These secure the ends of wire-based designs and provide a clean finish.
- Tools: Round-nose pliers, crimping pliers, wire cutters, and a bead mat to prevent rolling.
Design Planning and Measurement
Before assembly begins, determine your desired bracelet length. Standard sizes range from 7 to 7.5 inches for women. Measure your wrist with a soft tape measure and add 0.5 inches for comfortable fit and clasp allowance.
Sketch a simple layout showing how many pearls will fit within the chosen length. Account for spacer beads and end findings. For example:
| Bracelet Length | Pearl Size | Number of Pearls | Spacer Beads |
|---|---|---|---|
| 7 inches | 7mm | 18 | 17 |
| 7.5 inches | 6mm | 22 | 21 |
| 8 inches | 8mm | 18 | 17 |
This planning phase prevents last-minute adjustments and ensures symmetry in the final product.
“Precision in measurement translates directly into elegance in wear. A well-proportioned bracelet moves naturally with the hand.” — Lila Chen, Jewelry Designer & Educator
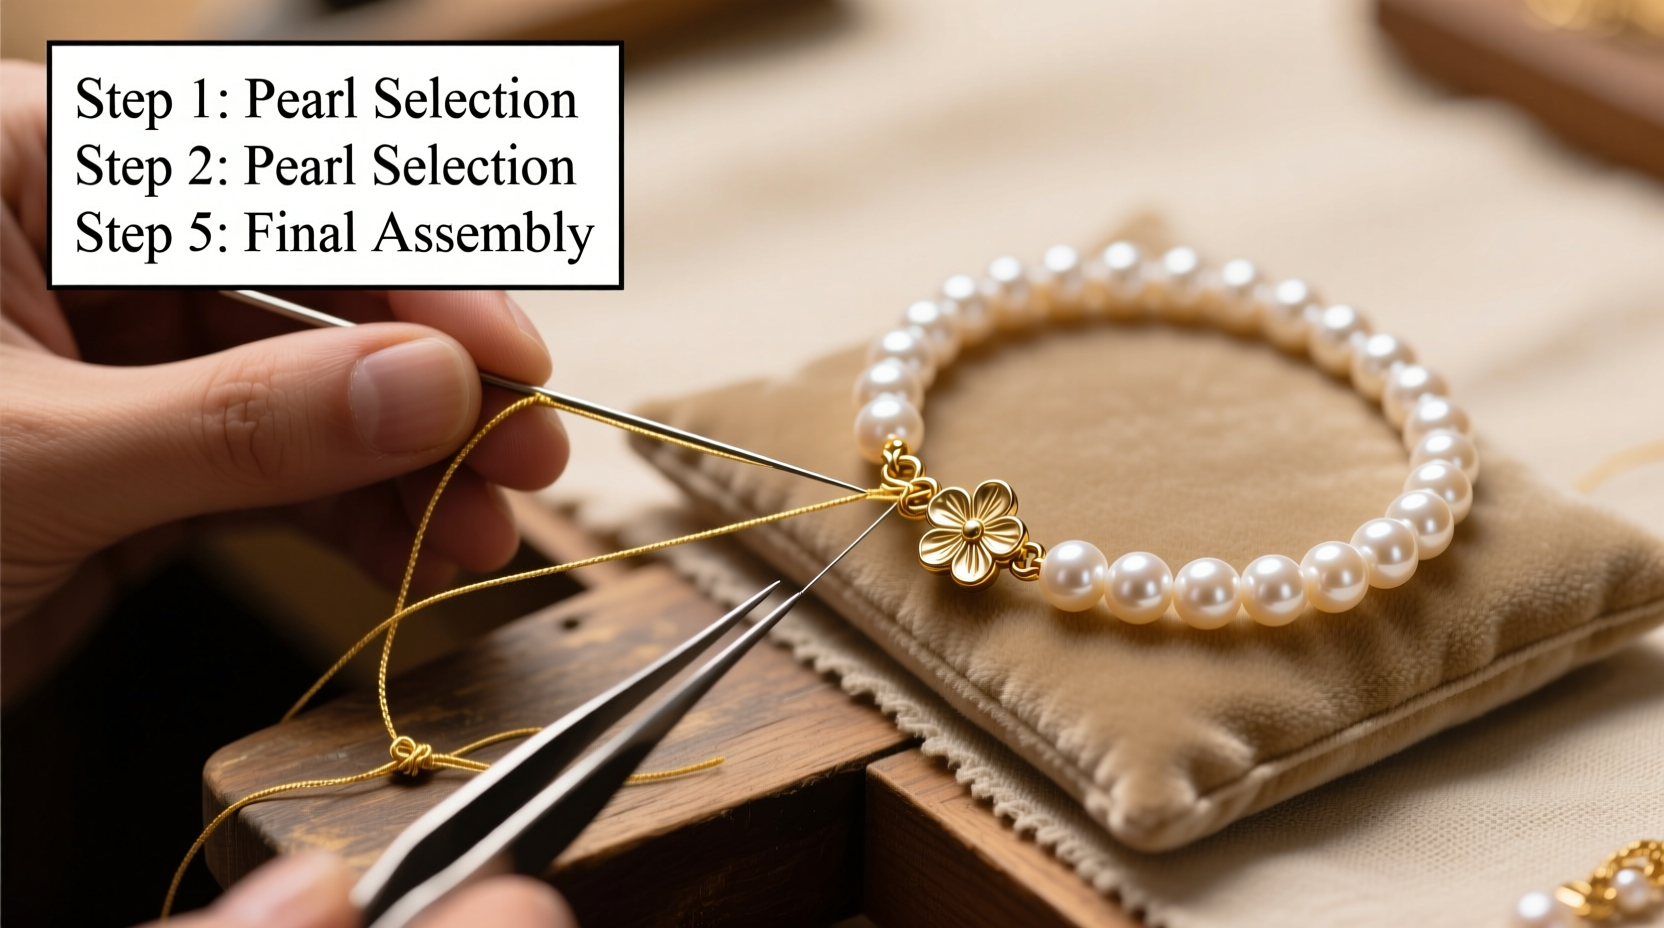
Step-by-Step Assembly Process
Follow this detailed sequence to construct your pearl bracelet with professional results.
- Cut the Wire: Cut your beading wire approximately 6 inches longer than the final bracelet length to allow for knotting and attachment.
- Attach One Half of the Clasp: Slide a crimp bead onto the wire, then pass the wire through one loop of the clasp. Loop the wire back through the crimp bead, creating a small loop around the clasp.
- Secure the Crimp: Position the crimp bead near the clasp. Use crimping pliers to flatten and secure it. Trim excess wire carefully.
- Begin Stringing: Thread your first spacer bead, followed by a pearl. Continue alternating spacers and pearls until only about 2 inches of wire remain.
- Add Final Spacer and Clasp Connector: After the last pearl, add a spacer bead, then thread another crimp bead and pass the wire through the second half of the clasp.
- Finalize the Connection: Pull the wire taut (but not overly tight), ensuring even spacing. Pass the wire back through the last few beads for reinforcement, then crimp the second crimp bead securely.
- Trim Excess: Cut away leftover wire, leaving no sharp ends.
- Apply Crimp Covers (Optional): For a seamless finish, slide gold crimp covers over each crimp bead and gently squeeze them closed with pliers.
Quality Checks and Finishing Touches
After assembly, inspect your bracelet thoroughly:
- Ensure all pearls face the same direction—most have a “top” side with optimal luster.
- Check that the clasp opens and closes smoothly and locks securely.
- Gently flex the bracelet to confirm there’s no slack or weak points at the crimps.
- Wipe the gold plated elements with a microfiber cloth to remove fingerprints and restore shine.
If using silk thread instead of wire, tie a surgeon’s knot between each pearl and apply a tiny drop of clear jewelry glue (like G-S Hypo Cement) to each knot for added strength. This method yields a softer drape but requires restringing every 1–2 years.
Mini Case Study: From Concept to Heirloom
Sophia, a hobbyist jeweler from Portland, wanted to create a meaningful gift for her sister’s wedding anniversary. She selected white freshwater pearls with rose undertones to complement her sister’s complexion and paired them with a vintage-style gold plated toggle clasp inherited from their grandmother. Following precise measurements and careful stringing, she completed the bracelet in under three hours. The result was a modern heirloom—personal, elegant, and deeply sentimental. Her sister wore it on her anniversary dinner and later shared photos online, sparking interest among friends who asked where they could buy one. Sophia now crafts custom pearl bracelets as a side business, proving that thoughtful handmade pieces often carry greater value than mass-produced alternatives.
Care and Maintenance Tips
A beautifully crafted pearl bracelet deserves proper care to maintain its brilliance and structural integrity.
- Avoid Exposure to Chemicals
- Remove the bracelet before applying perfume, lotion, or hairspray. These substances can dull the pearl’s surface and corrode gold plating.
- Clean Gently
- Wipe pearls with a soft, damp cloth after wearing. Never submerge in water or use ultrasonic cleaners.
- Store Separately
- Keep the bracelet in a soft pouch or lined jewelry box to prevent scratches from harder items.
- Reevaluate Periodically
- Inspect crimps and clasps every six months. Replace worn components before failure occurs.
FAQ
Can I use real gold instead of gold plated components?
Yes, solid gold clasps and spacers offer superior durability and value. However, they significantly increase cost. Gold filled or vermeil (gold over sterling silver) are excellent mid-range alternatives.
How do I know if my pearls are genuine?
Genuine pearls typically have slight irregularities in shape and surface texture. Perform the \"tooth test\": gently rub a pearl against your front teeth. Real pearls feel slightly gritty; imitations feel smooth.
Is it safe to wear this bracelet every day?
With proper construction and care, yes. Avoid high-moisture environments like swimming or showering. Daily wear enhances patina but accelerates wear on plating and stringing material.
Checklist: Crafting Your Pearl Bracelet
- ☐ Measure wrist and calculate total length
- ☐ Gather materials: pearls, wire/thread, clasp, crimps, tools
- ☐ Lay out design with correct pearl count and spacing
- ☐ Attach first clasp component with crimp
- ☐ String pearls and spacers evenly
- ☐ Secure second clasp end and reinforce connection
- ☐ Inspect alignment, tension, and clasp function
- ☐ Clean and store properly
Conclusion
Crafting a stunning pearl bracelet with a gold plated clasp blends artistry with precision. Each decision—from pearl selection to crimp placement—affects the final impression. With patience and attention to detail, you can create a piece that radiates sophistication and becomes a cherished keepsake. Whether made for yourself or as a heartfelt gift, handmade jewelry carries a story that store-bought items rarely match.


 浙公网安备
33010002000092号
浙公网安备
33010002000092号 浙B2-20120091-4
Comments
No comments yet. Why don't you start the discussion?