
Crafting your own accessories offers more than just personal satisfaction—it allows you to create unique, meaningful items tailored to your style or as thoughtful handmade gifts. Among the most charming and versatile leather crafts is the bow keychain: elegant, functional, and surprisingly simple to make with basic tools. Whether you're new to leatherworking or looking to expand your DIY repertoire, this guide walks you through every stage of creating a polished, professional-looking leather bow keychain from scratch.
Why Make a Leather Bow Keychain?
The appeal of a leather bow keychain lies in its blend of classic design and modern utility. Unlike mass-produced accessories, a handcrafted piece carries character and attention to detail. The bow shape adds a touch of vintage flair, making it ideal for keys, zippers, or even as a bag charm. Using genuine leather ensures durability and develops a beautiful patina over time, enhancing its appearance with use.
Beyond aesthetics, the process strengthens foundational leathercraft skills such as cutting, edge finishing, stitching, and tooling—skills that transfer seamlessly to larger projects like wallets or belts. Plus, the entire build can be completed in under three hours once you’re familiar with the steps.
Materials and Tools You’ll Need
Before beginning, gather all necessary supplies. Quality materials are essential for both appearance and longevity. Here’s what you’ll need:
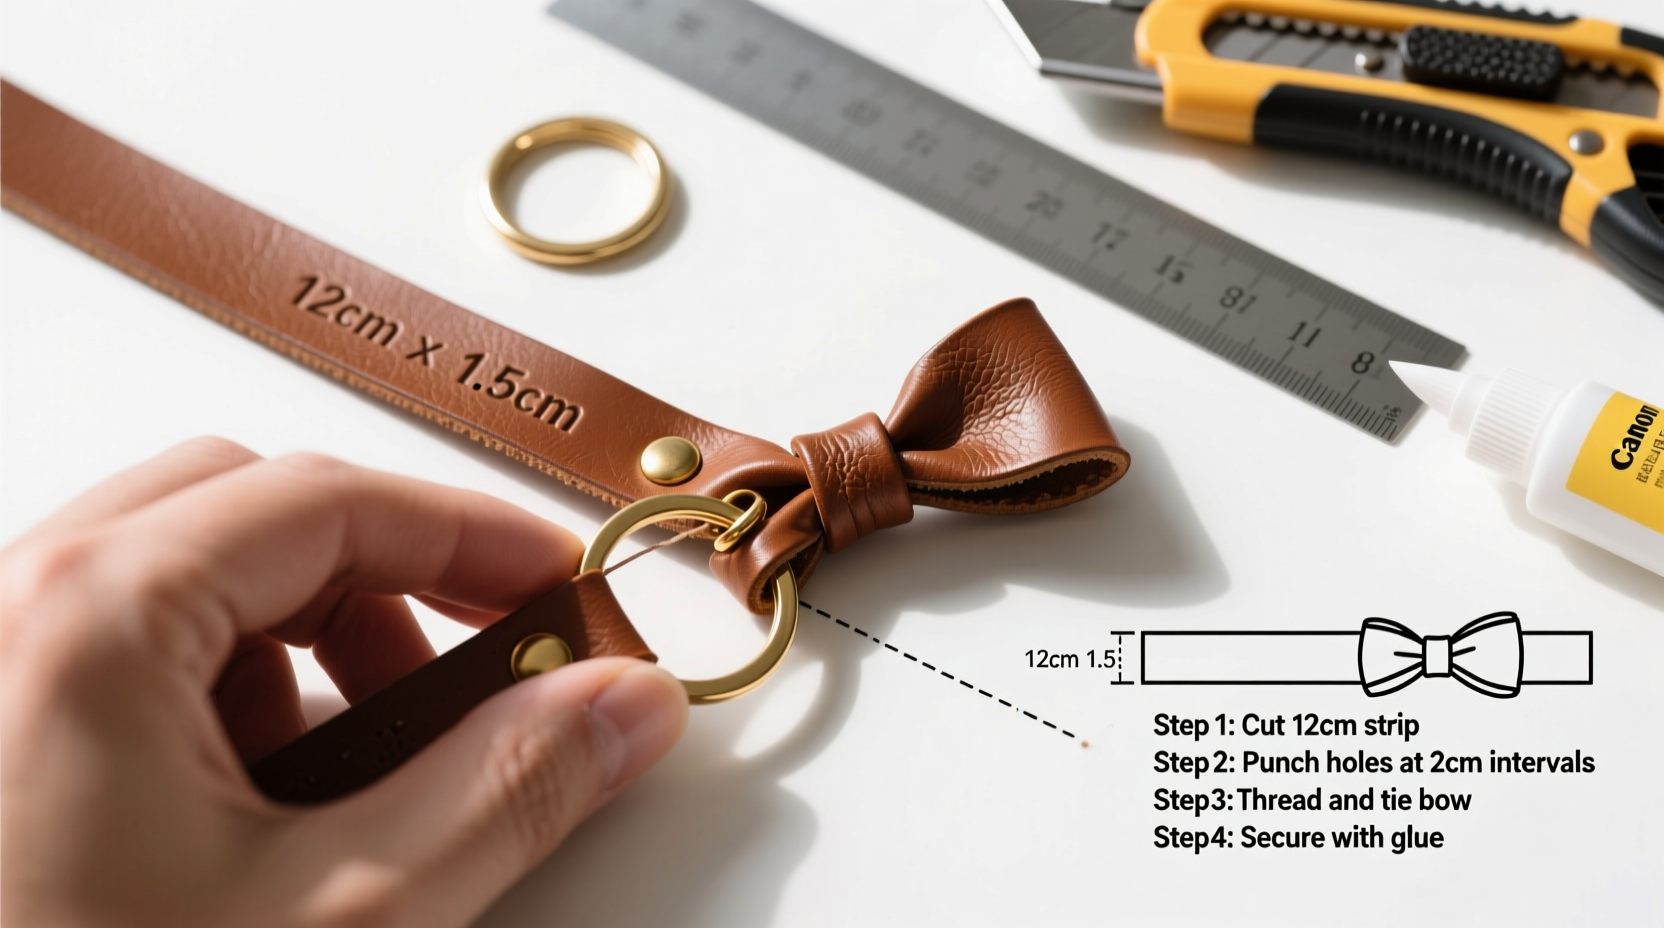
- Leather: 3–4 oz (1.1–1.4 mm) vegetable-tanned cowhide, 4” x 6” piece
- Key ring: 25mm split key ring (brass or nickel finish)
- Needles: Harness needles (size 2 or 3)
- Thread: Waxed polyester or linen thread (typically #2 or #3 weight)
- Shoe Goo or contact cement: For securing the key ring
- Rotary cutter or utility knife
- Self-healing cutting mat
- Leather hole punch (or pricking iron)
- Edge beveler
- Sanding block or fine-grit sandpaper (400–600 grit)
- Leather finish (optional): Eco-Flo, gum tragacanth, or wax polish
- Ruler and compass or stencil
- Clamps or binder clips
Step-by-Step Construction Guide
Follow these steps carefully to ensure precision and a refined final product.
- Design and Template Creation: Sketch a symmetrical bow shape measuring approximately 1.75” wide and 1.5” tall. Divide it into three parts: two rounded \"loops\" on the sides and a central knot section. Alternatively, print a template and trace it onto the leather with a pencil.
- Cut the Leather: Place the leather on a cutting mat. Use a ruler and rotary cutter to trim a rectangular base if needed, then carefully cut out the bow shape. Apply steady pressure for clean edges. Repeat to create a second identical piece for the back.
- Bevel and Sand Edges: Run an edge beveler around the perimeter of both pieces to soften sharp corners and give a professional contour. Follow with light sanding using 400-grit paper to smooth any roughness.
- Punch Stitching Holes: Align the two leather pieces and clamp them together. Use a pricking iron or hole punch to create evenly spaced holes along the outer edge—aim for 6–8 stitches per inch. Maintain consistent spacing for a clean look.
- Add the Key Ring Anchor: Before stitching, place the key ring between the two layers near the top center of the bow knot area. Ensure it sits flat and won’t rotate during use. Secure it temporarily with a small dab of contact cement.
- Stitch the Layers Together: Use the saddle stitch method—one of the strongest hand-sewing techniques in leatherwork. Thread two needles on either end of a 24” strand of waxed thread. Pass each needle through adjacent holes from opposite sides, pulling tight after each pair. Keep tension even throughout.
- Finish the Edges: After stitching, apply a leather edge coat or burnish with gum tragacanth and a denim scrap. Rub in circular motions until glossy. This seals the edge and prevents fraying.
- Cure and Condition: Let adhesive and finishes dry overnight. Lightly condition the surface with a leather balm to enhance color and flexibility. Avoid over-oiling delicate cuts.
“Hand-stitched leather goods have a soul. Each stitch reflects patience and care—qualities machines can’t replicate.” — Marcus Reed, Artisan Leatherworker & Instructor
Tips for a Polished Result
Attention to detail separates amateur attempts from heirloom-quality crafts. Consider these refinements:
- Use a stitching horse or clip the work to the edge of a table to keep it stable while sewing.
- Wax your thread again before starting if it feels dry—this reduces fraying and improves glide.
- For decorative flair, try contrast stitching (e.g., cream thread on dark brown leather).
- If desired, stamp a monogram or border design on the front piece before assembly.
Common Pitfalls and How to Avoid Them
| Issue | Causes | Solutions |
|---|---|---|
| Uneven stitching | Inconsistent hole spacing or tension | Use a pricking iron; practice tension control on scraps |
| Key ring spins or detaches | Insufficient glue or poor placement | Secure with Shoe Goo and sandwich between layers |
| Rough or chipped edges | Dull tools or improper sanding | Sharpen beveler; sand progressively from 220 to 600 grit |
| Leather warping during glue application | Excess adhesive absorption | Apply glue sparingly; clamp only briefly |
Real-Life Example: A Thoughtful Handmade Gift
Sophie, a graphic designer from Portland, wanted to create personalized gifts for her bridesmaids. Instead of generic presents, she made leather bow keychains in their favorite colors, engraving each with initials. She used a laser cutter for precise shapes but hand-stitched every piece. “They loved that it was useful and beautiful,” she said. “One told me she uses it on her work bag every day—it makes her feel connected to our friendship.” This project not only deepened emotional value but also sparked Sophie’s interest in launching a small craft business.
Frequently Asked Questions
Can I use fake leather or craft foam?
Synthetic materials like pleather or craft foam lack the durability and aesthetic depth of real leather. They may tear easily and don’t accept finishes well. For best results, stick to genuine vegetable-tanned leather.
How do I clean my leather bow keychain?
Wipe gently with a slightly damp cloth and mild soap. Dry immediately with a soft towel. Avoid soaking or using alcohol-based cleaners, which can strip natural oils.
Is this project suitable for children or beginners?
With supervision, teens and adults new to crafting can complete this project successfully. Start with pre-cut leather kits if freehand cutting feels intimidating. Focus on mastering one skill at a time—cutting, then stitching, then finishing.
Final Checklist Before You Begin
- Preparation:
- ☐ Choose 3–4 oz vegetable-tanned leather
- ☐ Print or draw a bow template (1.75” wide)
- ☐ Gather all tools: cutter, beveler, needles, thread, key ring
- Construction:
- ☐ Cut two identical bow shapes
- ☐ Bevel and sand edges
- ☐ Punch stitching holes while layers are aligned
- ☐ Insert and glue key ring before stitching
- ☐ Saddle-stitch with waxed thread
- Finishing:
- ☐ Burnish or coat edges
- ☐ Condition lightly after drying
- ☐ Inspect for loose threads or glue residue
Bring Craftsmanship Into Everyday Life
Making a leather bow keychain isn’t just about producing a useful object—it’s about cultivating mindfulness, precision, and appreciation for handmade quality. In a world of disposable goods, choosing to craft something enduring sends a quiet message of intentionality. Whether you keep it for yourself or give it to someone special, this small accessory carries the weight of effort and care.


 浙公网安备
33010002000092号
浙公网安备
33010002000092号 浙B2-20120091-4
Comments
No comments yet. Why don't you start the discussion?