
The ruby slippers from *The Wizard of Oz* are one of the most iconic pieces of cinematic history. Originally designed by Adrian for MGM in 1938, these glittering red shoes carry a legacy of magic, nostalgia, and craftsmanship. While the original pairs sell for millions at auction, you don’t need Hollywood access to own a pair that captures their spirit. With careful attention to detail and accessible materials, you can recreate an authentic-looking version at home—perfect for cosplay, theatrical performance, or display.
This guide walks you through every stage: from selecting the right base shoe to applying shimmering finishes and structural embellishments. Whether you're a seasoned crafter or a first-time DIYer, this process balances historical accuracy with practicality.
Understanding the Original Design
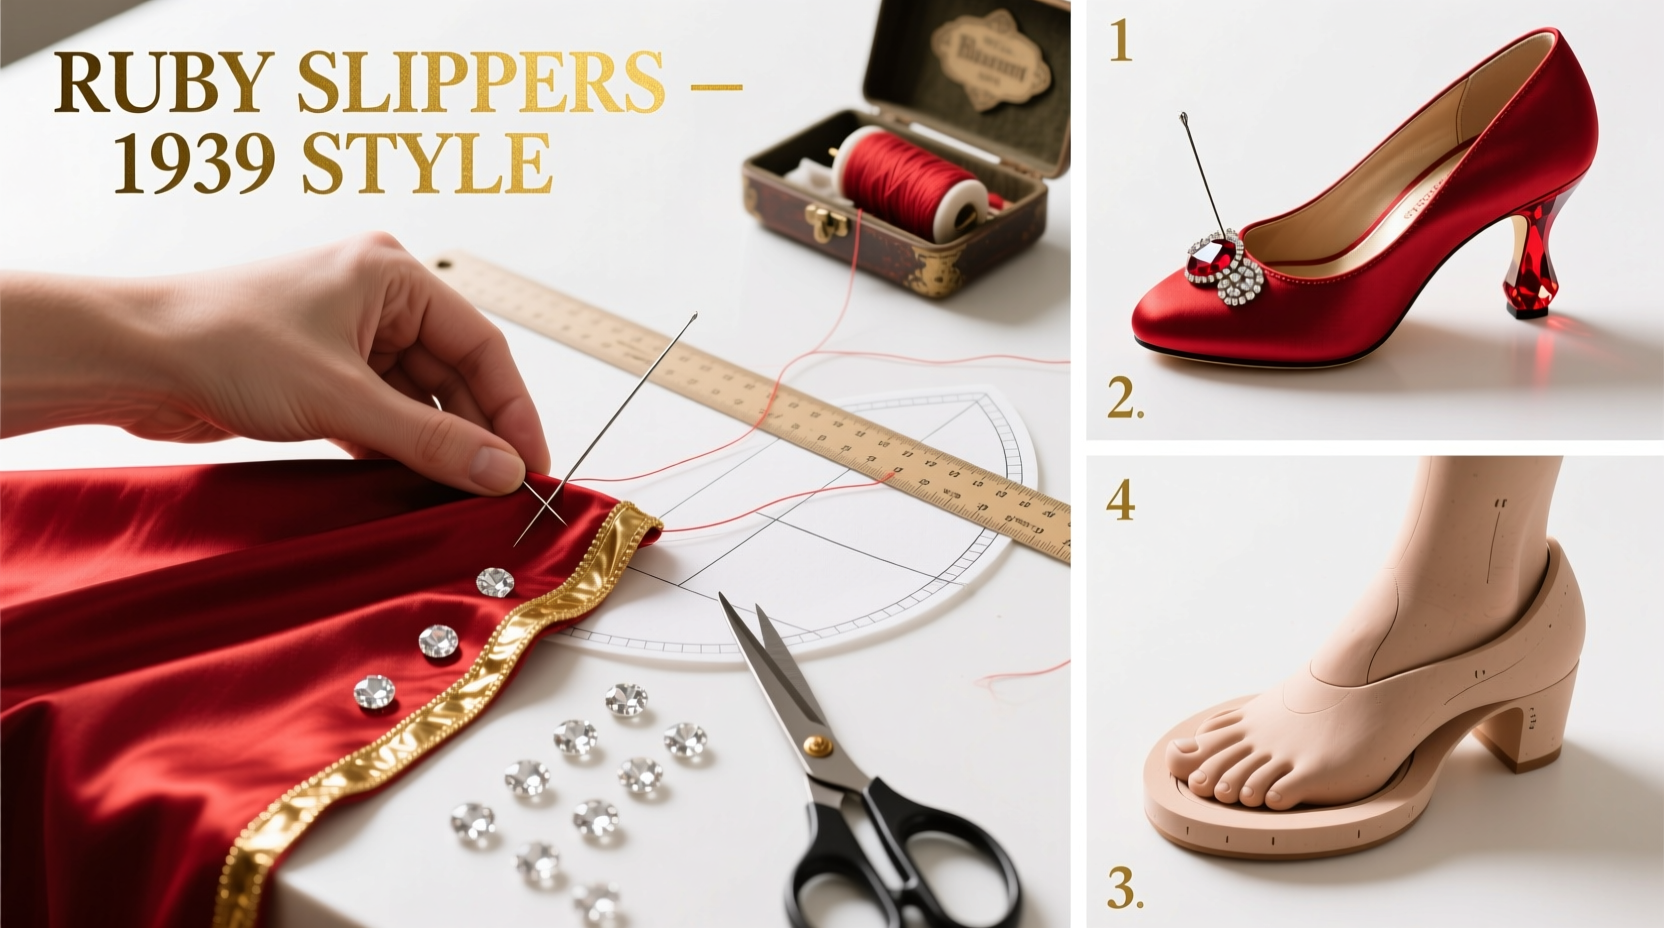
Before beginning construction, it’s essential to study the design of the original ruby slippers. Five pairs were made for the film, but only four are known to survive. They feature:
- A modest T-strap Mary Jane silhouette
- Burgundy-red silk faille fabric covering both shoe and heel
- 45 hand-glued sequins per square inch (over 2,300 total)
- Sewn-on bows with rhinestone centers
- A low stacked heel (approximately 1.5 inches)
While modern recreations often use bright red instead of deep burgundy, staying true to the original hue enhances authenticity. The structure is deceptively simple—the magic lies in precision, symmetry, and finish quality.
“Authenticity in prop replication isn’t just about appearance—it’s about respecting the craftsmanship behind the illusion.” — Dr. Lila Monroe, Costume Historian & Film Archivist
Materials and Tools Checklist
Gathering the correct supplies ensures a smoother build and more professional result. Below is a comprehensive checklist tailored to achieve museum-quality aesthetics without requiring industrial tools.
Essential Materials
- Pair of white or beige Mary Jane heels (T-strap preferred, size matching wearer)
- 1 yard of burgundy silk faille or satin (closely matched to vintage ruby tone)
- Approximately 3,000 hot-fix or sew-on red sequins (6mm recommended)
- Strong fabric glue (E6000 or Gem-Tac)
- Fusible webbing or double-sided tape
- Rhinestones (one 15mm center stone + eight 8mm stones per bow)
- Fray check or clear nail polish
- Matching thread (polyester or silk)
- Fine-tipped tweezers
- Scissors (fabric and small craft)
- Pins and needle
- Iron and pressing cloth
Step-by-Step Construction Process
Crafting the slippers demands patience and methodical execution. Rushing any phase compromises visual fidelity. Follow this timeline across 8–12 hours of intermittent work over several days.
- Prepare the Base Shoe: Clean the surface of the shoe with rubbing alcohol to remove oils. Disassemble the strap if possible, or plan to cover it seamlessly with fabric.
- Measure and Cut Fabric: Trace the upper, sole edge, and heel of the shoe onto the silk. Add 1/4 inch seam allowance around all edges. Cut two identical sets—one for each shoe.
- Adhere Fabric to Shoe: Apply fusible webbing to the back of the fabric pieces. Using low heat, iron them onto the shoe, starting from the toe and smoothing outward. Trim excess carefully. Seal raw edges with fray check.
- Begin Sequin Application: Start at the toe box and work backward in horizontal rows. Use tweezers to place each sequin, overlapping slightly (about 70%). Secure with a tiny dot of fabric glue beneath each. Allow 2–3 hours drying time between layers if covering large areas.
- Create the Bows: Cut two rectangular fabric pieces per shoe (approx. 3” x 1.5”). Fold into a classic bow shape, securing the center with thread. Glue the 15mm rhinestone in the middle, surrounded by eight smaller stones in a circular pattern.
- Attach Bows and Strap Detail: Position the bow directly over the T-strap junction. Reinforce with strong stitching through the fabric and underlying shoe material. If the strap was removed earlier, reattach or reconstruct it using covered fabric.
- Finish the Heel: Wrap the heel similarly to the upper. Ensure seams run vertically along the back for a clean look. Glue additional sequins to match the density of the rest of the shoe.
- Final Inspection: Check for loose sequins, uneven spacing, or visible glue spots. Touch up as needed. Let the entire piece cure for 24 hours before handling.
Do’s and Don’ts: Avoiding Common Pitfalls
| Do’s | Don’ts |
|---|---|
| Use a consistent light source when placing sequins to avoid glare inconsistencies | Apply sequins haphazardly—random placement breaks the illusion of luxury |
| Work in a dust-free environment to keep glue surfaces clean | Use white glue or school glue—these yellow over time and lack durability |
| Test fabric dyes on scraps first if custom-dyeing silk | Stretch silk grain improperly—it distorts fit and sheen |
| Store finished slippers in acid-free tissue inside a rigid box | Expose them to direct sunlight—UV rays fade sequins and fabric rapidly |
Real Example: A Theater Volunteer’s Success Story
Marissa Chen, a costume assistant at the Lakeside Community Theater, faced a tight deadline when their lead actress outgrew the rental ruby slippers three weeks before opening night. With no budget for new props, Marissa adapted this method using thrifted children’s Mary Janes and surplus theater fabrics.
She spent nine evenings meticulously gluing and aligning sequins, using a magnifying lamp for precision. By incorporating LED micro-lights hidden under the bows (powered by coin batteries in the heel), she added subtle sparkle under stage lighting. Her version not only passed scrutiny in close-up scenes but received compliments from visiting directors for its “period-appropriate luster.”
“People assume authenticity requires expensive materials,” Marissa said. “But with care, even $10 shoes can become something magical.”
Frequently Asked Questions
Can I make washable ruby slippers?
Due to the delicate nature of glued sequins and silk fabric, these slippers are not machine-washable. Spot-clean gently with a damp cloth and mild soap. Never submerge them in water, as this will loosen adhesive and cause fabric warping.
Are there non-sewing alternatives?
Yes. For those avoiding sewing, use high-strength fabric glue (like E6000) for all attachments, including bows and straps. However, hand-stitching provides superior durability, especially for wearable versions subjected to movement.
How can I make child-sized slippers safely?
Select flexible-soled shoes to support natural foot motion. Avoid heavy embellishment on soles or toes that could cause tripping. Test walkability indoors before finalizing the design. Consider lightweight plastic sequins instead of glass for younger wearers.
Final Thoughts and Encouragement
Recreating Dorothy’s ruby slippers is more than a craft project—it’s an act of storytelling. Each sequin placed by hand echoes the meticulous artistry of 1930s Hollywood. While perfection may be unattainable, the pursuit itself honors the wonder the original props inspired.
You don’t need a studio workshop or rare materials to begin. What matters most is intention, attention, and the willingness to embrace small imperfections as part of your creation’s charm. Whether worn once a year or displayed proudly on a shelf, your handmade ruby slippers will carry a personal spark far brighter than any gemstone.


 浙公网安备
33010002000092号
浙公网安备
33010002000092号 浙B2-20120091-4
Comments
No comments yet. Why don't you start the discussion?