
Creating a hand beaded dog collar is more than just a craft—it’s a way to express love, creativity, and personal style while ensuring your pet wears something truly unique. Unlike mass-produced accessories, handmade beaded collars allow you to control every detail: color, pattern, size, and comfort. With the right tools and techniques, even beginners can produce stunning, durable collars that stand out at the park or in photos.
This guide walks you through the entire process—from selecting quality materials to finishing your first custom collar—with practical advice, a detailed timeline, and real-world insights to help you succeed.
Gather Your Materials and Tools
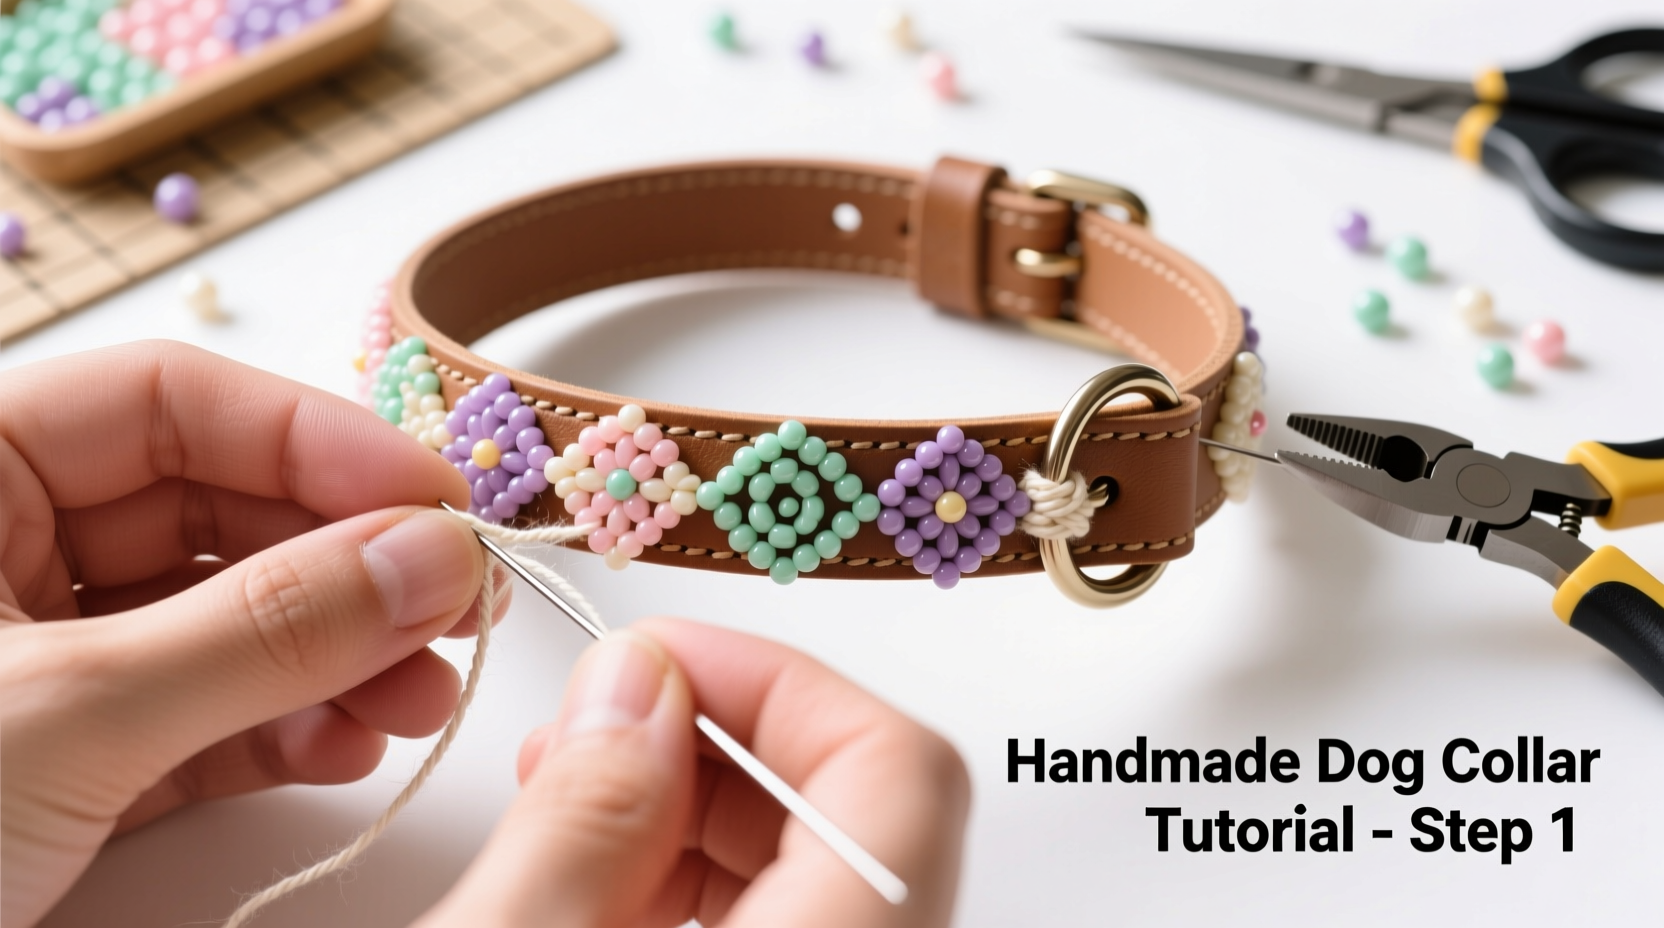
The foundation of a beautiful beaded collar lies in the quality of your supplies. Choose materials that are both visually appealing and safe for your pet. Dogs are active, so durability and comfort are as important as aesthetics.
- Beads: Glass seed beads (size 11/0) offer consistency and shine. Delica beads provide a uniform shape and tight fit, ideal for intricate patterns.
- Thread: Use fireline or nylon beading thread (6 lb test). These are strong, abrasion-resistant, and less likely to fray.
- Needle: A size 10 or 12 beading needle is thin enough to pass through small beads multiple times.
- Base collar: A sturdy nylon or leather collar in your dog’s correct size. Ensure it has a secure buckle and D-ring.
- Scissors, ruler, clipboard: For precision cutting, measuring, and holding your work taut.
Design Your Bead Pattern
Before threading a single bead, plan your design. Simple geometric patterns work well for beginners, while experienced crafters may attempt floral motifs or personalized names.
Use graph paper or free online bead design software like BeadTool or Perler Designer to map out your layout. Each square represents one bead. Keep symmetry in mind—especially if the collar will wrap around the neck.
“Patterns with repeating sequences not only look balanced but are easier to execute without mistakes.” — Lila Nguyen, Artisan Pet Accessory Designer
Consider your dog’s personality. Bright colors suit energetic breeds; earth tones complement calm, outdoor-loving dogs. Always avoid small charms or loose elements that could become choking hazards.
Checklist: Design Preparation
- Measure your dog’s neck snugly and add 1–2 inches for comfort
- Select a base collar that fits properly
- Choose a color palette (3–5 colors work best)
- Snap a photo of your design layout for reference
- Test bead placement on a short thread before committing
Step-by-Step Beading Process
Follow this structured approach to ensure clean, professional results. The technique used here is off-loom bead weaving, specifically the “brick stitch,” which allows flexibility and a snug fit over curves.
- Anchor the thread: Tie a stop bead to one end of your thread, about 6 inches from the end. This prevents beads from slipping off during work.
- Start the first row: String beads according to your first row pattern. Pass the needle back through the last bead to form a loop, securing the strand along the edge of the collar.
- Add subsequent rows: For each new row, pick up one bead, pass the needle under the thread between the last two beads of the previous row, then through the new bead. Pull gently to align.
- Maintain tension: Keep the thread taut but not overly tight. Too much pressure warps the pattern; too little causes sagging.
- Weave along the collar: Work in sections, securing the thread every 2–3 inches by weaving it back through existing beads. Avoid knots—they can create lumps.
- Finish securely: When complete, weave the thread through several completed rows, then trim excess. Repeat with the starting end.
Common Mistakes and How to Avoid Them
Even skilled crafters encounter setbacks. Recognizing these pitfalls early improves your success rate.
| Issue | Why It Happens | Solution |
|---|---|---|
| Beads falling off during weaving | Poor thread anchoring or loose tension | Use a stop bead and check tension frequently |
| Collar feels stiff or uncomfortable | Too many layers or rigid beads | Limit to 2–3 bead rows; use flexible thread |
| Pattern becomes misaligned | Skipping or double-beading a stitch | Count beads after each row; mark progress |
| Thread frays or breaks | Low-quality thread or repeated needle friction | Use fireline; replace needle if dull |
Real Example: From Idea to Wearing Success
Sarah, a dog trainer in Portland, wanted a standout accessory for her therapy dog, Milo, a golden retriever. She designed a collar using navy, silver, and white Delica beads in a wave pattern—symbolizing calm waters—to reflect his soothing presence.
She began by sketching the design on graph paper, calculated she’d need approximately 1,200 beads, and worked in 30-minute sessions over four evenings. Using a leather base collar and fireline thread, she applied the brick stitch method. After finishing, she tested durability by gently tugging and washing with mild soap.
Milo wore the collar during his next hospital visit. Nurses and patients alike complimented its elegance. “It looks store-bought,” one said. Sarah felt proud knowing it was made entirely by hand, with love and intention.
Frequently Asked Questions
Can I wash a beaded dog collar?
Yes, but carefully. Spot clean with a damp cloth and mild detergent. Avoid submerging it, as water can weaken thread and loosen glue on beads. Air dry completely before reuse.
How long does it take to make a beaded collar?
Average time ranges from 4 to 10 hours depending on length, complexity, and experience. Simpler designs with smaller dogs take less time. Breaking the work into sessions helps maintain focus and quality.
Are beaded collars safe for daily wear?
They can be, provided they’re well-made. Use durable thread, secure all ends, and avoid sharp or loose components. Inspect weekly for wear. For rough play or outdoor hikes, consider rotating with a plain nylon collar.
Final Tips for Lasting Beauty and Function
A hand beaded collar should be both artful and functional. To preserve its appearance and integrity:
- Store flat or rolled—not folded—to prevent bead cracking.
- Keep away from direct sunlight to avoid color fading.
- Rotate usage with other collars to reduce strain.
- Inspect stitching monthly, especially near the buckle.
“A handmade collar isn’t just an accessory—it’s a story woven in thread and bead.” — Rafael Torres, Canine Fashion Artisan
Conclusion
Crafting a hand beaded dog collar at home blends creativity with care, resulting in a one-of-a-kind piece your pet can wear with pride. By following a clear process, choosing safe materials, and learning from common errors, you can create accessories that are as durable as they are beautiful.


 浙公网安备
33010002000092号
浙公网安备
33010002000092号 浙B2-20120091-4
Comments
No comments yet. Why don't you start the discussion?