
After a long day on your feet, nothing feels better than a soothing foot massage. While professional options exist, creating your own DIY massage slippers at home offers a cost-effective, customizable, and therapeutic solution. These slippers incorporate textured surfaces that gently stimulate acupressure points on the soles, promoting circulation, easing tension, and supporting overall foot health. With basic household materials and a few simple tools, you can craft personalized footwear that delivers comfort every time you slip them on.
Why Make Your Own Massage Slippers?
Commercial massage slippers can be expensive and may not fit your specific foot shape or pressure preferences. By making your own, you gain full control over materials, texture intensity, cushioning level, and design. Additionally, this project is beginner-friendly, eco-conscious (by repurposing old shoes or fabrics), and makes an excellent gift for friends or family dealing with foot fatigue.
According to Dr. Lena Patel, a podiatrist specializing in holistic foot care:
“Stimulating the feet through textured surfaces can improve blood flow and reduce discomfort associated with prolonged standing or minor plantar fasciitis. When done safely, home-based solutions like DIY massage slippers offer gentle daily support.” — Dr. Lena Patel, DPM, Holistic Foot Wellness Clinic
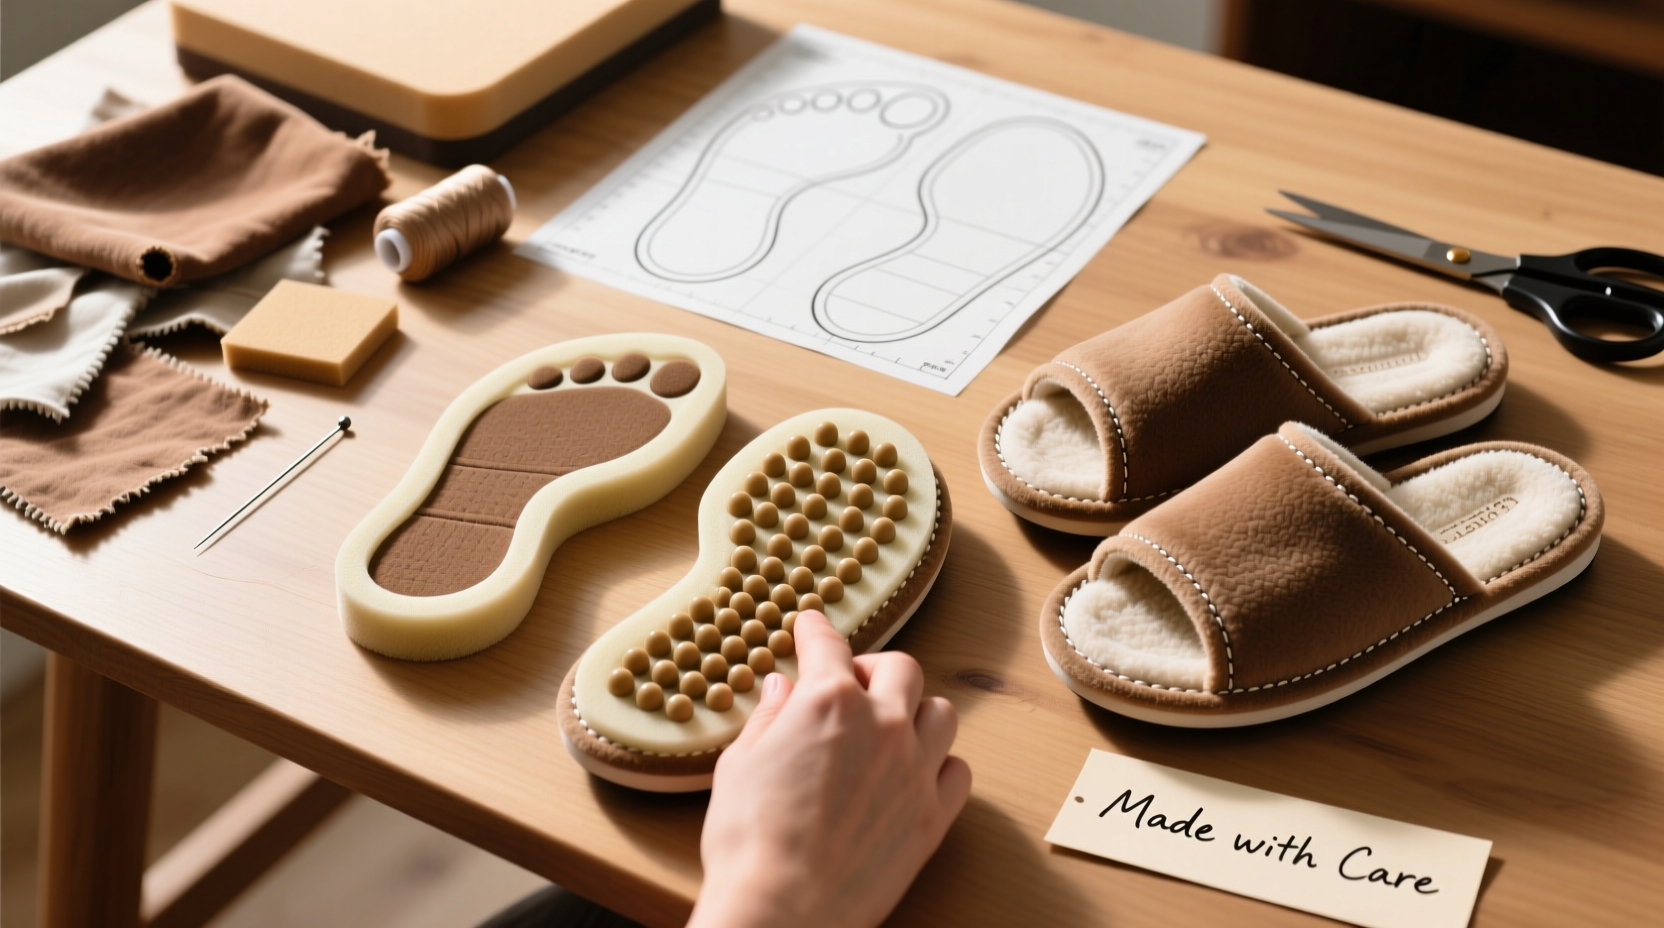
Materials and Tools You’ll Need
Before beginning, gather all necessary supplies. Most items are affordable and readily available at craft stores or around the house.
| Material/Tool | Purpose | Alternative Options |
|---|---|---|
| Soft fabric slippers or old sneakers | Base for attachment | Fleece-lined sandals, moccasins |
| Felt sheets (wool or synthetic) | Comfort layer and grip | Yarn scraps, non-slip rug padding |
| Plastic bottle caps or wooden beads | Massage nodules | Large buttons, pebbles (sealed) |
| Strong fabric glue or E6000 adhesive | Bonding components | Hole punch + thread (for sewing method) |
| Scissors, ruler, marker | Measuring and cutting | N/A |
| Sandpaper (medium grit) | Textured sole option | Rubber shelf liner |
Step-by-Step Construction Process
Follow these clear steps to build durable, effective massage slippers tailored to your comfort needs.
- Evaluate your base footwear: Choose slippers with flat, stable soles. Avoid overly cushioned or curved designs. If reusing old shoes, clean thoroughly and remove any loose material.
- Map key pressure zones: On the insole, mark areas corresponding to heel, ball of foot, and arch. These are prime locations for massage elements.
- Cut felt inserts: Trace the insole shape onto felt and cut two layers per foot. This adds softness between your foot and nodules.
- Prepare massage nodes: Collect 15–20 plastic bottle caps (rinse and dry). Flatten slightly if needed. Alternatively, use round wooden beads (1–1.5 cm diameter).
- Arrange node layout: Place caps or beads on the insole within marked zones. Cluster more densely under the heel and ball; space sparsely across the arch. Avoid overcrowding.
- Secure the nodes: Apply small dabs of fabric glue under each node. Press firmly and let dry 4–6 hours. For extra durability, sew through holes in caps using heavy-duty thread.
- Add the felt layer: Glue one felt layer directly over the attached nodes. Once dry, insert the entire unit back into the slipper. Top with second felt layer for cushioning.
- Reinforce outer sole (optional): To enhance traction and longevity, glue sandpaper or rubber shelf liner to the bottom exterior of the slipper.
Customization Ideas for Enhanced Comfort
Your slippers don’t have to be one-size-fits-all. Adjust based on personal preference and intended use.
- Adjust intensity: Use smaller beads for mild stimulation; larger or firmer nodes (like golf tees cut short) for deeper pressure.
- Target specific issues: Focus more nodes under the heel for plantar fasciitis relief, or along the arch for flat-foot support.
- Add aromatherapy: Insert dried lavender or eucalyptus sachets inside the slipper lining for calming sensory enhancement.
- Dual-layer design: Create removable insoles with nodes so you can switch between massage mode and regular comfort as needed.
Mini Case Study: Sarah’s Evening Relief Routine
Sarah, a nurse from Portland, spends 10–12 hours daily on her feet. After months of foot soreness, she tried store-bought massage slippers but found them too rigid. She followed this DIY method using soft fleece slippers, flattened water bottle caps, and double-thick felt padding. Within a week of wearing them for 20 minutes post-shift, she reported reduced arch stiffness and improved evening relaxation. “They’re not just functional—they feel like they were made for my feet,” she said. Her only modification was adding fewer nodes near the toes, which initially caused discomfort.
Do’s and Don’ts of DIY Massage Slipper Use
| Do’s | Don’ts |
|---|---|
| Start with light pressure and short durations (5–10 min) | Walk long distances or stand for extended periods in them |
| Clean insoles regularly to prevent odor buildup | Use sharp or jagged objects as nodes (risk of injury) |
| Replace worn-out felt or loose nodes promptly | Wear them barefoot if you have open cuts or diabetic neuropathy |
| Customize node patterns seasonally (e.g., denser in winter) | Assume they replace medical treatment for chronic foot conditions |
Frequently Asked Questions
Can I wash my DIY massage slippers?
Spot clean only. Avoid submerging them in water, as moisture weakens glue bonds and promotes mold under layers. Use a damp cloth with mild soap on exterior surfaces and allow full air drying.
Are these safe for people with diabetes?
Exercise caution. Individuals with reduced foot sensitivity should consult a healthcare provider before use. Unfelt pressure points could lead to unnoticed irritation or sores. Opt for very low-profile, soft nodes if approved for use.
How long do homemade massage slippers last?
With moderate use (15–30 minutes daily), expect 3–6 months of reliable function. Replace when nodes loosen, felt compresses significantly, or odors persist despite cleaning.
Final Checklist Before Wearing
- ✅ Base slippers cleaned and structurally sound
- Ensure no tears or collapsing support.
- ✅ Nodes securely attached and evenly distributed
- No wobbling or sharp edges.
- ✅ Felt layers smooth and wrinkle-free
- Prevents internal friction against skin.
- ✅ Dry completely after assembly
- Guarantees adhesive strength and hygiene.
- ✅ Tested in short sessions first
- Monitor comfort and adjust if needed.
Making Self-Care Accessible, One Step at a Time
Crafting your own massage slippers isn’t just about saving money—it’s an act of intentional self-care. In a world that often prioritizes speed over wellness, taking the time to build something that supports your body fosters mindfulness and physical awareness. Whether you're recovering from a workday, managing minor foot strain, or simply seeking a moment of tactile comfort, these handmade slippers deliver tangible benefits.
Now that you have the tools and knowledge, there’s no reason to wait. Gather your materials tonight and create a pair that fits not just your feet—but your lifestyle. Share your design ideas or improvements in the comments below and inspire others to walk the path of comfort, one DIY step at a time.


 浙公网安备
33010002000092号
浙公网安备
33010002000092号 浙B2-20120091-4
Comments
No comments yet. Why don't you start the discussion?