
Revitalizing your living space doesn’t always require a full furniture overhaul. One of the most effective and budget-friendly updates is replacing worn or outdated sofa cushion covers. Custom-made covers not only restore visual appeal but also offer superior comfort and longevity when tailored correctly. Whether you're refreshing a vintage set or adapting to new décor, creating perfectly fitted cushion covers ensures a polished, professional look. This comprehensive guide walks through every stage—from measuring and fabric selection to sewing and finishing—with precision and practicality.
Why Custom Cushion Covers Matter
Premade cushion covers often fall short in fit, style, and durability. Off-the-shelf options may gape at the corners, stretch awkwardly, or fail to match your exact dimensions. Custom covers eliminate these issues by conforming precisely to your cushions’ shape and thickness. They allow complete control over fabric choice, seam placement, and closure method, resulting in a seamless integration with your sofa’s design.
Beyond aesthetics, well-fitted covers protect foam inserts from dust, spills, and daily wear. When properly constructed, they can extend the life of your cushions by years. Additionally, making your own covers opens up creative possibilities—choose pet-friendly performance fabrics, eco-conscious textiles, or statement prints that reflect your personal taste.
Essential Tools and Materials
Before beginning, gather all necessary supplies. Having everything on hand streamlines the process and prevents mid-project delays.
- Fabric (upholstery-grade recommended)
- Measuring tape
- Scissors or rotary cutter
- Chalk or fabric marker
- Pins or clips
- Sewing machine with heavy-duty needle
- Thread (polyester or upholstery-weight)
- Seam ripper (for adjustments)
- Zippers, buttons, or Velcro (optional, for closures)
- Iron and ironing board
Choose tightly woven, durable fabrics such as cotton duck, linen blends, or synthetic microfibers. Avoid delicate materials like silk or loosely woven cotton, which may tear under pressure or fade quickly.
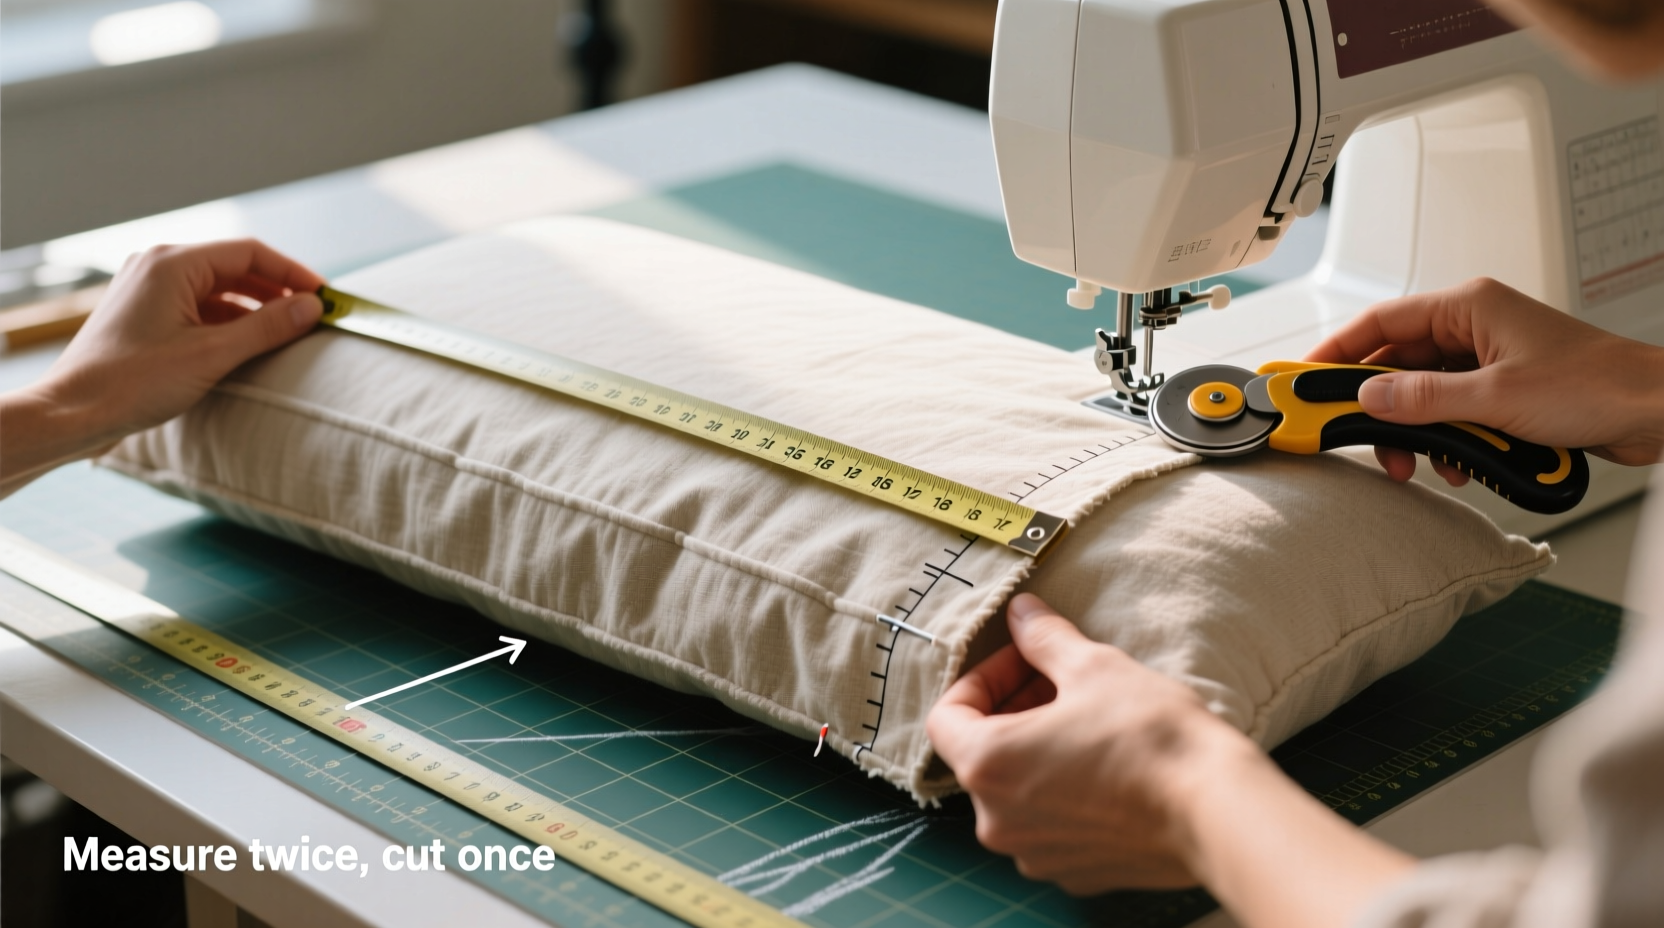
Step-by-Step Guide to Measuring and Cutting
Accurate measurements are the foundation of a flawless fit. Follow this timeline to capture every dimension correctly.
- Remove cushions: Take each cushion off the sofa and lay them flat on a clean surface.
- Measure length and width: Use a flexible measuring tape to record the top surface dimensions. For example, a seat cushion might measure 22” x 20”.
- Measure depth (thickness): Compress the cushion slightly and measure from top to bottom. A typical depth ranges from 3” to 6”.
- Add seam allowances: Add 1 inch to both length and width for seams. For depth, add twice the depth measurement plus 1 inch for overlap and seam allowance.
- Sketch a template: Draw the cushion shape on paper or cardboard, including side panels. Cut it out and test-fit around the cushion.
- Transfer to fabric: Pin the template to your right-side-down fabric and trace with chalk. Cut carefully along the lines.
For square or rectangular cushions, construction is straightforward. Odd shapes—like rounded corners or contoured backrests—require extra attention. Trace the actual cushion outline directly onto paper placed over it, then transfer that pattern to fabric.
| Cushion Type | Dimensions (Example) | Fabric Needed (Including Seams) |
|---|---|---|
| Seat Cushion | 22” x 20” x 5” | 23” x 21” (top/bottom), 5” x 67” (side strip) |
| Back Cushion | 24” x 18” x 4” | 25” x 19” (top/bottom), 4” x 86” (side strip) |
| Corner Cushion | L-shaped, 20” legs, 4” thick | Custom template required |
Sewing Techniques for Durable Construction
Strong seams ensure your covers withstand daily use. Begin by aligning the top and side pieces with right sides together. Pin thoroughly, especially at corners, to prevent shifting.
Sew around the perimeter using a ½-inch seam allowance. Use a straight stitch with medium tension. Reinforce stress points—such as corners and edges—by backstitching at the start and end of each seam.
If including a closure, install a zipper along one side edge before closing the final seam. Alternatively, use overlapping flaps with Velcro or button closures for a cleaner look without visible hardware.
After sewing, trim excess fabric and clip corners diagonally (without cutting stitches) to reduce bulk. Turn the cover right-side out and use a blunt tool—like a chopstick—to push out corners gently. Press seams flat with an iron on low heat, using a pressing cloth if working with synthetic fibers.
“Precision in measuring and seam finishing separates amateur projects from professional results.” — Lena Torres, Upholstery Instructor at New York School of Interior Design
Real Example: Reviving a Family Heirloom Sofa
A homeowner in Portland inherited a 1970s sectional from her grandparents. While structurally sound, the cushions were flattened and covered in faded floral fabric. Rather than replacing the entire piece, she decided to re-cover the eight seat and back cushions herself.
She measured each cushion individually, discovering slight variations due to years of uneven wear. Using a mix of cotton-linen blend for breathability and indoor-outdoor fabric for spill resistance, she created tailored covers with hidden zippers. The result was a refreshed sofa that honored its heritage while fitting seamlessly into her modern, minimalist home.
The project took three weekends but saved over $600 compared to professional reupholstery. More importantly, it preserved sentimental value while improving comfort and functionality.
Do’s and Don’ts of DIY Cushion Covers
| Do’s | Don’ts |
|---|---|
| Use upholstery-weight thread for durability | Use lightweight dress fabric not designed for seating |
| Press seams open or flat for neat finish | Ignore seam allowances when calculating fabric size |
| Label fabric pieces during assembly | Sew too fast without pinning layers |
| Test washability and fading on fabric swatches | Forget to consider pet claws or children when choosing fabric |
FAQ
How do I clean custom cushion covers?
Removable covers with zippers can be spot-cleaned or machine washed (on gentle cycle) if the fabric allows. Always check manufacturer care instructions. Non-removable covers should be cleaned with a damp cloth and mild detergent.
Can I make covers without a sewing machine?
Hand-sewing is possible using a backstitch for strength, though it’s time-consuming. For better results, consider using fusible bonding tape for seams, but note this method is less durable for high-use areas.
What if my cushions are different sizes?
This is common, especially in older furniture. Measure each cushion separately and create individual patterns. Uniform appearance comes from consistent fabric and stitching, not identical dimensions.
Final Checklist Before You Begin
- ✅ Remove and label all cushions
- ✅ Measure length, width, and depth of each
- ✅ Choose durable, appropriate fabric
- ✅ Pre-wash and dry fabric
- ✅ Create templates for each cushion type
- ✅ Cut fabric with proper seam allowances
- ✅ Sew with reinforced seams and neat finishes
- ✅ Install closure for easy removal
- ✅ Test fit and adjust if needed
Conclusion
Crafting custom sofa cushion covers is a rewarding project that combines practicality with creativity. With accurate measurements, quality materials, and careful construction, you can transform tired furniture into a centerpiece that reflects your style and meets your lifestyle needs. Unlike mass-produced alternatives, handmade covers offer a level of fit and finish that elevates the entire look of your room.


 浙公网安备
33010002000092号
浙公网安备
33010002000092号 浙B2-20120091-4
Comments
No comments yet. Why don't you start the discussion?