
Wooden windows combine timeless beauty with structural integrity, offering both insulation and aesthetic appeal. When properly crafted, they can last decades while enhancing your home’s character. Unlike mass-produced vinyl or aluminum alternatives, handmade wooden windows allow for customization in design, proportion, and finish. This guide walks through the entire process—from planning to installation—with practical insights to ensure durability and visual harmony.
Selecting the Right Wood Species
The foundation of a long-lasting wooden window lies in the choice of wood. Not all timber is suitable for exterior applications where exposure to moisture, UV rays, and temperature fluctuations is inevitable. Stability, grain structure, and natural resistance to decay are critical factors.
| Wood Type | Durability | Workability | Best For |
|---|---|---|---|
| American White Oak | High | Good | Traditional homes, painted or stained finishes |
| Western Red Cedar | Very High (naturally rot-resistant) | Excellent | Exterior use, natural finish applications |
| Poplar | Moderate | Excellent | Painted windows, interior trim integration |
| White Pine | Low-Moderate | Excellent | Historic restorations, low-moisture zones |
Cedar and oak are top choices for exterior windows due to their dimensional stability and resistance to warping. Poplar, though less weather-resistant, performs well when fully protected by overhangs and sealed properly. Avoid using untreated softwoods like spruce in high-exposure areas.
“Wood selection isn’t just about strength—it’s about matching material behavior to climate. In humid regions, cedar outperforms even some engineered woods.” — Daniel Reeves, Master Timber Carpenter & Restoration Specialist
Design Planning and Measurement
Before cutting any wood, precise measurements and thoughtful design are essential. Begin by measuring the rough opening in your wall—not the existing window if replacing one. Use a level and tape measure to record height, width, and diagonal consistency to detect out-of-square conditions.
Consider the architectural style of your home:
- Colonial: Double-hung sash with six-over-six lites
- Craftsman: Large fixed panes with smaller upper sashes
- Modern Farmhouse: Wide stiles and rails, minimal muntin patterns
Sketch your design at full scale on graph paper or using CAD software. Include frame dimensions, glazing bead profiles, and joinery types. Decide whether the window will be fixed, double-hung, casement, or awning style.
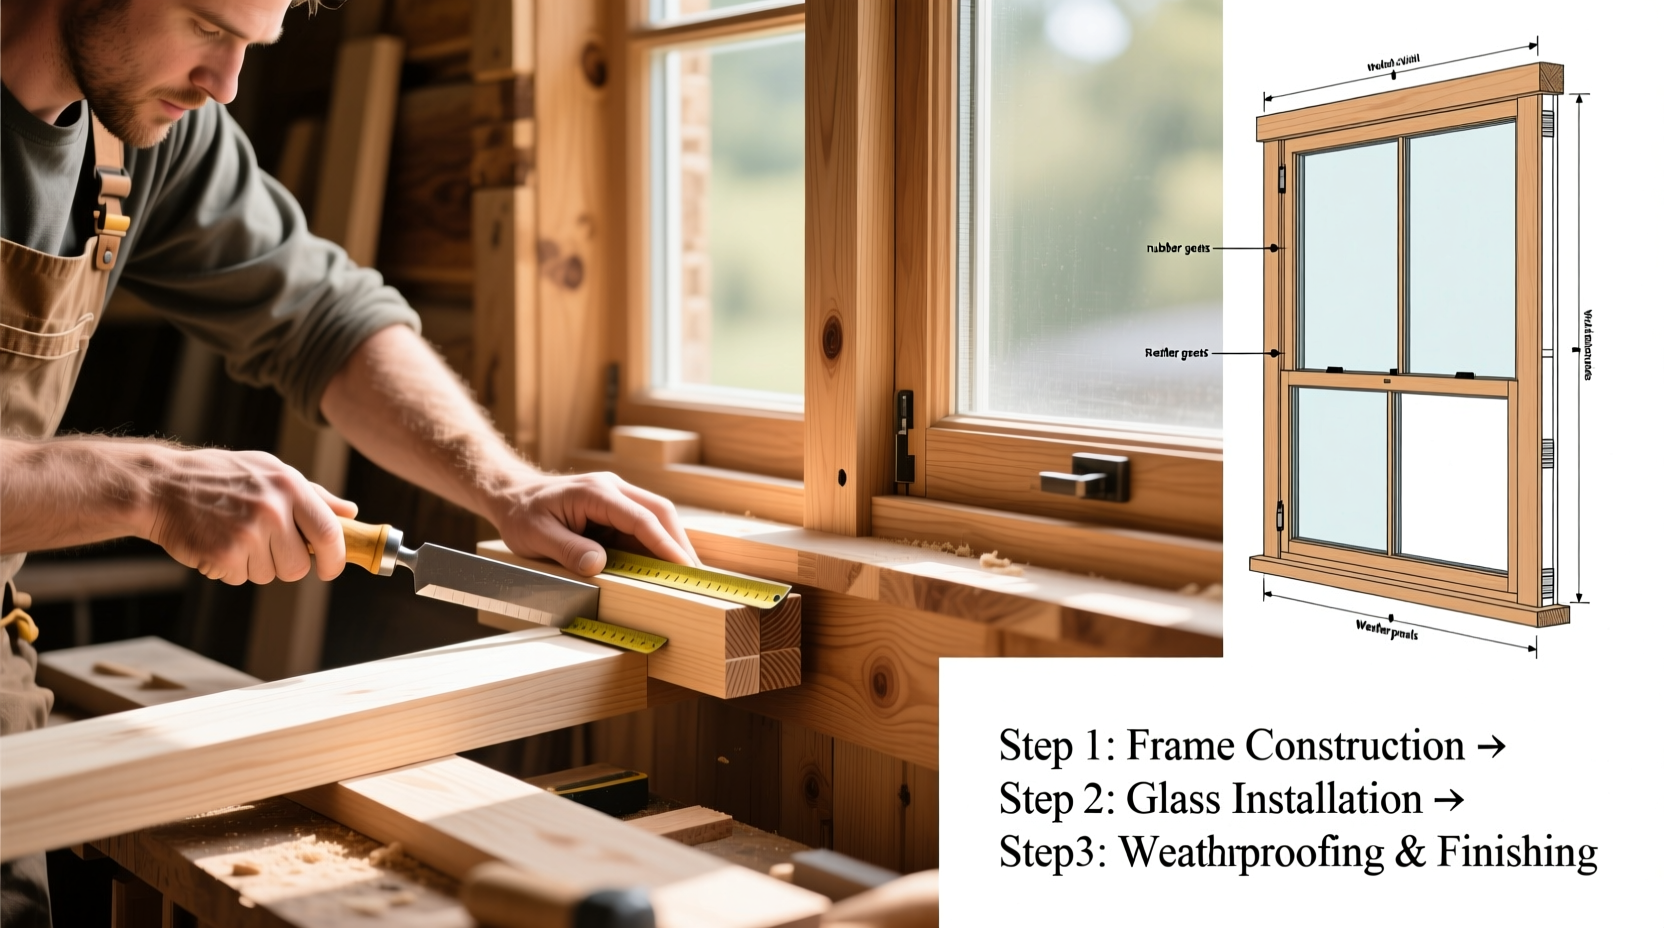
Step-by-Step Construction Process
Building a wooden window requires precision joinery and careful assembly. Below is a timeline-based guide for constructing a standard double-hung sash window.
- Mill the stock: Plane and joint hardwood to final thickness (typically 1¾ inches for stiles and rails). Cut pieces slightly longer than needed for trimming after joinery.
- Cut mortise and tenon joints: Use a mortiser or router to cut 3/8-inch deep mortises in stiles; shape corresponding tenons on rail ends. Fit snugly without glue at this stage.
- Layout and cut muntin intersections: For divided lites, use cope-and-stick or through-mortise techniques for clean intersections. Dry-fit all components.
- Assemble the sash: Apply waterproof wood glue (such as Titebond III) to joints, clamp firmly, and let cure for 24 hours. Check for squareness with diagonals.
- Sand and shape edges: Round over sharp corners slightly for safety and finish adhesion. Use 120-grit followed by 180-grit sandpaper.
- Install parting strips and pulley systems (if double-hung): Attach these to the jamb liners before final fitting.
- Prime all surfaces: Including end grains and internal cavities. Never skip priming—it prevents moisture ingress.
- Glaze the window: Set glass with linseed oil putty or synthetic glazing compound. Tool neatly and allow proper curing time.
Allow at least five days from milling to final glazing, factoring in drying times between stages.
Finishing and Weather Protection
A beautiful finish enhances appearance but more importantly, protects against environmental degradation. The key is layering: sealant, primer, undercoat, and topcoat.
Recommended finishing sequence:
- Apply epoxy-based wood stabilizer to end grains and joints.
- Seal all surfaces with oil-based exterior primer.
- Apply two coats of high-quality exterior enamel (e.g., Benjamin Moore Aura Grand Entrance).
- For natural looks, use penetrating oil finishes like Sikkens Cetol HF + topcoat every 2–3 years.
Real Example: Restoring Windows in a 1905 Craftsman Bungalow
In Portland, Oregon, homeowner Maria Tran undertook the restoration of her bungalow’s original front windows. Rather than replace them, she worked with a local woodworker to replicate the lower sashes that had rotted at the bottom rails.
Using old growth Douglas fir sourced from reclaimed lumber yards, they matched the original profile using a router table. Instead of traditional putty, they opted for modern glazing tape and butyl rubber gaskets behind the glass for improved moisture sealing. Each new sash was triple-primed and finished with a semi-gloss white urethane enamel.
Result: Energy efficiency improved with interior storm windows, while historic authenticity remained intact. After three Pacific Northwest winters, no signs of swelling or paint failure have appeared.
Checklist: Building Durable Wooden Windows
- ☑ Choose rot-resistant wood species appropriate for your climate
- ☑ Measure openings accurately and account for framing tolerances
- ☑ Use waterproof glue and mechanical fasteners (dowels or pegs) for joints
- ☑ Prime all parts—including recesses and end grain—before assembly
- ☑ Install proper flashing and drainage planes during mounting
- ☑ Use tempered or insulated glass for safety and thermal performance
- ☑ Schedule regular maintenance inspections every 12 months
Frequently Asked Questions
Can I build wooden windows myself without professional tools?
Yes, basic models can be made with hand tools like chisels, saws, and planes. However, power tools such as a table saw, router, and mortiser significantly improve accuracy and efficiency. Start with a simple fixed window before attempting operable designs.
How do wooden windows compare to vinyl in energy efficiency?
Well-constructed wooden windows with insulated glazing often outperform vinyl in thermal retention due to wood’s lower conductivity. With proper weatherstripping and multi-pane glass, U-values can reach 0.25 or lower—comparable to premium vinyl units.
What should I do if my wooden window starts to swell?
Swelling usually indicates moisture absorption. First, check for failed caulking or missing flashings. Sand down swollen areas lightly, reseal, and repaint. If structural damage exists, replace affected components before further deterioration occurs.
Final Thoughts
Crafting durable and stylish wooden windows is a rewarding investment in your home’s comfort and curb appeal. By selecting the right materials, following sound construction principles, and maintaining a proactive care routine, you create functional art that lasts generations. These windows don’t just frame views—they become part of your home’s story.


 浙公网安备
33010002000092号
浙公网安备
33010002000092号 浙B2-20120091-4
Comments
No comments yet. Why don't you start the discussion?