
Creating handmade rope keychains is more than just a craft—it's a practical way to personalize everyday items while developing useful knotting and braiding skills. Whether you're making one for yourself or as a thoughtful gift, a well-made rope keychain can last years with proper construction. Unlike mass-produced versions that often fray or break, a handmade version built with care offers strength, character, and a unique touch. This guide walks you through every stage of the process, from selecting materials to finishing techniques that ensure durability.
Choosing the Right Rope and Materials
The foundation of a long-lasting keychain lies in material selection. Not all ropes are created equal—some are too stretchy, others too slippery, and many degrade quickly under daily stress. For homemade keychains, opt for natural or synthetic fibers with high tensile strength and low elasticity.
- Paracord (550 cord): Ideal for durability and grip. It’s weather-resistant and holds knots tightly.
- Hemp rope: Offers a rustic look and excellent texture. Naturally antimicrobial and strong when tightly braided.
- Cotton cord: Softer and easier to work with but less durable unless waxed or sealed.
- Nylon braided cord: Resistant to abrasion and moisture, great for outdoor use.
Avoid thin shoelaces or decorative cords—they may look good initially but lack structural integrity over time.
Essential Tools and Setup
You don’t need a full workshop to create professional-quality keychains. A small, organized workspace with basic tools will suffice. Here’s what you’ll need:
| Tool | Purpose | Alternative |
|---|---|---|
| Sharp scissors | Clean cuts without fraying | Wire cutters (for thick cord) |
| Lighter or heat source | Seal rope ends to prevent unraveling | Nail polish (temporary fix) |
| Keyring or split ring | Attachment point | Cargo clip or carabiner |
| Clamp or tape | Secure rope during braiding | Helping hands tool or binder clip |
| Ruler or measuring tape | Ensure consistent length | Standard pen for quick reference |
Work on a clean, flat surface with good lighting. Secure one end of the rope using tape or a clamp to keep tension steady during braiding.
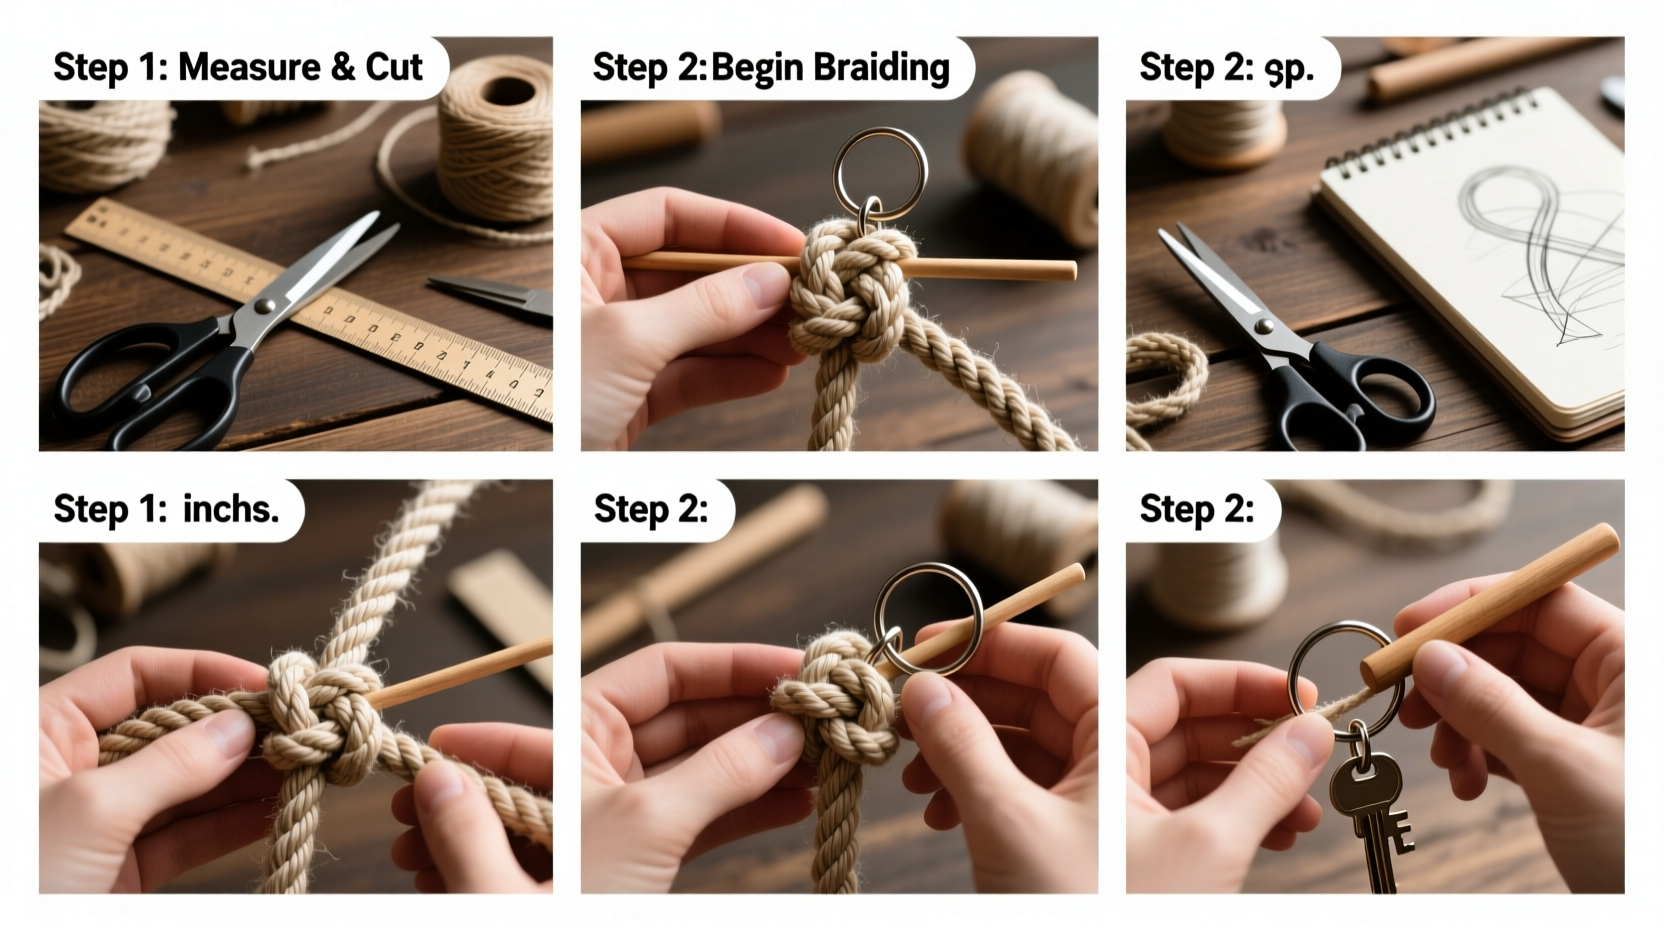
Step-by-Step Construction Process
Follow this proven sequence to build a compact, tangle-resistant keychain that withstands daily wear.
- Cut the rope: Measure and cut three strands, each 36 inches long. This allows enough length for braiding and finishing.
- Seal the ends: Use a lighter to briefly melt the tips of synthetic rope or apply clear nail polish to cotton/hemp. Let dry completely.
- Attach to keyring: Fold all three strands in half and loop them through the keyring. Pull the loose ends through the loop to form a lark’s head knot.
- Begin the braid: Separate into three even sections. Start a standard three-strand braid—right over center, left over center—maintaining even tension.
- Braid consistently: Continue for 4–5 inches, depending on desired length. Avoid twisting strands; keep them parallel.
- Secure the end: Tie a tight overhand knot at the bottom to prevent unbraiding. Trim excess, leaving ¼ inch, then seal again with heat.
- Optional embellishments: Add beads between strands before the final knot, or incorporate colored threads for contrast.
For added strength, consider a diamond braid or cobra weave using paracord—more complex but far more resilient.
Real Example: Crafting Keychains for a Community Market
Jamie, a hobbyist crafter from Portland, started making rope keychains as holiday gifts for friends. After positive feedback, she began selling them at a local artisan market. She uses recycled paracord remnants, reducing waste while offering colorful designs. Her best-selling variant features a double-layer cobra braid with a stamped metal tag.
“I noticed cheaper keychains broke within weeks,” Jamie said. “By focusing on tight knots and sealed ends, mine hold up after months of use. People now come back asking for replacements—for their coworkers.”
Her success came not from complexity, but consistency in technique and attention to detail. She pre-cuts all ropes to the same length and tests each knot under tension before packaging.
“Durability starts before the first knot is tied—it’s in the prep, tension, and finish.” — Marcus Tran, Knotwork Instructor at Pacific Craft Guild
Dos and Don’ts of Handmade Rope Keychains
| Do | Don’t |
|---|---|
| Use consistent tension while braiding | Allow loose or uneven strands |
| Seal every cut end thoroughly | Leave raw ends exposed |
| Test knots with light pulling before finishing | Assume knots will hold without testing |
| Store finished keychains away from moisture | Keep them in humid bathrooms or cars |
| Add a drop of glue to critical knots | Overuse adhesive, making it brittle |
Frequently Asked Questions
How long should a handmade rope keychain be?
A functional length is typically 4 to 6 inches from the keyring. This provides enough grip without being bulky in pockets. Adjust based on user preference—shorter for minimalist styles, longer for decorative flair.
Can I wash a rope keychain?
Yes, but carefully. Hand wash with mild soap and lukewarm water if dirty. Avoid soaking for extended periods, especially with natural fibers like hemp or cotton, which can weaken when wet. Air dry completely before reuse.
What if my braid keeps twisting?
This usually happens when tension is uneven or the rope isn’t anchored securely. Make sure the top is clamped firmly and recheck each crossover during braiding. If using twisted rope, let it hang with a weight for a few minutes before starting to relax the coils.
Checklist: Building a Durable Rope Keychain
- ☐ Choose sturdy, fray-resistant rope (paracord recommended)
- ☐ Cut three strands to 36 inches each
- ☐ Seal all six ends with heat or polish
- ☐ Attach strands to keyring using a lark’s head knot
- ☐ Braid tightly and evenly for 4–6 inches
- ☐ Tie off with an overhand knot and trim excess
- ☐ Re-seal the final tip and test for strength
- ☐ Optional: Add glue or bead accents
Final Thoughts and Encouragement
Making a durable rope keychain at home blends simplicity with craftsmanship. It doesn’t require advanced tools or years of experience—just patience, the right materials, and attention to detail. Once mastered, the process becomes meditative, even therapeutic. Each keychain carries not just keys, but effort, intention, and care.
These creations make meaningful gifts, thoughtful giveaways, or satisfying personal projects. With practice, you can experiment with patterns, colors, and textures to develop your signature style. The most important element isn’t perfection—it’s persistence. Every knot you tie strengthens both the keychain and your skill.


 浙公网安备
33010002000092号
浙公网安备
33010002000092号 浙B2-20120091-4
Comments
No comments yet. Why don't you start the discussion?