
Camellias, with their layered petals and timeless elegance, have long been a symbol of refinement in floral design. Translating this beauty into wearable art allows crafters to blend nature-inspired aesthetics with personal expression. Mini camellia flower earrings offer a delicate, sophisticated accessory that can be customized in color, size, and finish. With basic tools and a mindful approach, you can create handcrafted earrings that rival boutique designs—all from the comfort of your home workspace.
Gathering Your Materials and Tools
The foundation of any successful craft project lies in preparation. For miniature camellia earrings, precision and material compatibility are essential. Choose lightweight, moldable components that maintain shape while remaining comfortable for daily wear.
Here’s what you’ll need:
- Fine-gauge polymer clay (white, blush pink, or deep red for classic camellia tones)
- Clay conditioning tool or pasta machine (optional but helpful)
- Precision sculpting tools (needle tool, ball stylus, blade)
- Earring hooks or studs (sterling silver, gold-plated, or hypoallergenic)
- Jewelry glue (E6000 or equivalent strong adhesive)
- Sandpaper (400–600 grit)
- Baking tray and parchment paper
- Acrylic roller or smooth glass bottle
- Optional: mica powder or translucent clay for petal depth
Designing the Camellia Petals
The camellia’s signature is its overlapping, slightly ruffled petals arranged in a symmetrical bloom. To replicate this naturally, avoid perfect uniformity—subtle variation adds realism.
- Roll a small ball of clay (about the size of a pea) and flatten it into a 1/2-inch disc using the roller.
- Shape the edge with a needle tool or soft brush to create gentle undulations resembling natural petals.
- Add dimension by pressing the center slightly downward with a ball stylus, giving each petal a cupped appearance.
- Create 5–7 petals per flower, varying sizes slightly—larger on the outer layer, smaller toward the center.
- Layer transparency by blending a touch of translucent clay or dusting mica powder on edges for a dewy, lifelike sheen.
Arrange the petals on parchment paper in a circular pattern, slightly overlapping like rose petals. Gently press them together at the base to form a cohesive bud. Use tweezers for precise placement if needed.
Baking and Finishing the Flowers
Once shaped, the flowers must be cured according to the clay manufacturer’s instructions. Most polymer clays require baking at 265°F–275°F (129°C–135°C) for 15–20 minutes.
| Stage | Action | Time/Temp |
|---|---|---|
| Preheat Oven | Ensure consistent temperature | 10 minutes before baking |
| Bake | On parchment-lined tray | 15–20 min at 275°F |
| Cool | Air dry completely | 10–15 minutes |
| Sanding | Smooth edges lightly | Use 600-grit paper |
After cooling, lightly sand any rough edges. Avoid over-sanding, which can distort delicate shapes. For added realism, consider dry-brushing the petal edges with a diluted metallic paint (gold or copper) to mimic aging or light exposure.
“Hand-sculpted floral jewelry captures a moment of nature’s grace. The key is patience—each petal should feel intentional, not rushed.” — Lila Chen, Artisan Jewelry Designer & Craft Educator
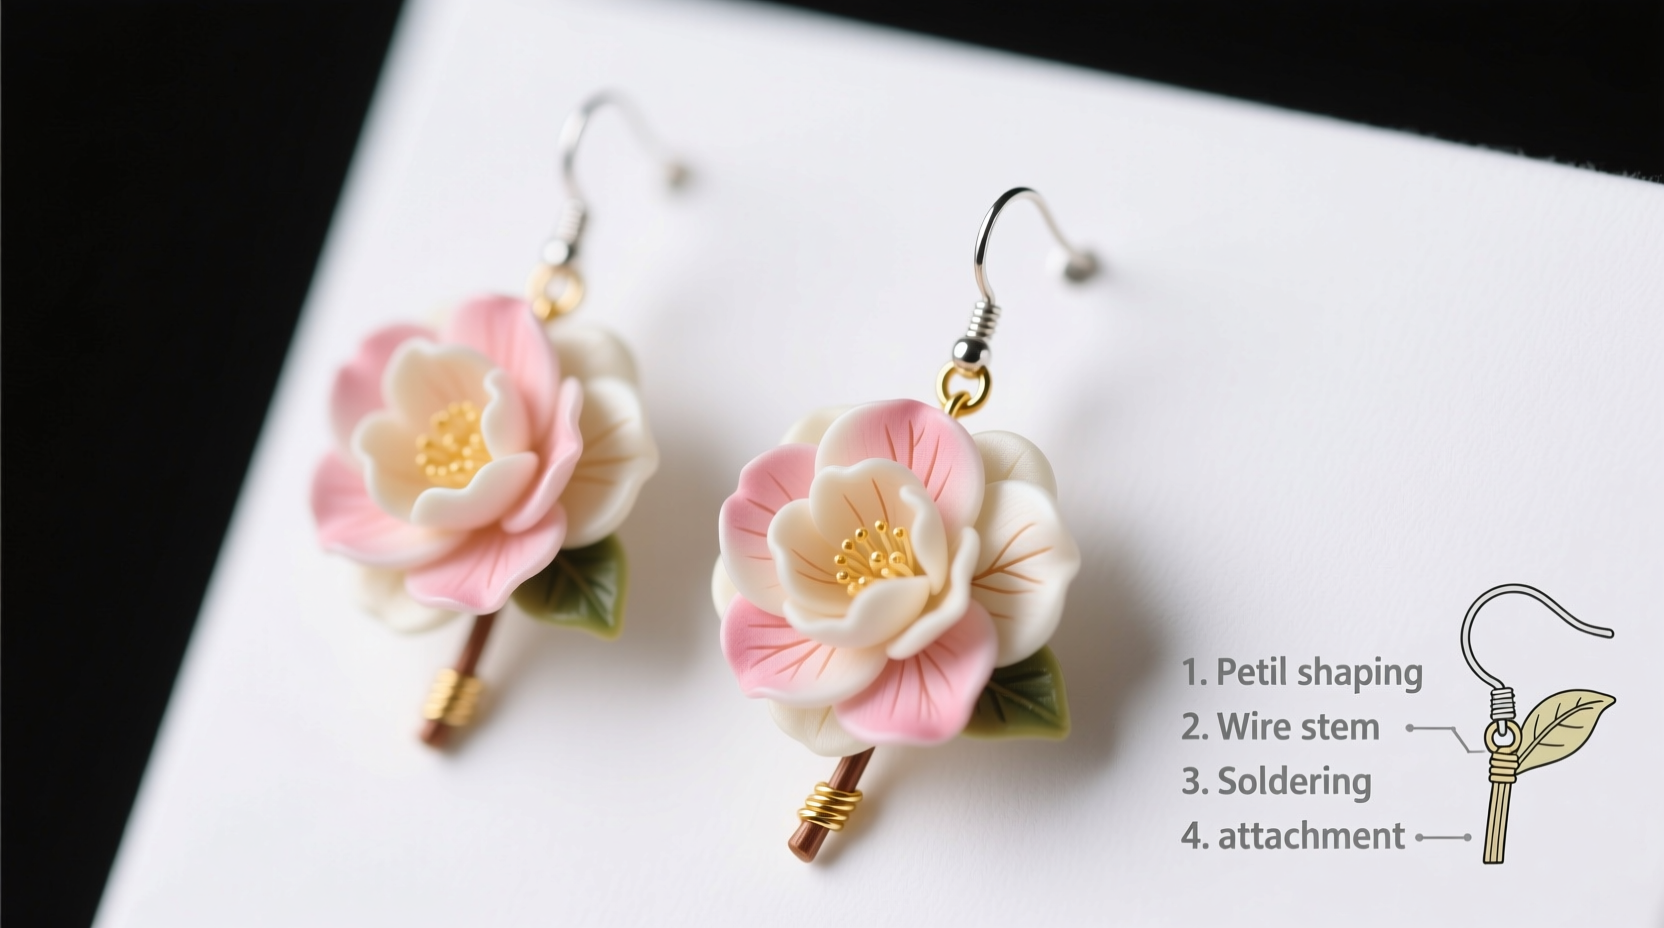
Assembling the Earrings
Now that your camellia blooms are baked and finished, it’s time to turn them into wearable pieces.
- Prepare the back: Cut a small slit or press a flat surface on the reverse side of the flower base to create a stable bonding area.
- Apply adhesive: Use a toothpick to apply a tiny drop of jewelry glue to the back center of the flower.
- Attach findings: Press an earring post backing or hook finding firmly onto the glued area. Hold for 30 seconds to set initial bond.
- Cure fully: Let the glue dry for 24 hours in a dust-free space before handling or wearing.
Customization Ideas
Personalize your earrings to match your wardrobe or occasion:
- Color gradients: Blend two clay colors from base to tip for ombré petals.
- Miniature centers: Add a tiny bead or hand-formed stamen cluster in yellow or bronze.
- Different finishes: Apply a matte or glossy varnish depending on desired effect—gloss enhances petal wetness; matte gives vintage softness.
- Size variation: Create petite 8mm buds for subtle studs or larger 15mm statement drops.
Mini Case Study: Sarah’s Bridal Earrings
Sarah, a DIY enthusiast from Portland, wanted meaningful accessories for her spring wedding. Inspired by her grandmother’s camellia garden, she crafted a pair of blush-pink mini camellia stud earrings using polymer clay and surgical steel posts. She incorporated a hint of pearl mica powder for luminosity and sealed them with a satin finish.
She followed this process two weeks before the ceremony to allow time for curing and testing comfort. After receiving compliments from guests and her bridal party, Sarah started a small Etsy shop offering custom floral earrings for bridesmaids. Her success began with one thoughtful, handcrafted pair—proof that personal touches resonate deeply.
Frequently Asked Questions
Can I make these earrings waterproof?
Polymer clay itself is water-resistant once baked, but prolonged exposure to moisture can degrade glue bonds and metal findings. For durability, choose tarnish-resistant hooks and seal the back of the flower with a thin layer of clear resin if intended for occasional outdoor use.
Are these safe for sensitive ears?
Yes, provided you use hypoallergenic earring backs—such as titanium, niobium, or certified nickel-free sterling silver. Always label your creations accordingly if selling or gifting.
How long do handmade clay earrings last?
With proper care—stored in a soft pouch away from pressure and sunlight—polymer clay earrings can last for years. Avoid dropping them on hard surfaces, as the clay can chip or crack under impact.
Final Checklist Before Wearing
- ✅ Flowers are fully baked and cooled
- No soft spots or under-cured areas.
- ✅ Edges are sanded smooth
- No sharp ridges that could irritate skin.
- ✅ Glue is fully cured
- 24-hour cure time observed for maximum strength.
- ✅ Findings are secure
- Gently tug test the earring hook or post.
- ✅ Comfort checked
- Wear for 10 minutes to ensure balance and weight feel right.
Conclusion: Wear Your Creativity with Pride
Crafting mini camellia flower earrings at home is more than a hobby—it’s an act of mindful creation. Each petal shaped by hand carries intention, memory, and artistry. Whether worn for a special event or gifted to someone dear, these delicate blossoms become heirlooms of emotion and effort.
Start with a single pair. Experiment with colors, textures, and finishes. Over time, your technique will refine, and your confidence will grow. There’s no need for expensive tools or formal training—just curiosity and care.


 浙公网安备
33010002000092号
浙公网安备
33010002000092号 浙B2-20120091-4
Comments
No comments yet. Why don't you start the discussion?