
Personalizing your handbags with handmade touches is a growing trend among fashion-conscious crafters. Among the most accessible and expressive accessories you can make are rope bag charms. These small, decorative additions not only enhance the visual appeal of your bags but also reflect your personality and creativity. With just a few basic supplies and some patience, you can design unique rope charms that stand out in any setting. This guide walks you through the entire process—from selecting materials to finishing techniques—so you can create professional-looking charms from the comfort of your home.
Why Make Your Own Rope Bag Charms?
Store-bought bag charms can be expensive and often lack originality. By making your own, you gain full control over color, texture, length, and embellishments. Rope charms are particularly versatile because they can be braided, knotted, twisted, or woven into countless styles. They’re lightweight, durable, and work well with leather, canvas, nylon, and even designer bags without risking damage. Plus, crafting them offers a satisfying blend of creativity and practicality, making it an ideal hobby for both beginners and experienced makers.
Materials and Tools You’ll Need
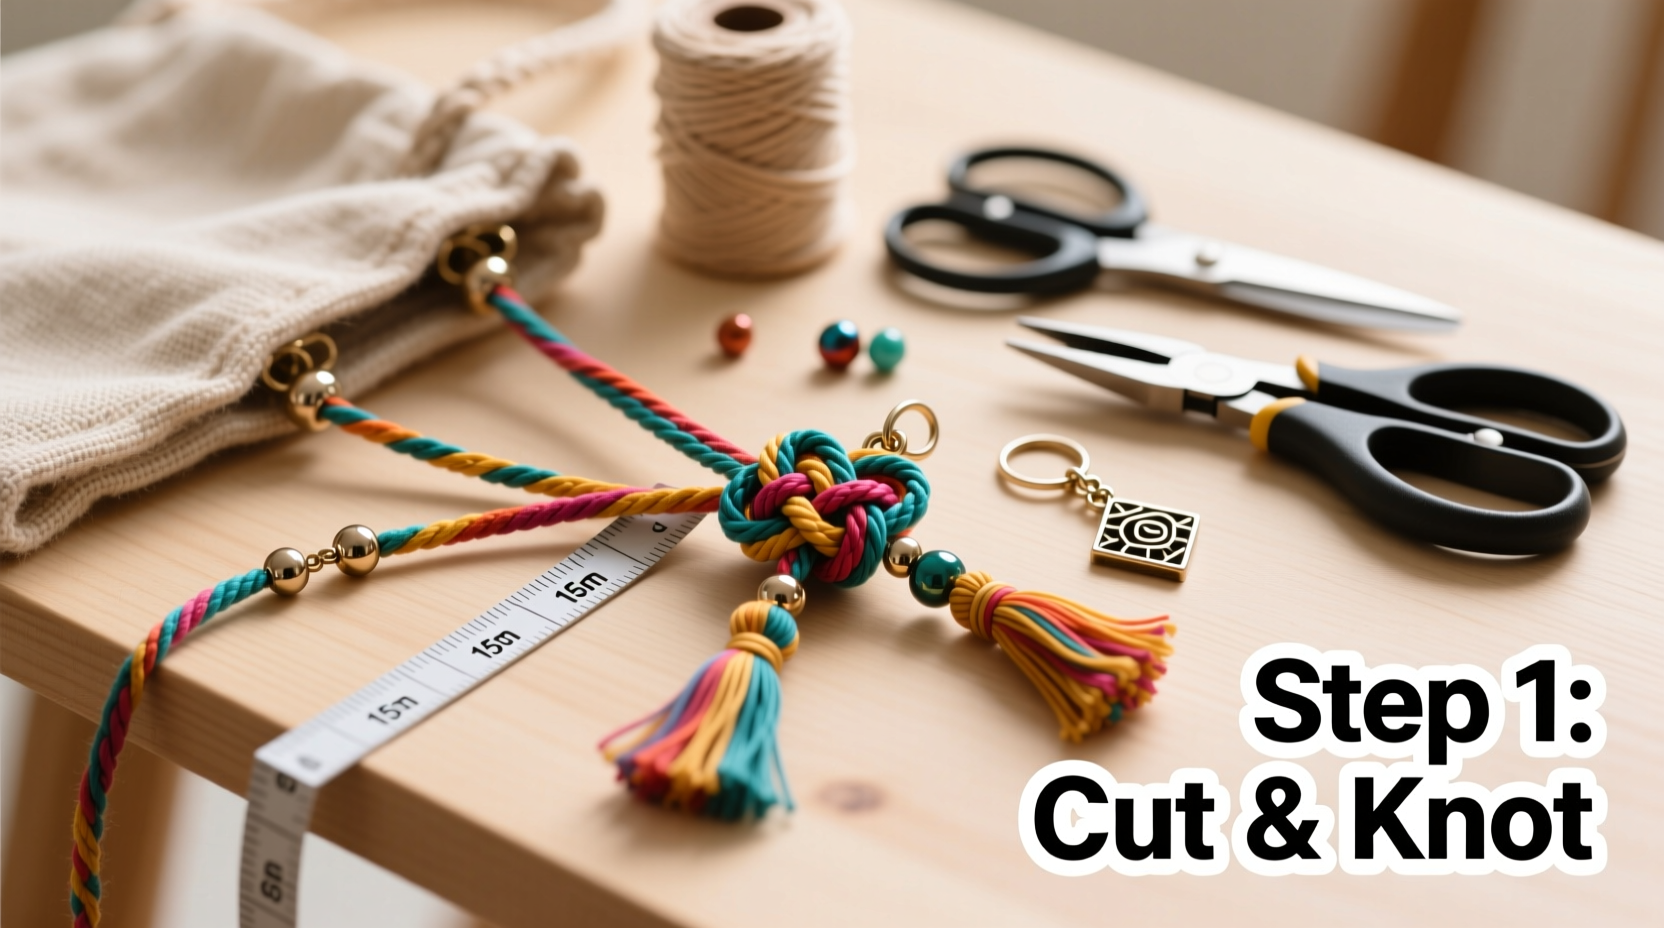
The beauty of this project lies in its simplicity. Most items can be found at craft stores, hardware shops, or repurposed from household supplies. Here’s what you should gather before starting:
- Rope or cord: Cotton macramé cord (3mm–5mm), nylon paracord, or waxed cotton thread
- Scissors: Sharp fabric scissors for clean cuts
- Lighter or fray check: To seal synthetic rope ends and prevent unraveling
- Keyring or lobster clasp: For attaching the charm to your bag
- Beads (optional): Wooden, metal, or acrylic beads for added flair
- Glue (optional): Clear-drying craft glue like E6000 for securing knots
- Tape or clipboard: To anchor your work while knotting
Cotton rope is ideal for beginners due to its softness and ease of handling. Paracord offers a bolder, more structured appearance and is excellent for outdoor or utilitarian-style bags.
Step-by-Step Guide to Creating a Braided Rope Charm
This method produces a sleek, three-strand braid that’s timeless and elegant. Follow these steps carefully for consistent results.
- Cut three equal lengths of rope – Each strand should be about 60 cm long. This allows enough material for braiding and finishing.
- Secure one end – Tape the top ends together or clip them to a surface to keep them stable during braiding.
- Begin the braid – Hold one strand in each hand and place the third between them. Cross the right strand over the center, then the left over the new center. Repeat until you reach the desired length (typically 15–20 cm).
- Add a bead (optional) – Slide a bead onto the center strand before finishing the braid, then continue braiding below it to lock it in place.
- Finish the end – Tie a tight overhand knot at the bottom to prevent fraying. Trim excess, leaving a small tassel if desired.
- Attach the clasp – Loop the top end through a keyring or jump ring and secure it with another overhand knot. Use a drop of glue on the knot for extra durability.
- Seal the ends – Lightly run a lighter over the cut ends of synthetic rope to melt and seal them. Do not burn cotton—use fray check instead.
Variations and Creative Enhancements
Once you’ve mastered the basic braid, experiment with different patterns and materials to expand your repertoire.
| Style | Description | Best For |
|---|---|---|
| Knotwork (e.g., spiral knot) | Uses repeated half-hitch knots to form a corkscrew pattern | Statement pieces with high texture |
| Twisted two-strand | Two strands twisted tightly together and coiled at the end | Minimalist, modern bags |
| Multi-color braid | Combines contrasting rope colors for visual impact | Seasonal or themed designs |
| Fringe charm | Single strand with a knotted body and long, loose fringe at the base | Boho-chic or beach bags |
You can also incorporate meaningful elements—initial beads, birthstone-colored cords, or charms representing hobbies like travel or music. The goal is to make something that feels uniquely yours.
“Handmade details transform ordinary accessories into personal statements. A simple rope charm can become a signature element of someone’s style.” — Lila Nguyen, Accessory Designer & Craft Educator
Mini Case Study: Emma’s Custom Branding Project
Emma, a small business owner selling handmade totes, wanted a way to brand her products affordably. Instead of logos printed on tags, she began adding custom rope charms in her brand’s signature navy and gold. She used a twisted two-strand technique with a small engraved metal tag at the base. Not only did customers love the detail, but several asked where they could buy the charms separately. Within two months, Emma launched a side product line of DIY charm kits, increasing her revenue by 18%.
This real-world example shows how a simple accessory can serve both aesthetic and strategic purposes—enhancing identity, building recognition, and even opening new income streams.
Dos and Don’ts of DIY Rope Charms
| Do | Don’t |
|---|---|
| Measure twice before cutting | Use dull scissors that crush the rope fibers |
| Test knot strength before finalizing | Overload with heavy beads that strain the cord |
| Match charm style to bag type (e.g., rugged paracord for backpacks) | Leave synthetic ends unsealed |
| Wash hands before handling light-colored rope | Expose cotton charms to prolonged moisture |
Checklist: Crafting Your First Rope Bag Charm
- ☐ Gather all materials: rope, scissors, clasp, lighter/fray check
- ☐ Cut three 60 cm strands (or adjust based on desired length)
- ☐ Secure the top ends with tape or a clip
- ☐ Begin and complete a three-strand braid
- ☐ Add a bead or decorative knot if desired
- ☐ Finish with a secure knot at the bottom
- ☐ Attach the keyring at the top with a reinforced knot
- ☐ Seal the ends appropriately based on material
- ☐ Inspect for balance and durability
- ☐ Attach to your favorite bag and enjoy!
FAQ
How long should a rope bag charm be?
A standard length is between 15 and 25 cm from the attachment point to the tip. This ensures visibility without dragging on the ground. Adjust based on your bag size—smaller clutches suit shorter charms, while tote bags can handle longer ones.
Can I wash a rope charm if it gets dirty?
Spot clean with a damp cloth and mild soap. Avoid submerging cotton or waxed rope, as this can weaken fibers or cause shrinkage. Synthetic cords like paracord can be gently rinsed and air-dried, but never machine-wash.
Are rope charms safe for delicate bags?
Yes, as long as the charm is securely tied and doesn’t have sharp components. Use smooth beads and avoid excessive weight. Always test on a less visible area first to ensure no rubbing or discoloration occurs.
Final Thoughts and Inspiration
Crafting your own rope bag charms is more than a fun weekend project—it’s a way to infuse everyday objects with meaning and artistry. Whether you're personalizing your daily carryall, creating gifts for friends, or exploring a new creative outlet, the skills you develop here are both practical and deeply rewarding. With minimal investment and endless design possibilities, there’s no limit to what you can create.


 浙公网安备
33010002000092号
浙公网安备
33010002000092号 浙B2-20120091-4
Comments
No comments yet. Why don't you start the discussion?