
Crafting your own beaded keychains is a rewarding blend of creativity and practicality. These small accessories serve as functional tools while reflecting personal style—perfect for gifts, self-expression, or even starting a small craft business. With just a few basic supplies and some patience, you can design one-of-a-kind pieces that stand out from mass-produced items. This guide walks you through every stage, from selecting materials to finishing your creation with professional flair.
Essential Materials and Tools
Before diving into the crafting process, gather all necessary components. Having everything ready ensures a smooth workflow and prevents interruptions mid-project.
- Beads: Choose from glass, plastic, wood, or gemstone beads in various sizes and shapes (round, cube, tube).
- Stringing material: Use nylon-coated stainless steel wire, stretchy elastic cord, or durable nylon thread depending on flexibility needs.
- Keychain hardware: Lobster clasps, split rings, or key rings made of stainless steel or zinc alloy.
- Findings: Crimp beads, end caps, or bead tips to secure ends neatly.
- Tools: Round-nose pliers, chain-nose pliers, wire cutters, and scissors.
- Optional: Charms, pendants, tassels, or letter beads for added personality.
Design Planning: Sketch Your Vision
Start by deciding the theme or purpose of your keychain. Is it minimalist? Colorful? Themed around a holiday, hobby, or favorite color palette? Sketching a quick layout helps visualize spacing and balance.
Consider symmetry, repetition, and contrast when arranging beads. For example, alternating large and small beads creates rhythm, while grouping similar colors adds cohesion. If using letter beads to spell names or words, test the sequence on a flat surface before stringing.
| Design Element | Effect | Example Use |
|---|---|---|
| Monochrome Scheme | Elegant, modern look | Black agate + silver spacers |
| Rainbow Gradient | Vibrant, playful energy | Ombre acrylic rounds |
| Mixed Textures | Tactile interest | Wood + metal + faceted glass |
| Symbolic Charms | Personal meaning | Heart charm for love, star for dreams |
“Intentional design transforms simple beads into meaningful keepsakes.” — Lena Ruiz, Jewelry Designer & Craft Educator
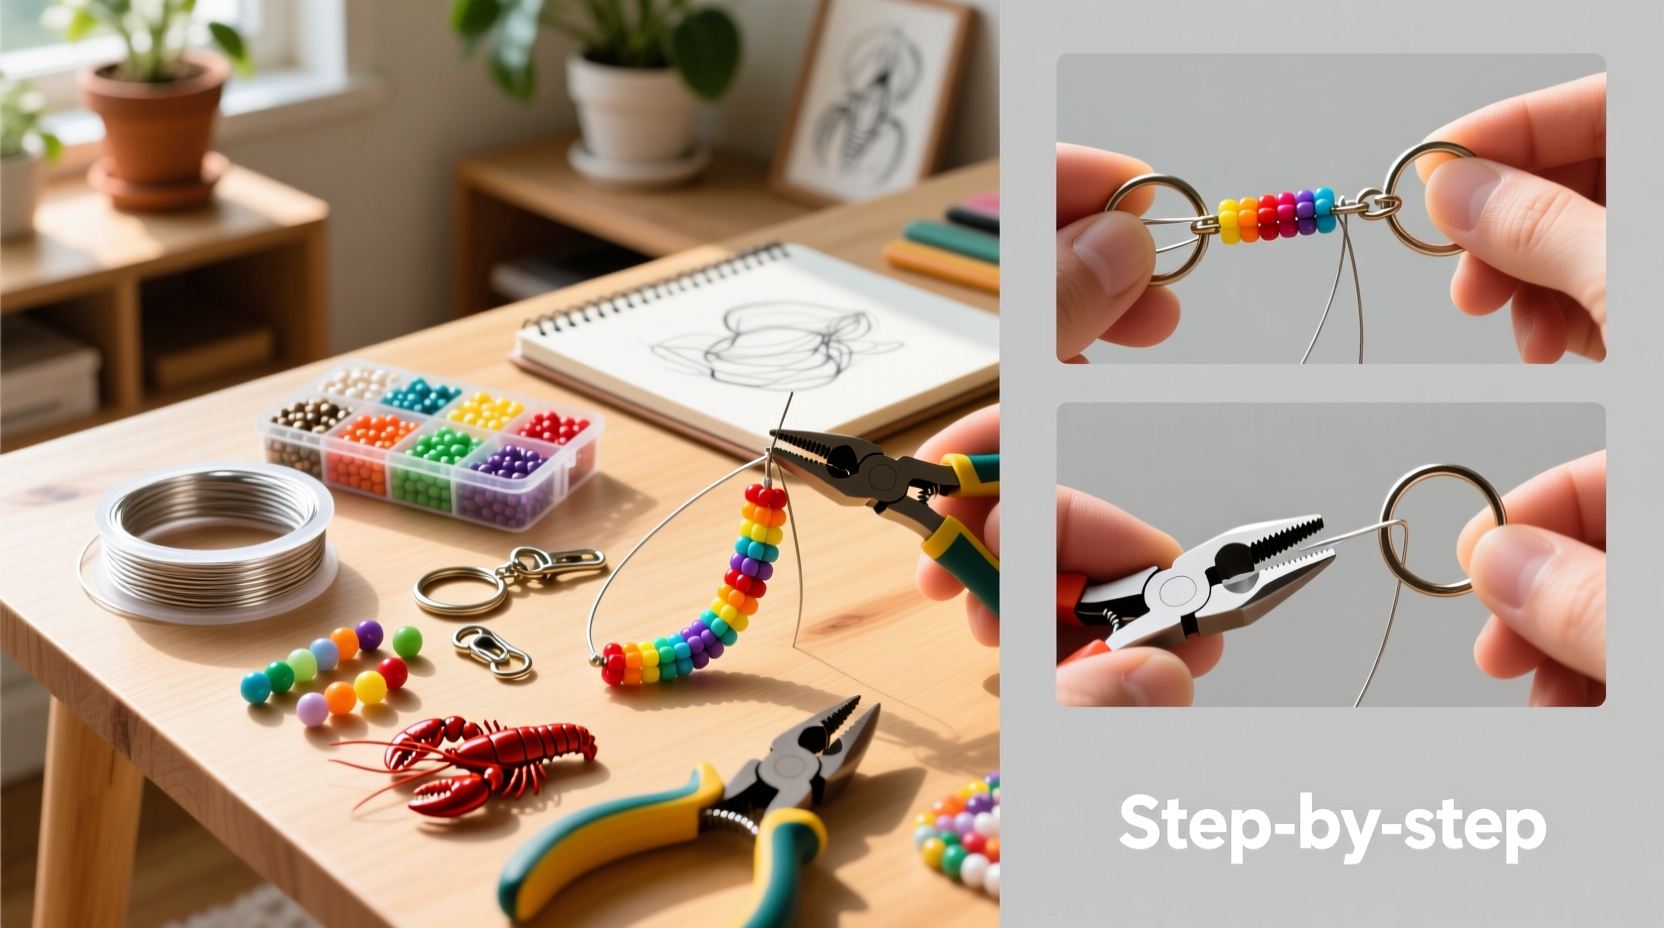
Step-by-Step Assembly Process
Follow this detailed timeline to assemble your beaded keychain with precision and confidence.
- Cut the Stringing Material: Measure about 6 inches longer than desired length to allow room for tying and attaching hardware.
- Attach the Key Ring Temporarily: Slide a split ring onto one end of the cord and knot loosely to hold it in place during beading.
- Begin Stringing Beads: Thread beads in your planned order. Use a bead mat to prevent rolling.
- Check Fit Frequently: Lay the piece flat to assess spacing and adjust if needed before finalizing.
- Secure the First End: Once complete, pass the cord back through several beads to reinforce tension. Add a crimp bead near the terminal point and flatten it with pliers to lock position.
- Trim Excess Cord: Cut any leftover thread close to the last bead or crimp, leaving no loose ends.
- Attach Final Hardware: Open a jump ring with pliers, connect it to the loop formed by the crimp, then attach the key ring or lobster clasp. Close securely.
- Test Durability: Gently tug on both ends to ensure connections are tight and won’t slip under normal use.
Real Example: Crafting a Birthday Gift Keychain
Sophie wanted to create a thoughtful gift for her best friend’s birthday. She chose pastel pink, lavender, and mint green beads to match her friend’s favorite colors. Using alphabet beads, she spelled “BFF” in the center, flanked by tiny pearl-like spacers. A small silver butterfly charm dangled from the bottom. After assembling the piece on elastic cord, she secured both ends with double knots and clear nail polish. The result was a cheerful, personalized accessory that her friend now uses daily—proof that handmade details carry emotional value no store-bought item can replicate.
Dos and Don’ts of Beadwork
| Do’s | Don’ts |
|---|---|
| Use consistent tension when stringing | Overload lightweight cords beyond their capacity |
| Inspect findings for sharp edges before use | Leave long, exposed threads that may snag |
| Label storage containers clearly | Mix metal types without considering tarnish risk |
| Wipe tools after use to prevent corrosion | Work on uneven surfaces where beads can roll away |
Frequently Asked Questions
What kind of thread is strongest for beaded keychains?
Nylon-coated stainless steel wire offers excellent strength and kink resistance, ideal for heavier beads. For lighter designs, high-quality beading thread like FireLine or Silamide works well, especially when knotted properly.
How do I stop my beads from sliding around?
To minimize movement, incorporate spacer beads or small metal tubes between larger ones. Alternatively, use crimp beads at strategic points to segment the design and lock positions in place.
Can I wash my beaded keychain?
Avoid submerging most beaded keychains in water, especially those with glued components or porous beads like wood or stone. Instead, wipe gently with a damp cloth and dry immediately. Never use harsh chemicals.
Final Checklist Before You Begin
- ✅ Gather all beads, cord, and hardware
- ✅ Prepare workspace with good lighting and a non-slip mat
- ✅ Confirm your design layout visually or on paper
- ✅ Test stringing material strength with a pull test
- ✅ Have tools cleaned and within reach
- ✅ Keep a small container nearby for stray beads
Conclusion: Bring Your Creativity to Life
Creating DIY beaded keychains isn’t just about making something useful—it’s about investing time and intention into an object that carries meaning. Whether you’re designing for yourself, giving as gifts, or exploring a new creative outlet, each piece becomes a reflection of thoughtfulness and craftsmanship. Now that you have the foundation, experiment freely: mix textures, play with symbolism, and refine your technique over time.


 浙公网安备
33010002000092号
浙公网安备
33010002000092号 浙B2-20120091-4
Comments
No comments yet. Why don't you start the discussion?