
Crafting your own keychain ornaments isn’t just a fun pastime—it’s a way to express individuality, create meaningful gifts, or even launch a small creative business. In a world saturated with mass-produced accessories, a handmade keychain carries emotional weight and visual distinction. With the right materials, techniques, and attention to detail, you can design pieces that are not only functional but also miniature works of art. This guide walks you through every phase of creating standout DIY keychains, from concept to finishing touches.
Selecting Your Materials for Maximum Impact
The foundation of any exceptional keychain lies in the quality and thoughtfulness of its materials. While cost-effective supplies are appealing, prioritize durability and aesthetic cohesion. Consider combining textures—like wood, resin, metal, and fabric—to add depth and tactile interest.
Common material categories include:
- Polymer clay: Moldable, oven-bake clay available in countless colors; ideal for custom shapes.
- Epoxy resin: Creates glossy, glass-like finishes; perfect for encapsulating photos, glitter, or dried flowers.
- Felt or fabric: Soft, lightweight, and easy to sew; great for whimsical or seasonal designs.
- Wood slices or laser-cut wood: Natural, rustic appeal; accepts paint and engraving well.
- Metal charms and findings: Add elegance and structural integrity, especially jump rings and lobster clasps.
Design Planning: Sketch, Theme, and Personalization
Before cutting or molding anything, spend time designing your keychain. A clear vision prevents wasted effort and elevates the final product. Start by choosing a theme: minimalist, nature-inspired, pop culture, holiday, or monogrammed elegance.
Sketch your idea on paper or use free digital tools like Canva or Inkscape to visualize proportions and color combinations. Think about scale—most keychains should be under 2.5 inches wide to remain practical.
Personalization is where your keychain truly stands out. Consider embedding initials, significant dates, tiny symbols (like hearts, stars, or animals), or even micro-quotes. For gift-giving, incorporate the recipient’s favorite color or hobby into the design.
“Handmade items gain value not just from craftsmanship, but from the story they carry.” — Lena Torres, Artisan Craft Educator
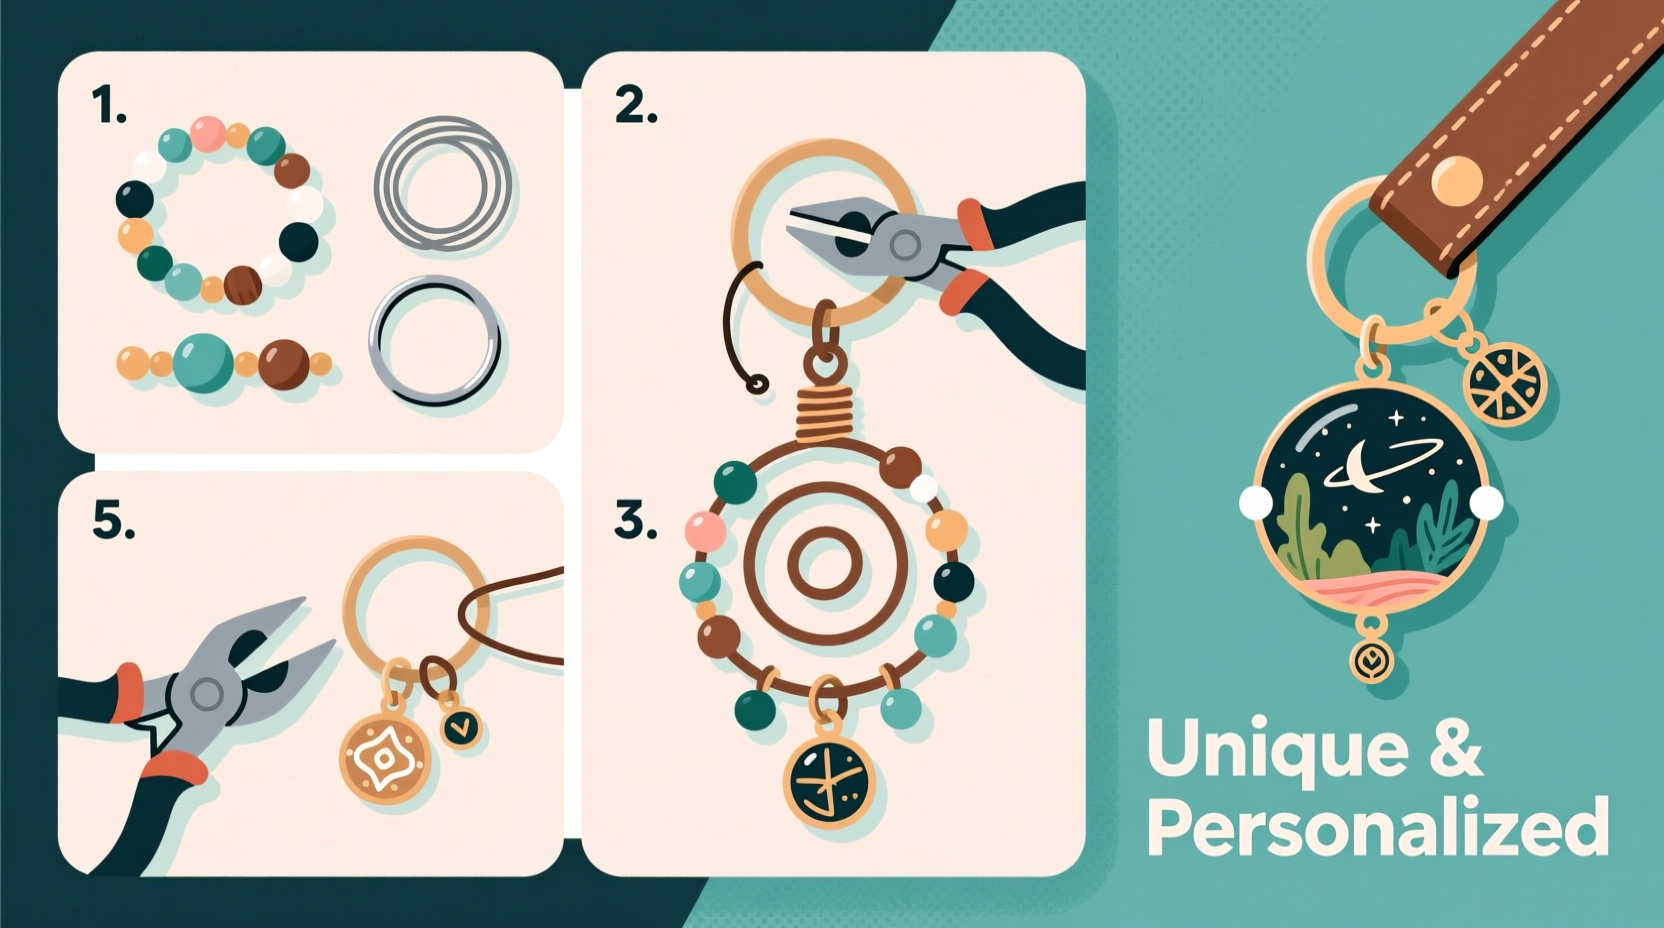
Step-by-Step Guide to Crafting a Resin Keychain
Resin keychains offer a sleek, durable finish and allow for endless customization. Follow this detailed process to make one successfully:
- Prepare your workspace: Cover surfaces with silicone mats or wax paper. Wear gloves and work in a well-ventilated area.
- Mix the resin: Combine epoxy resin and hardener in the ratio specified by the manufacturer (typically 1:1). Stir slowly for 3–5 minutes to avoid bubbles.
- Pour into silicone molds: Use geometric, animal, or custom-shaped molds. Fill halfway if layering elements.
- Add decorative elements: Place dried flowers, glitter, tiny beads, or handwritten notes into the wet resin.
- Top off and de-bubble: Pour a second layer to seal in items. Use a heat gun or toothpick to pop surface bubbles.
- Cure for 24 hours: Leave undisturbed on a level surface. Avoid dust and temperature fluctuations.
- Demold and drill (if needed): Gently remove from mold. If no built-in hole, carefully drill a small top hole using a rotary tool.
- Attach hardware: Insert a metal jump ring, then connect a keyring or split ring.
Alternative Techniques: Polymer Clay and Fabric Keychains
Not all standout keychains require resin. Two accessible alternatives are polymer clay and fabric-based designs.
Polymer Clay Process
Roll, shape, and bake polymer clay into custom forms. After baking and cooling, sand edges lightly for smoothness, then apply a gloss varnish. Use clay cutters for consistency or hand-sculpt abstract shapes. Baking times vary by brand and thickness—always follow package instructions.
Fabric-Fused Keychains
Cut two identical shapes from felt or cotton fabric. Sew around the edge with embroidery floss, leaving a small gap. Turn inside out, stuff lightly with poly-fill, then hand-stitch closed. Embellish with buttons, embroidery, or fabric markers.
| Technique | Best For | Time Required | Durability |
|---|---|---|---|
| Resin | Glittery, encapsulated, photo-based designs | 24+ hours (mostly curing) | High – resistant to water and wear |
| Polymer Clay | Custom shapes, painted details | 2–3 hours (active + baking) | Moderate – can chip if dropped |
| Fabric | Soft, playful, kid-friendly styles | 30–60 minutes | Low to moderate – avoid moisture |
Finishing Touches That Elevate Your Design
A professional finish separates amateur crafts from polished creations. Sand rough edges, buff glossy surfaces, and inspect each piece for stray glue or imperfections. Use UV-resistant sealants on painted or porous materials to prevent fading.
Consider packaging: a small kraft box tied with twine or a branded sticker adds perceived value, especially for gifts or sales. Attach a tiny tag with care instructions or a personal message.
Mini Case Study: From Idea to Market Success
Jessica, a college student in Portland, began making resin keychains featuring local flora like Douglas fir sprigs and wildflowers. She used recycled bottles as molds and sustainably sourced materials. After posting her creations on Instagram, she gained a following and launched an Etsy shop. Within six months, her monthly income from keychains exceeded $800. Her secret? Consistent branding, limited-edition seasonal drops, and personalized customer notes.
DIY Keychain Creation Checklist
Use this checklist to stay organized and ensure quality throughout your project:
- ☑ Choose a theme or purpose (gift, sale, personal use)
- ☑ Gather all materials and tools
- ☑ Test materials in a small batch
- ☑ Sketch or digitally plan the design
- ☑ Work in a clean, ventilated space
- ☑ Cure or dry pieces completely before assembly
- ☑ Attach hardware securely
- ☑ Inspect for flaws and polish final product
- ☑ Package thoughtfully for gifting or display
Frequently Asked Questions
Can I make waterproof keychains?
Yes. Resin, sealed polymer clay, and coated metal or acrylic are naturally water-resistant. Avoid untreated wood, fabric, or paper unless fully encapsulated.
How do I attach a photo to a keychain?
Print the image slightly smaller than your mold or charm base. Seal it with Mod Podge before placing in resin, or laminate it first to prevent smudging.
What’s the best way to sell handmade keychains?
Start online via Etsy, Instagram, or craft marketplaces. Attend local fairs or consignment shops. High-quality photos, consistent branding, and responsive communication build trust with buyers.
Final Thoughts: Make It Meaningful
A truly standout keychain does more than hold keys—it tells a story, sparks joy, or becomes a signature accessory. Whether you’re crafting for relaxation, connection, or commerce, the process invites mindfulness and creativity. Each decision, from color choice to finishing sealant, contributes to a piece that reflects your intent and care.


 浙公网安备
33010002000092号
浙公网安备
33010002000092号 浙B2-20120091-4
Comments
No comments yet. Why don't you start the discussion?