
Crafting handmade bag charm pendants is more than a pastime—it’s a personal expression. These small, decorative accents breathe life into everyday accessories, turning a simple tote or backpack into a statement piece. Unlike mass-produced trinkets, handmade charms carry intention, texture, and individuality. With minimal tools and a bit of creativity, anyone can design custom pendants that reflect their style, mood, or even seasonal themes. This guide walks through the entire process, from selecting materials to finishing touches, ensuring your creations are both beautiful and durable.
Gathering Essential Materials and Tools
Before beginning any craft project, preparation is key. Assembling the right supplies ensures a smooth workflow and reduces frustration. For handmade bag charms, most materials are affordable and widely available at craft stores or online retailers.
Basic components include:
- Fimo, Sculpey, or air-dry clay (for sculpted pendants)
- Jewelry findings: jump rings, lobster clasps, split rings
- Pliers (round-nose, flat-nose, and chain-nose)
- Acrylic paints and sealant (e.g., Mod Podge or UV resin)
- Embroidery floss, beads, tassels, or pom-poms (for textile-based charms)
- Scissors, ruler, glue (E6000 or fabric glue)
- Molds or cookie cutters (optional, for shaping)
Designing Your Charm Concept
The uniqueness of handmade charms lies in originality. Begin by sketching ideas on paper. Consider themes: nature-inspired leaves, celestial moons, miniature animals, or abstract shapes. Think about color palettes that complement your wardrobe or seasonal aesthetics—soft pastels for spring, warm earth tones for autumn.
Ask yourself: Is this charm meant to be playful, elegant, or bold? Will it dangle from a leather satchel or a denim crossbody? Matching the charm’s personality to its intended bag enhances cohesion.
“Handmade accessories tell stories. A tiny hand-sculpted mushroom isn’t just decoration—it might represent a favorite forest hike or childhood memory.” — Lila Chen, Artisan Jewelry Designer
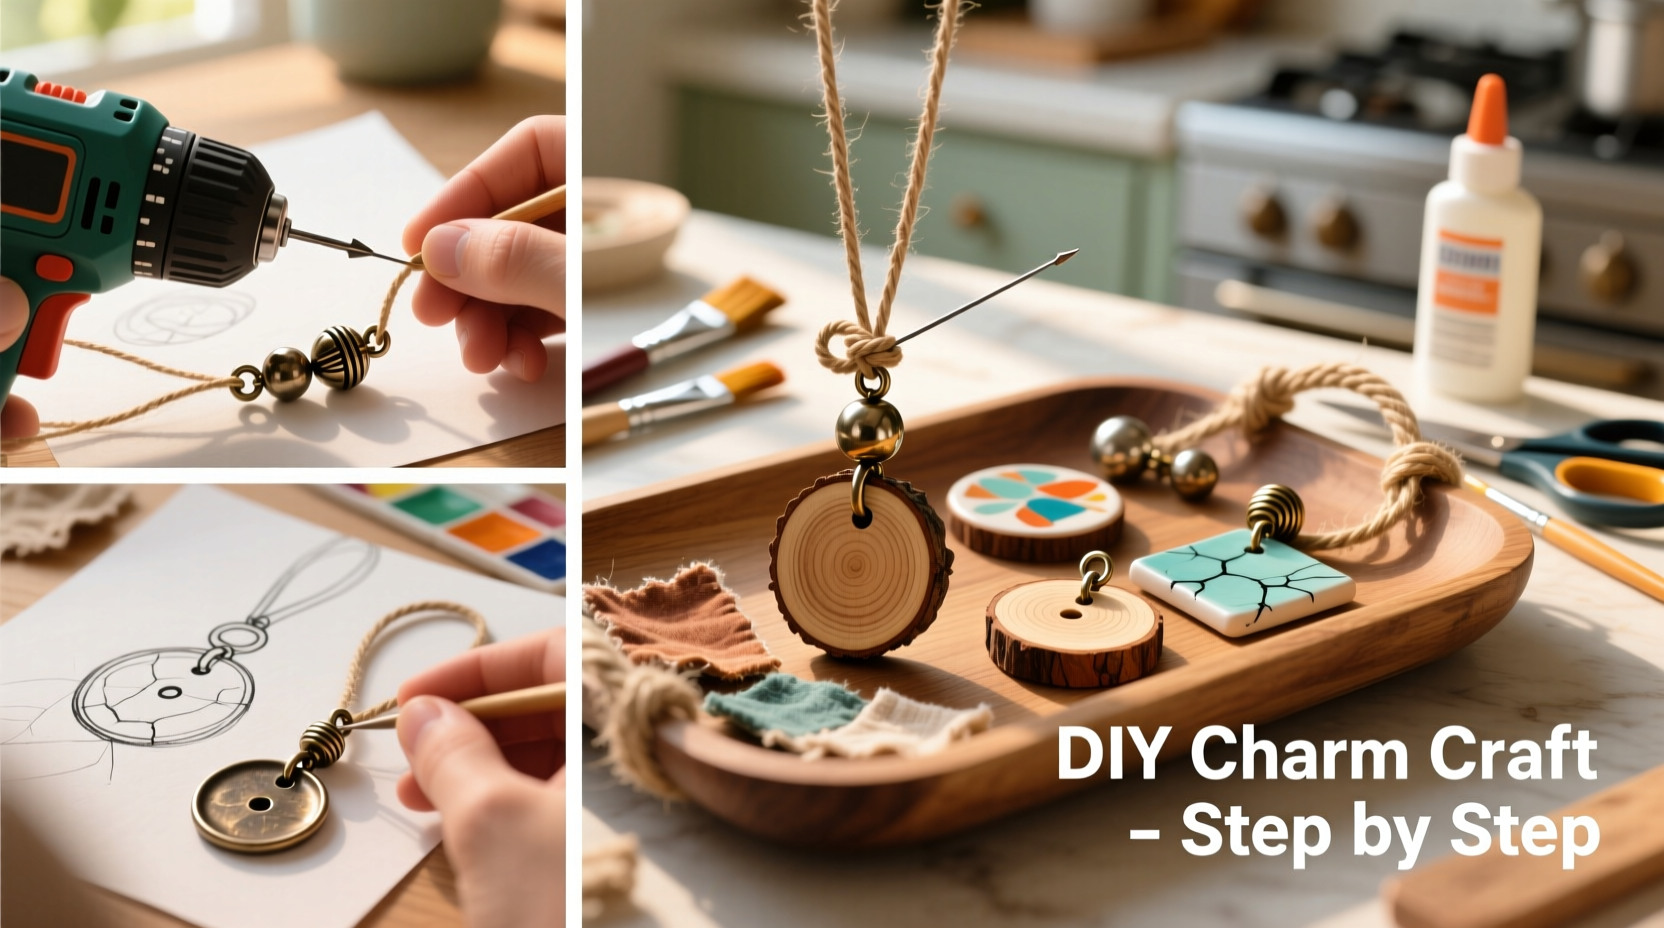
Step-by-Step Creation Process
Follow this structured timeline to turn your concept into a tangible charm:
- Shape the Base: Roll out polymer clay to 1/8-inch thickness. Use cutters or freehand carving to form the desired shape. Add texture with stamps, lace, or toothpicks.
- Bake or Cure: Follow manufacturer instructions. Polymer clay typically bakes at 230°F–275°F for 15–30 minutes. Air-dry clay requires 24 hours in open air.
- Sand and Smooth: Lightly sand edges with fine-grit paper for a polished finish. Wipe clean with a dry cloth.
- Paint and Detail: Apply acrylic paint in thin layers. Allow drying between coats. Use a fine brush for intricate details like eyes or patterns.
- Seal the Surface: Coat with a clear sealant. For durability, use two-part UV resin; for simplicity, a matte or glossy Mod Podge works well. Let cure fully.
- Attach Hardware: Open a jump ring with pliers, thread through the charm’s hole and a clasp, then close securely. Avoid twisting the ring sideways, which weakens it.
- Add Embellishments: Tie on tassels, wrap with embroidery floss, or glue on beads. Secure all elements with strong adhesive and allow drying overnight.
Alternative Techniques for Non-Clay Charms
Not all charms require sculpting. Fabric scraps can be folded into origami-style hearts or braided into micro friendship bracelets. Metal washers become chic minimalist discs when spray-painted and adorned with enamel dots. Even repurposed buttons or vintage keys make striking focal points when cleaned and fitted with jump rings.
Do’s and Don’ts of Charm Crafting
| Do’s | Don’ts |
|---|---|
| Test sealants on a scrap piece first | Use water-based glue on porous clay without sealing |
| Label and date your clay projects | Leave baked clay unpainted or unsealed |
| Work in a dust-free area | Expose delicate charms to prolonged moisture |
| Use masking tape to block off paint areas | Force a jump ring open with fingers—use pliers |
| Store finished charms in padded containers | Overload a single bag with too many heavy charms |
Real Example: The Mini Botanical Series
Sophie, a hobbyist crafter from Portland, wanted to create a set of nature-themed charms for her eco-conscious friends. She rolled green polymer clay, pressed real dried leaves onto the surface, and carefully baked each piece. After painting subtle gold veins onto the leaf imprints, she sealed them with UV resin for a dew-like shine. Each charm was attached to a brushed brass split ring and paired with a tiny wooden bead. The result? A collection of six lightweight, weather-resistant botanical pendants that became instant favorites on tote bags and journal zippers. Her secret: pressing actual foliage into the clay created organic textures no stamp could replicate.
Checklist: Crafting Your First Bag Charm
- ☐ Choose a theme or inspiration
- ☐ Gather materials and tools
- ☐ Sketch initial design
- ☐ Shape and cure base material
- ☐ Sand and prep surface
- ☐ Paint and add fine details
- ☐ Seal with protective coating
- ☐ Attach jump ring and clasp
- ☐ Add optional embellishments
- ☐ Test durability by gently tugging hardware
Frequently Asked Questions
Can I make waterproof bag charms?
Yes. Fully curing polymer clay and sealing it with waterproof resin makes the charm resistant to light rain and splashes. Avoid submerging in water, especially if textile elements like yarn or fabric are used.
How do I prevent my clay charms from cracking?
Ensure even thickness when rolling clay—thin spots crack during baking. Bake at the correct temperature; overheating causes bubbling and fractures. Condition stiff clay thoroughly before shaping.
Are handmade charms safe for children’s backpacks?
Only if designed with safety in mind. Use non-toxic materials, secure all small parts (like beads) with industrial-strength glue, and avoid sharp edges. Supervise young children to prevent choking hazards.
Bringing Creativity Into Everyday Life
A handmade bag charm is more than an accessory—it’s a signature detail. Whether you gift them to friends, sell them at local markets, or simply enjoy making one for yourself each month, the process fosters mindfulness and creative confidence. Over time, your skills will evolve: you might experiment with mica powders for shimmer, try resin layering, or incorporate metal leafing for luxury effects.
The beauty of this craft lies in its accessibility. No formal training is required. Mistakes—uneven paint, crooked holes, or broken jump rings—are part of learning. What matters is the joy of creating something tactile and meaningful with your own hands.


 浙公网安备
33010002000092号
浙公网安备
33010002000092号 浙B2-20120091-4
Comments
No comments yet. Why don't you start the discussion?