
Lapel pins are more than accessories—they’re statements of identity, loyalty, and creativity. From corporate branding to wedding favors and fan merchandise, custom lapel pins carry personal or organizational significance. Crafting a unique pin isn’t just about aesthetics; it’s a blend of artistry, precision engineering, and thoughtful planning. Whether you're designing for a nonprofit event, a startup launch, or a personal gift, understanding the full journey—from concept to physical object—ensures your vision translates perfectly into metal.
This guide walks through every phase of creating a custom lapel pin, offering practical insights, industry standards, and expert-backed decisions that lead to high-quality, durable, and visually striking results.
1. Define Your Purpose and Audience
Before sketching a single line, clarify why you’re making the pin. Is it for employee recognition? A music festival giveaway? A political campaign? The purpose shapes everything: size, color, material, and even packaging.
A pin meant for outdoor use at a marathon needs rust-resistant plating and secure clasps. One designed as a collectible keepsake can afford intricate detailing and softer finishes. Knowing your audience helps determine complexity. Children’s event pins should avoid sharp edges, while collectors may appreciate limited edition numbering or holographic backing cards.
2. Design Your Concept with Precision
The design stage is where creativity meets technical constraints. While digital art allows limitless imagination, manufacturing requires adherence to physical limitations. Begin with hand sketches or digital mockups using vector-based software like Adobe Illustrator or Inkscape, which preserves scalability without pixelation.
Key design considerations include:
- Line thickness: Fine lines below 0.5mm may not hold during molding.
- Color count: Enamel colors beyond six increase cost significantly.
- Text legibility: Small text must be bold and at least 1.5mm tall to remain readable.
- Shape complexity: Highly irregular outlines raise tooling costs and production time.
Always design at actual size (e.g., 1 inch wide) in CMYK color mode, using Pantone (PMS) references for accurate color matching. Avoid gradients or shadows—enamel filling works best with flat, solid areas separated by metal ridges (called “cloisonné wires”).
“Designing a pin is like sculpting in two dimensions—you're creating depth through contrast, not pixels.” — Daniel Reyes, Industrial Designer & Pin Specialist
3. Choose Materials and Manufacturing Techniques
Not all lapel pins are made alike. The choice of base metal, plating, and coloring method directly affects durability, appearance, and price. Here's a breakdown of common options:
| Material/Technique | Best For | Pros | Cons |
|---|---|---|---|
| Hard Enamel | Premium gifts, awards | Durable, smooth surface, vibrant colors | Higher cost, longer lead time |
| Soft Enamel | Promotional items, events | Affordable, textured feel, quick turnaround | Less refined, enamel sits below metal lines |
| Silkscreen Printing | Photographic details, gradients | Full-color capability, cost-effective for complex images | Less scratch-resistant than enamel |
| Zinc Alloy (Zamak) | Budget-friendly runs | Cheap, lightweight, easy to mold | Prone to chipping if dropped |
| Brass | High-end, long-term use | Strong, takes plating well, classic weight | More expensive, heavier shipping |
Plating finishes also play a major role. Polished gold or silver offers elegance; antique finishes add vintage character; black nickel provides modern edge. Rubber backings enhance grip and comfort, especially for all-day wear.
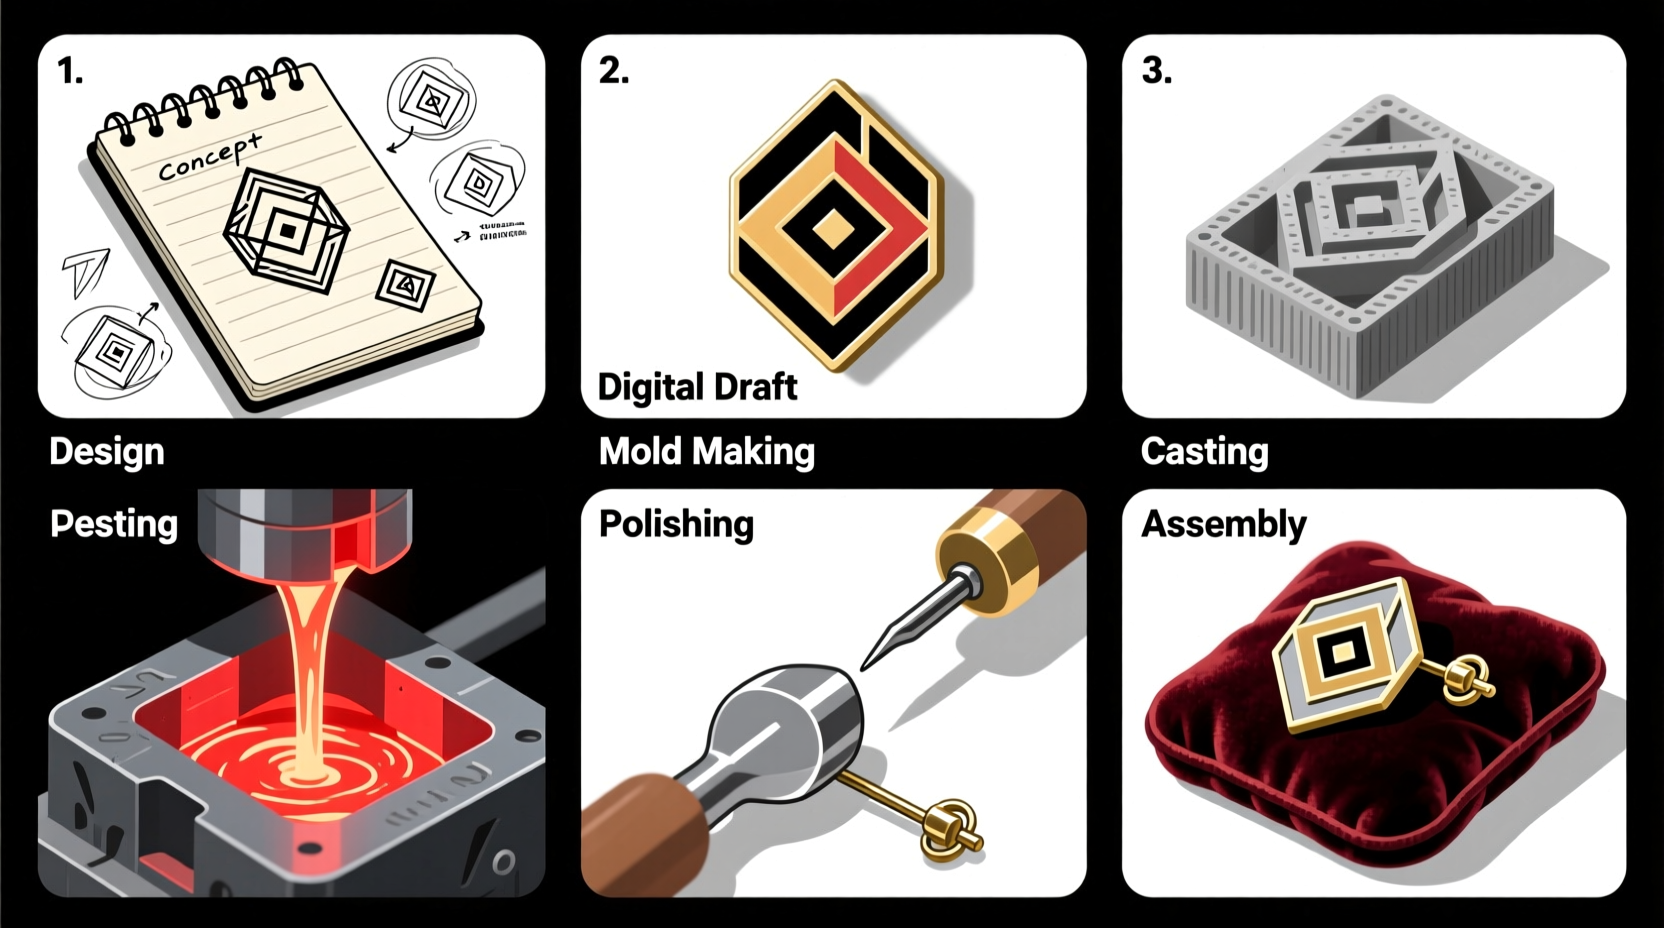
4. Step-by-Step Production Timeline
Once your design is finalized and materials selected, the manufacturing process follows a precise sequence. Understanding this timeline helps manage expectations and deadlines.
- Artwork Approval: Submit final vector files. The manufacturer creates a digital proof within 1–2 days for your confirmation.
- Mold Creation: Steel molds are machined based on your design. This takes 3–5 days and is required for each new pin shape.
- Die-Casting: Molten metal is injected into molds. Pins are cooled, removed, and cleaned. Takes 5–7 days depending on order size.
- Polishing & Plating: Raw pins are buffed smooth, then electroplated with chosen finish (e.g., gold, nickel). Duration: 2–3 days.
- Enamel Filling: Colors are hand-filled into recessed areas and baked for hardening. Soft enamel dries faster; hard enamel requires multiple layers and curing cycles.
- Polishing Finish: Hard enamel pins are sanded flush for a glass-like surface. Soft enamel retains texture.
- Attachment Addition: Butterfly clutches, rubber backs, or magnetic closures are attached.
- Quality Check & Packaging: Each batch is inspected for flaws, counted, and packed per your specifications.
Total production time typically ranges from 10 to 18 business days, not including shipping. Rush services are available but increase costs by 25–50%.
5. Real-World Example: Launching a Nonprofit Awareness Campaign
A women’s health nonprofit wanted to distribute lapel pins at an annual gala to symbolize solidarity. Their goal was a subtle yet meaningful design: a lavender ribbon intertwined with a stylized \"W.\" They opted for soft enamel on brass with an antique silver finish to convey dignity and warmth.
Early drafts included fine script text, but after feedback from the manufacturer, they simplified the font to ensure legibility. They chose rubber backings for comfort during long evening events. The final run of 500 pins arrived in custom organza bags with thank-you cards.
Feedback was overwhelmingly positive—attendees wore them throughout the night, and several donors requested extras for colleagues. The pin became a recurring symbol in their annual outreach, proving that even small objects can carry lasting impact.
Essential Checklist Before Ordering
To ensure success, verify these points before submitting your project:
- ✅ Design is in vector format (AI, EPS, or SVG)
- ✅ Colors are specified with PMS codes
- ✅ Minimum line width is 0.5mm
- ✅ Text is legible at actual size
- ✅ Chosen plating matches brand identity
- ✅ Attachment type suits intended use (e.g., clutch vs. magnet)
- ✅ Quantity aligns with budget (larger orders reduce unit cost)
- ✅ Deadline includes production + shipping buffer
Frequently Asked Questions
How much does a custom lapel pin cost?
Unit prices vary widely. Simple soft enamel pins start around $1.50–$2.50 each for 100 pieces. Complex hard enamel or photo-etched designs can exceed $5–$8 per unit. Mold fees ($50–$150) are usually one-time charges.
Can I make a pin with glow-in-the-dark enamel?
Yes. Some manufacturers offer specialty enamels, including glow-in-the-dark, translucent, or even temperature-sensitive pigments. These require advance notice and may extend production time.
What’s the smallest pin size possible?
Most factories can produce pins as small as 0.5 inches (12mm), but detail clarity diminishes below 0.75 inches. For tiny pins, silkscreen printing often works better than traditional enamel.
Bring Your Vision to Life
Crafting a unique lapel pin is both an artistic endeavor and a logistical process. When done thoughtfully, it results in a tangible piece of meaning—something that can be held, worn, and remembered. By defining your purpose clearly, respecting manufacturing limits, and partnering with experienced producers, you turn abstract ideas into enduring symbols.


 浙公网安备
33010002000092号
浙公网安备
33010002000092号 浙B2-20120091-4
Comments
No comments yet. Why don't you start the discussion?