
Crafting your own keychains isn’t just a fun pastime—it’s a way to personalize everyday items with meaning, creativity, and flair. Multi-element keychains combine various textures, shapes, and materials into cohesive, eye-catching designs. Whether you're making one for yourself or as a heartfelt gift, the process allows for endless customization. With basic supplies and a little patience, you can create durable, stylish keychains that reflect personality, memories, or themes close to your heart.
Gathering Materials and Tools
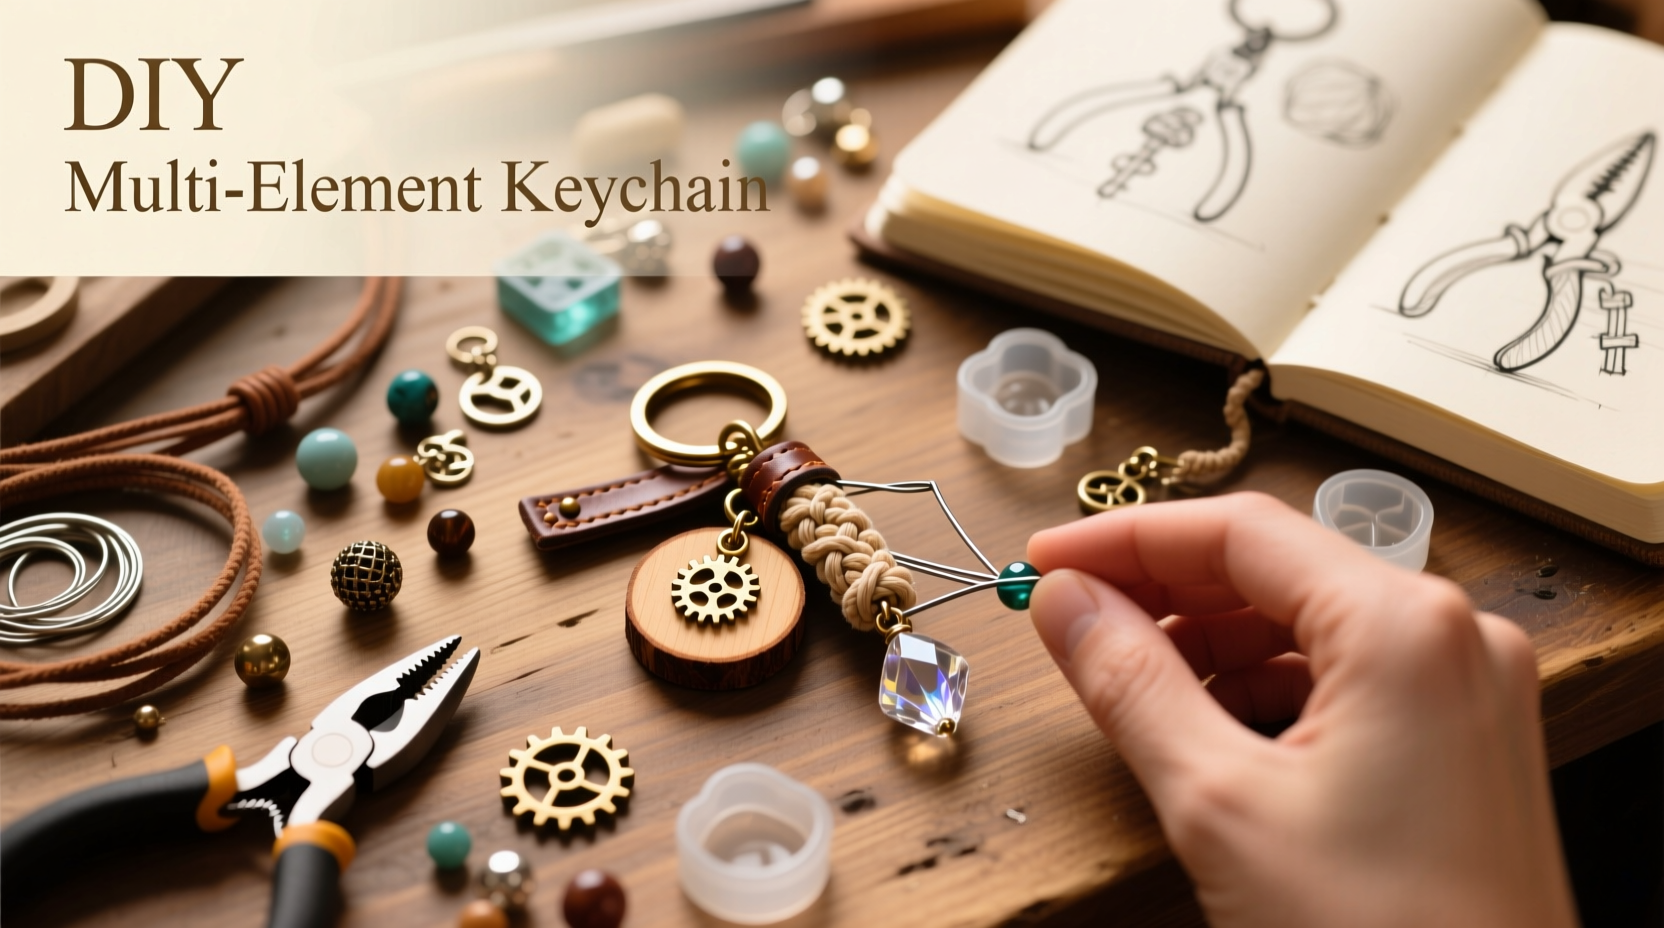
The foundation of any successful craft project lies in preparation. Before diving into assembly, gather all necessary components. The beauty of multi-element keychains is their versatility—you can mix beads, charms, leather, resin, metal findings, and even fabric scraps.
- Base components: Keyring (preferably 25–30mm for durability)
- Beads: Glass, wood, acrylic, or clay—choose varied sizes and colors
- Charms: Metal, enamel, or polymer clay shapes (hearts, stars, initials)
- Cord or chain: Leather lace, waxed cotton cord, ball chain, or jump rings
- Finding tools: Pliers (round-nose and flat-nose), wire cutters, crimp beads
- Optional elements: Resin pendants, fabric tassels, miniature photos in locket charms
Design Planning: Sketching Your Vision
Before assembling, sketch a rough layout. This helps visualize balance, proportion, and flow. Consider symmetry, color harmony, and weight distribution—keychains should hang evenly and not feel top-heavy.
“Planning prevents clutter. A well-designed keychain tells a story through its layers.” — Lila Chen, Jewelry Designer & Craft Educator
Key Design Principles
- Hierarchy: One focal point (e.g., large charm) anchors the design
- Rhythm: Repeat colors or shapes to guide the eye through elements
- Texture contrast: Combine smooth beads with rough leather or metallic shine
| Element Type | Purpose | Recommended Quantity |
|---|---|---|
| Focal Charm | Centerpiece (initial, symbol, photo) | 1 |
| Spacer Beads | Separate sections, add rhythm | 3–6 |
| Accent Charms | Add whimsy or theme (music note, paw print) | 2–3 |
| Cord/Chain | Connect elements structurally | As needed |
Step-by-Step Assembly Process
Follow this timeline to build a layered, professional-quality keychain from scratch.
- Attach the base ring: Open the keyring slightly with pliers and slide on the first component (e.g., a jump ring connected to a central charm).
- Create sub-assemblies: String beads onto headpins or eye pins, then form loops at the ends using round-nose pliers. These become dangles.
- Layer the elements: Connect each dangle to the main ring or a central chain using jump rings. Alternate bead types and charm sizes for visual interest.
- Incorporate mixed media: Add a leather tag stamped with a word, or a tiny resin piece containing dried flowers. Secure with strong glue or stitching if needed.
- Finalize connections: Close all jump rings fully to prevent snagging. Test movement by gently shaking the keychain.
- Inspect and adjust: Ensure no sharp edges, loose parts, or imbalance. Trim excess wire cleanly.
Adding Personal Touches
Personalization elevates a simple craft into a keepsake. Engrave a metal tag, embed a tiny handwritten note in a locket charm, or use birthstone-colored beads. For pet lovers, include a paw-print charm; travelers might appreciate a miniature compass or globe.
Mini Case Study: Emma’s Memory Keychain
Emma, a college student, wanted a meaningful keychain to carry daily reminders of home. She combined a small seashell from her childhood beach, a blue glass bead representing her favorite sweater, and a silver initial “E” charm. Using braided navy cord, she linked these with copper jump rings, adding spacer beads between each. The result was a lightweight, tactile keychain that sparked joy every time she used it. Friends began requesting custom versions for birthdays, turning her hobby into a small side project.
This example shows how emotional resonance enhances functionality. By selecting items with significance, Emma transformed ordinary objects into a narrative tool.
Troubleshooting Common Issues
Even experienced crafters encounter hiccups. Here’s how to handle frequent challenges:
- Loose connections: Always double-check that jump rings are fully closed. A gap can lead to lost pieces.
- Overcrowding: Limit total elements to 5–7 major components to maintain elegance.
- Weak cords: Replace thin threads with waxed cotton or nylon-coated wire for heavier builds.
- Allergic reactions: Use hypoallergenic stainless steel or titanium findings for sensitive skin.
Do’s and Don’ts Summary
| Do | Don't |
|---|---|
| Balance weight across the ring | Stack too many heavy charms on one side |
| Use quality findings | Reuse damaged or bent jump rings |
| Test fit before finalizing | Glue components without drying time |
| Seal porous materials | Expose wood or fabric to prolonged moisture |
FAQ
How long does it take to make a multi-element keychain?
Beginners should allow 45–60 minutes for planning, assembly, and adjustments. With practice, construction time drops to 20–30 minutes per piece.
Can I wash or clean my handmade keychain?
Spot-clean with a dry or slightly damp cloth. Avoid submerging unless all materials are waterproof (e.g., metal, sealed resin). Remove leather or paper elements before cleaning.
What’s the best adhesive for attaching non-traditional materials?
E6000 or GS Hypo Cement offers strong, flexible bonds for mixed media. Allow 24 hours of curing time under light pressure for maximum hold.
Checklist: Crafting Success in 10 Steps
- Choose a theme or personal story
- Collect all materials and tools
- Sketch a rough design layout
- Select a sturdy keyring and base connector
- Prepare dangles and pre-string components
- Begin assembly with the focal element
- Layer secondary elements symmetrically or rhythmically
- Secure all jump rings and crimps
- Inspect for balance, sharp edges, and stability
- Add finishing touches like polish or protective sealant
Maintaining Your Creations
To extend lifespan, store keychains in small pouches or boxes when not in use. Avoid leaving them in hot cars or damp environments. Periodically check connections, especially after heavy use. A quick wipe with a jewelry polishing cloth keeps metal components shining.
Conclusion
Crafting multi-element keychains blends artistry with practicality. Each piece becomes more than an accessory—it’s a wearable memory, a conversation starter, or a token of affection. With thoughtful design, durable materials, and attention to detail, your homemade creations can rival store-bought ones in both beauty and longevity.


 浙公网安备
33010002000092号
浙公网安备
33010002000092号 浙B2-20120091-4
Comments
No comments yet. Why don't you start the discussion?