
Single-use plastic bags contribute significantly to environmental pollution, with billions ending up in landfills and oceans each year. A reusable canvas shopping bag offers a sustainable, sturdy, and stylish alternative. Unlike mass-produced versions, a DIY canvas bag allows you to customize size, design, and durability. With basic sewing skills and minimal supplies, you can create a bag that lasts for years. This guide walks through the entire process—from selecting materials to final stitching—ensuring your handmade bag is both functional and resilient.
Why Make Your Own Canvas Shopping Bag?
Commercial reusable bags often fail after a few months due to weak seams or thin fabric. By making your own, you control the quality of materials and construction. Heavy-duty cotton canvas, reinforced stitching, and thoughtful design choices result in a bag capable of carrying 20+ pounds without strain. Additionally, creating your own supports sustainable living by reducing reliance on disposable packaging and minimizing textile waste through upcycling opportunities.
“Handmade canvas bags, when constructed properly, can outlast store-bought versions by three to five times.” — Lena Torres, Sustainable Textile Designer
Materials and Tools You’ll Need
Selecting the right components is crucial for longevity. Opt for natural fiber canvas over synthetic blends, as it breathes better, resists pilling, and ages gracefully. Below is a checklist of everything required to begin.
Essential Materials
- 1 yard of 10-ounce cotton canvas (double-layered for strength)
- Coordinating thread (poly-cotton or heavy-duty polyester)
- Two wooden or metal dowels (for structured handles, optional)
- Fusible interfacing (optional, for added body in the base)
- Scissors or rotary cutter
- Pins or fabric clips
- Measuring tape or ruler
- Sewing machine with a heavy-duty needle (size 100/16 recommended)
- Iron and ironing board
- Chalk or fabric marker
Optional Upgrades
- Interior pocket fabric (denim or canvas)
- Magnetic snap or button closure
- Leather handle reinforcements
- Water-resistant fabric coating spray
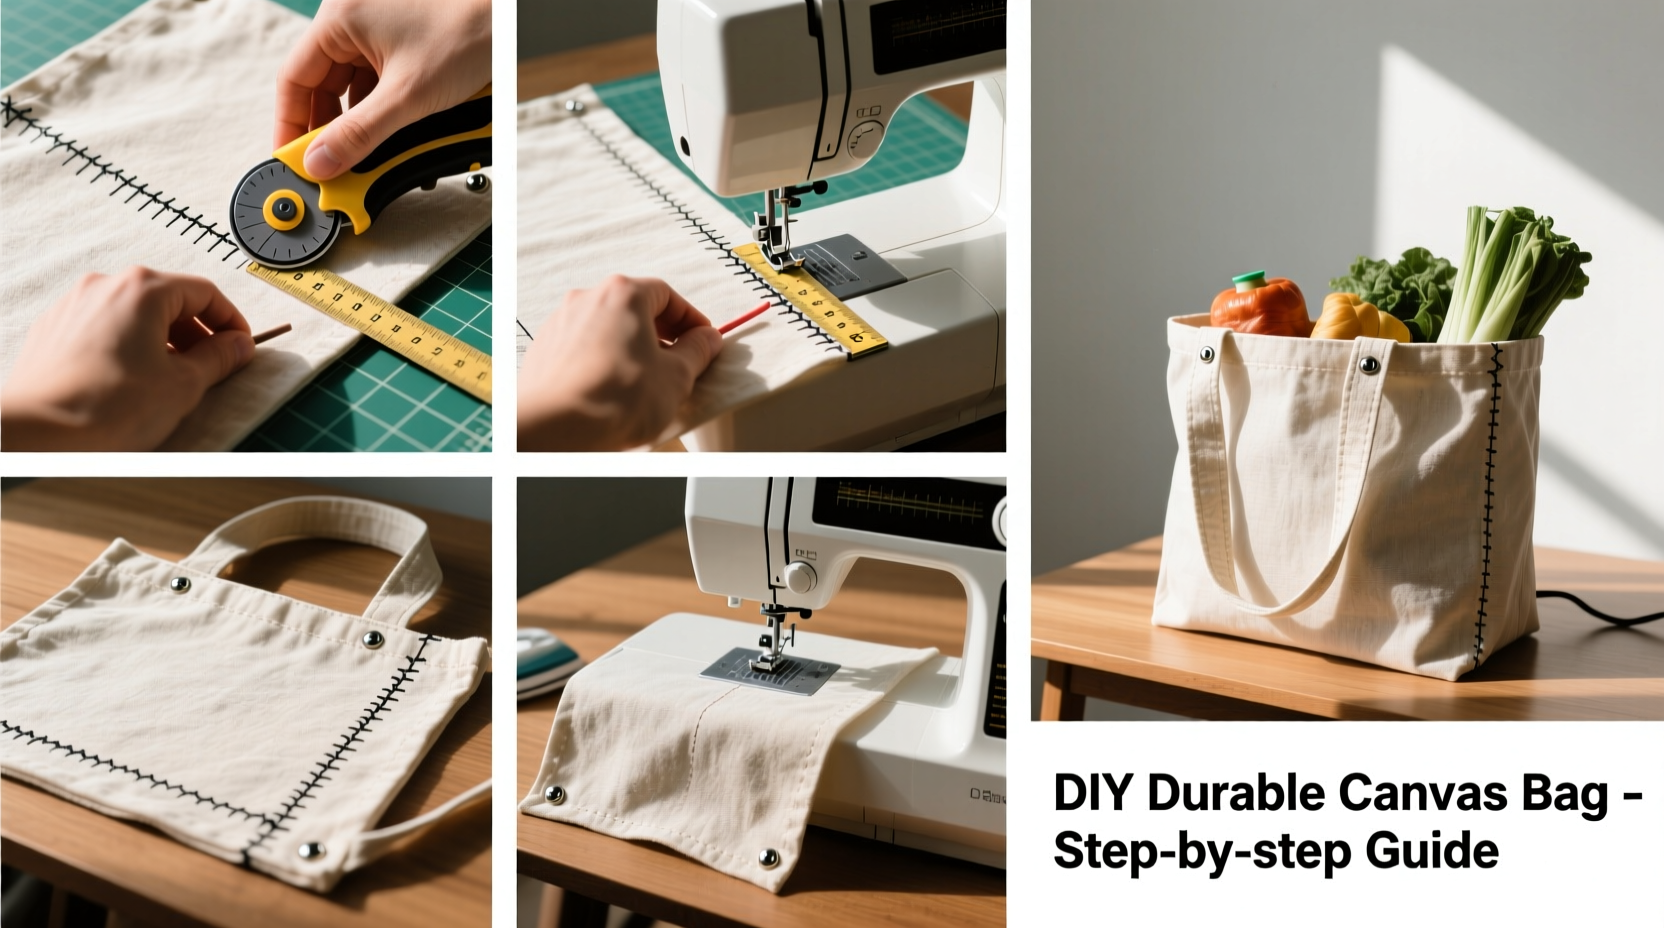
Step-by-Step Construction Guide
Follow this detailed sequence to assemble a professional-grade canvas tote. Each stage emphasizes structural integrity and clean finishes.
- Cut the Fabric: Measure and cut two identical rectangles: 16 inches wide by 14 inches tall for the main body. Cut two strap pieces: 20 inches long by 3 inches wide. For the base, cut one rectangle 16” x 5”.
- Prepare the Base: Attach the base piece to the bottom edge of one main panel using a ½-inch seam allowance. Press the seam open with an iron for flatness. Repeat for the second panel.
- Join Side Panels: Place the two main panels right sides together. Sew along both vertical edges using a straight stitch, backstitching at start and end. Finish raw edges with a zigzag stitch or serger to prevent fraying.
- Create the Lining (Optional): If adding a lining, repeat steps 1–3 with a lighter fabric, then insert it into the outer shell before attaching straps.
- Reinforce Stress Points: At the top corners where handles will attach, sew a square box (1” x 1”) followed by an “X” pattern inside to distribute weight evenly.
- Make the Handles: Fold each strap piece lengthwise, right sides together, and sew along the long edge. Turn right side out using a safety pin or turning tool. Press flat, folding raw edges inward. Topstitch along both edges for durability.
- Attach Handles: Position each handle end 2 inches from the side seams at the top of the bag. Secure with a box-and-X stitch pattern across each end for maximum strength.
- Finish the Top Edge: Fold the top edge down ½ inch, then another 1 inch, and press. Stitch around the perimeter ¼ inch from the lower folded edge to create a clean hem that hides raw edges.
- Add Final Touches: Trim loose threads, press seams flat, and optionally apply a water-resistant spray if using the bag in damp conditions.
Design Considerations for Longevity
Durability isn’t just about materials—it’s also shaped by design choices. The following table outlines key decisions and their impact on performance.
| Design Choice | Do | Avoid |
|---|---|---|
| Seam Allowance | Use ½ inch for strength | Narrow seams under ¼ inch |
| Stitch Type | Straight stitch with backstitch reinforcement | Zigzag-only seams on load points |
| Handle Attachment | Box-and-X stitching | Single line stitching only |
| Fabric Weight | 10 oz or higher canvas | Lightweight quilting cotton |
| Washing Care | Machine wash cold, air dry | Bleach or high-heat drying |
Real-World Example: Maria’s Market Tote
Maria, a zero-waste advocate from Portland, replaced her weekly plastic bag use with two homemade canvas totes. She used recycled denim for interior pockets and leather patches under the handles for extra support. After 18 months of biweekly grocery trips—including hauling potatoes, canned goods, and wine bottles—her bags showed only minor fading and no seam damage. She attributes their resilience to double-stitched handles and pre-washed fabric. “I spend less than $15 total,” she says, “and I’ve eliminated over 150 plastic bags from my routine.”
FAQ: Common Questions About DIY Canvas Bags
Can I make this bag without a sewing machine?
Yes, but it will take significantly longer. Use a backstitch by hand with heavy-duty thread and waxed ends to prevent fraying. Focus on reinforcing handle attachments and corners with multiple passes.
How do I clean my canvas bag?
Spot clean with mild soap and water for small stains. For deeper cleaning, machine wash on cold with like colors and hang to dry. Avoid bleach and dryers, which weaken fibers and cause shrinkage.
What if I don’t have canvas? Can I use old tents or sails?
Repurposed outdoor gear like tents or sailcloth can work well due to their inherent durability and water resistance. However, these materials are often coated and may require special needles and thread. Test stitches on scraps first.
Final Checklist Before Use
Before taking your new bag to the store, run through this quick verification list:
- ✅ All seams are securely stitched with no skipped stitches
- ✅ Handles are firmly attached with box-and-X reinforcement
- ✅ Raw edges are finished or enclosed in hems
- ✅ No loose threads or weak tension spots
- ✅ Dimensions fit standard grocery cart hooks
- ✅ Optional: Interior pocket or closure functions smoothly
Conclusion: Start Sewing, Stop Wasting
A durable DIY canvas shopping bag is more than a craft project—it’s a statement of sustainability and self-reliance. With thoughtful construction and quality materials, your handmade tote can replace hundreds of disposable bags over its lifetime. The skills you gain—pattern cutting, seam finishing, and stress-point reinforcement—are transferable to other garment and home projects. Whether you’re mending old clothes or designing custom accessories, this small act of creation has outsized environmental benefits.


 浙公网安备
33010002000092号
浙公网安备
33010002000092号 浙B2-20120091-4
Comments
No comments yet. Why don't you start the discussion?