
Creating a woven bag charm keychain is more than just a craft—it’s a way to express individuality, repurpose leftover materials, and add a handmade touch to everyday accessories. Whether you're new to weaving or looking for a mindful creative outlet, this guide walks you through the entire process using accessible tools and techniques. With just a few hours of focused work, you can produce a durable, eye-catching charm that enhances any tote, backpack, or handbag.
Why Make Your Own Woven Keychain?
Mass-produced accessories often lack uniqueness and sustainability. Handmade woven charms offer an alternative: they’re customizable in color, texture, and size, and allow you to use eco-friendly or upcycled materials like cotton cord, embroidery floss, or even strips of old fabric. Beyond aesthetics, the repetitive motion of weaving has been shown to reduce stress and improve focus—making this project both productive and therapeutic.
“Weaving connects craft with mindfulness. Each knot and braid becomes a moment of presence.” — Lila Chen, Textile Artist & Craft Educator
Materials and Tools You’ll Need
Before starting, gather the following supplies. Most can be found at craft stores or repurposed from household items:
- Cording material: Cotton macramé cord (2mm or 3mm), embroidery floss, yarn, or leather strips
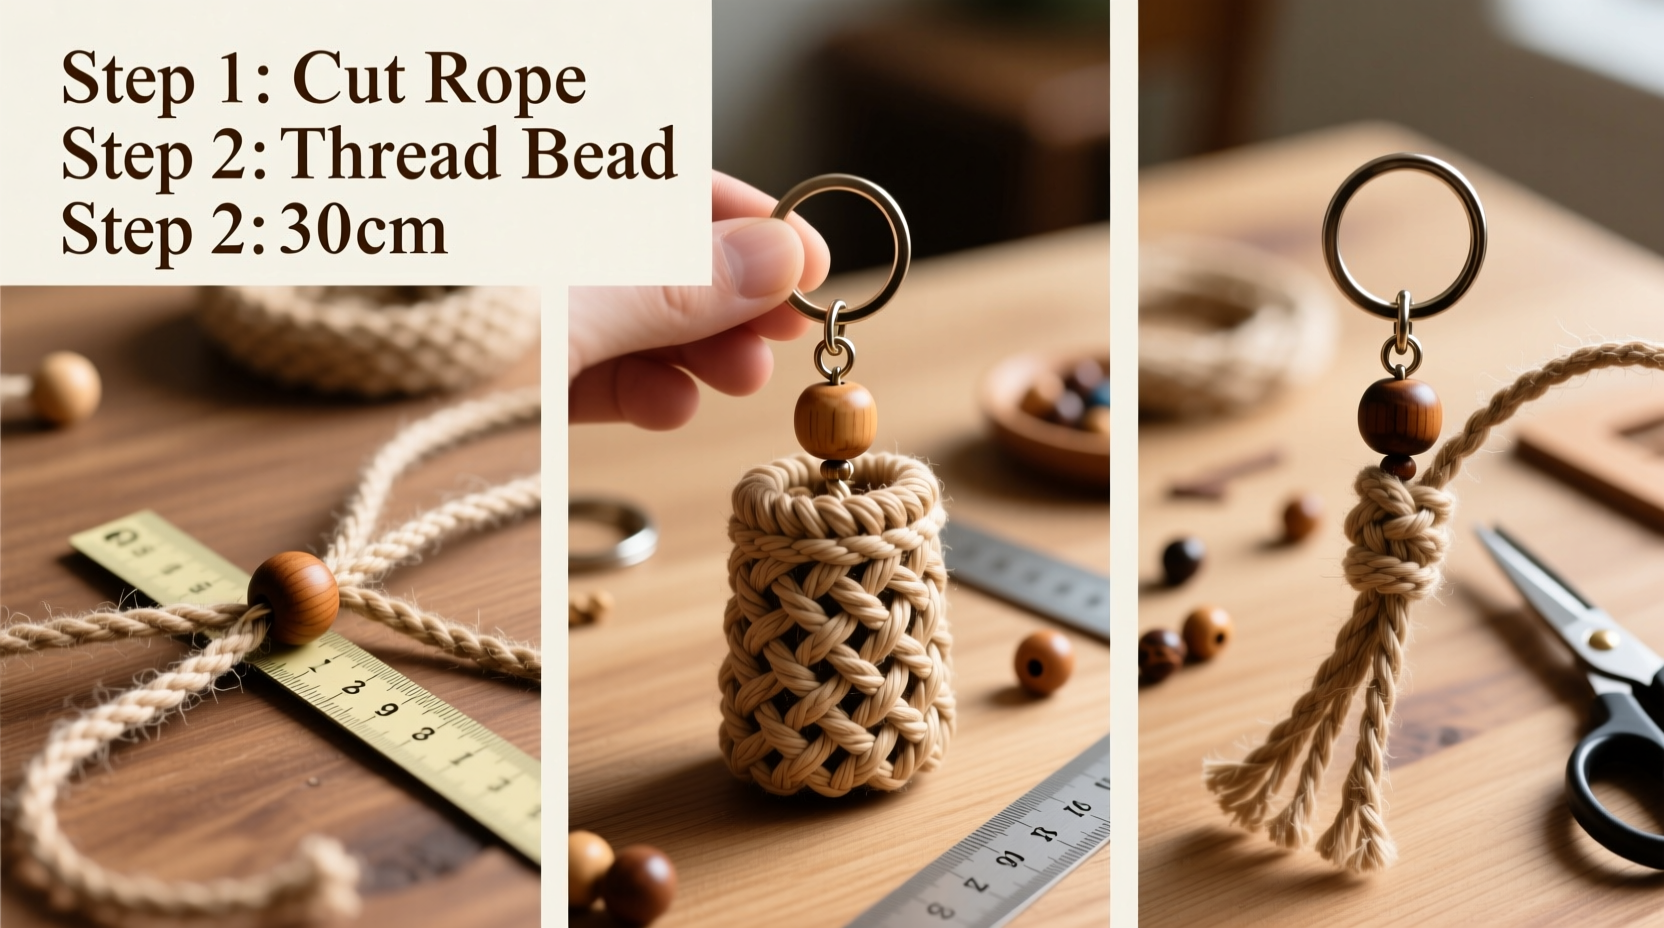
- Keyring: Metal or brass ring (15–20mm diameter)
- Scissors: Sharp, small-blade scissors for precision cutting
- Tape or clipboard: To secure your work while weaving
- Beeswax (optional): Helps prevent fraying and stiffens cords slightly
- Glue (optional): Fabric glue or clear-drying adhesive for securing knots
Step-by-Step Weaving Process
Follow this detailed sequence to create a classic square-knot woven keychain, ideal for beginners and adaptable for advanced variations.
- Prepare the base strands: Cut four pieces of cord, each 40 cm long. Fold them in half and attach them to the keyring using a lark’s head knot—loop the folded end over the ring, pull the loose ends through, and tighten.
- Secure your workspace: Tape the keyring to a flat surface or clip it to a clipboard. This keeps tension consistent while you weave.
- Begin square knotting: Divide the eight strands into four pairs. Working left to right, take the left cord of the first pair over the middle two (filler cords) and under the right cord. Then bring the right cord under the fillers and up through the loop created on the left. Pull tight. Repeat in reverse to complete one square knot. Continue across all four pairs.
- Repeat rows: After completing the first row of square knots, start the next directly beneath it. Maintain even tension to ensure uniformity. Aim for 8–10 rows to form a solid woven block.
- Add variation (optional):span> Introduce diagonal patterns by shifting filler cords between knots or alternate with spiral (half-hitch) sections for texture.
- Finish the end: Once the woven section reaches 4–5 cm in length, tie a final gathering knot below the weave using a separate 20 cm piece of cord. Wrap it tightly around all eight strands, then tuck the end through the loop and secure with a drop of glue if desired.
- Trim and shape: Cut the loose ends to your preferred length—typically 2–3 cm for a neat tassel. Optionally, lightly fray the tips by separating fibers for a bohemian look.
Design Variations and Customization Ideas
Once you’ve mastered the basic square knot weave, experiment with these creative upgrades:
- Color blocking: Use three different colored cords in alternating pairs for bold contrast.
- Bead accents: Slide small wooden or metal beads onto individual strands before knotting to break up texture.
- Layered lengths: Vary strand lengths to create tiered tassels beneath the woven body.
- Natural elements: Incorporate dried seed pods, feathers, or tiny shells for an earthy aesthetic.
| Design Style | Ideal Material | Best For |
|---|---|---|
| Minimalist | Single-color cotton cord | Clean-lined bags, professional use |
| Boho Chic | Multicolored embroidery floss + beads | Festival totes, casual wear |
| Rustic Natural | Leather strips + wood beads | Heritage-style backpacks, outdoor gear |
| Modern Geometric | Stiff waxed thread, metallic cord | Designer handbags, gift accents |
Mini Case Study: A Gift That Grew Into a Small Business
Sophie Ramirez, a graphic designer from Portland, began making woven keychains as holiday gifts for friends. She used leftover embroidery floss and vintage keyrings from flea markets, personalizing each with initials or favorite colors. The response was overwhelming—friends requested more, then coworkers started placing orders. Within six months, Sophie launched a small Etsy shop featuring seasonal collections and custom commissions. Her secret? Consistency in quality and storytelling. “People don’t just buy a charm,” she says. “They buy the care behind it.” Today, her side hustle funds her art supplies and supports local textile recycling initiatives.
Common Mistakes and How to Avoid Them
Even simple projects can go off track. Watch for these frequent errors:
- Inconsistent tension: Pulling some knots tighter than others creates a warped appearance. Practice maintaining steady pressure.
- Using slippery synthetic cord: Nylon or polyester may unravel easily. Stick to cotton or linen blends for better grip.
- Skipping the securing knot: Without a strong bottom knot, the weave can loosen over time. Always bind the base securely.
- Overcomplicating early attempts: Start with basic patterns before attempting intricate weaves like chevrons or diamonds.
Checklist: Before You Begin Weaving
- ☐ Choose your cord type and color scheme
- ☐ Cut four 40 cm strands and fold in half
- ☐ Attach strands to keyring with lark’s head knots
- ☐ Secure keyring to clipboard or tape to table
- ☐ Test tension by tying two practice square knots
- ☐ Keep scissors and glue within reach
Frequently Asked Questions
How long does it take to make a woven keychain?
For a beginner, expect 45 to 60 minutes from setup to finishing touches. With practice, you can complete one in 20–30 minutes.
Can I wash my woven keychain?
Spot clean only. Submerging it may weaken glued knots or cause natural fibers to shrink. Use a damp cloth with mild soap if needed.
What if my knots become uneven?
Gently undo the last few rows and re-tie with consistent tension. Marking equal intervals on your work surface can help maintain alignment.
Final Thoughts and Creative Encouragement
Crafting a woven bag charm keychain is more than a weekend activity—it’s an invitation to slow down, engage your hands, and create something meaningful. Every twist of the cord, every completed knot, adds to a growing sense of accomplishment. These small accessories carry stories: of patience, creativity, and the joy of making. Whether you keep one for yourself or gift it to someone special, its value goes far beyond aesthetics.


 浙公网安备
33010002000092号
浙公网安备
33010002000092号 浙B2-20120091-4
Comments
No comments yet. Why don't you start the discussion?