
Whether you're planning a road trip, managing a delivery route, or showcasing local businesses, a custom Google Map with multiple locations simplifies navigation and improves communication. Google’s free tool, Google My Maps, allows anyone to create personalized, interactive maps without coding. With intuitive features and seamless integration across devices, it's the go-to solution for visualizing geographic data. This guide walks through the entire process—from setup to sharing—with expert tips and real-world applications.
Why Use Custom Google Maps?
A standard Google search gives directions between two points, but when you need to visualize several destinations at once—like tourist spots in Paris, client addresses for field sales, or food trucks at a festival—a custom map becomes indispensable. Unlike static images or spreadsheets, a custom map offers interactivity: users can zoom, click on markers, get turn-by-turn directions, and even view photos or notes tied to each location.
Businesses use these maps for asset tracking, service areas, and marketing campaigns. Travelers build itinerary maps to optimize sightseeing routes. Educators use them for historical tours or environmental studies. The versatility comes from combining simplicity with powerful customization.
“Custom maps bridge the gap between raw data and human understanding—turning lists of addresses into meaningful visual stories.” — Dr. Alan Kim, Geospatial Data Analyst at Urban Insights Lab
What You’ll Need Before You Start
No special software is required, just a few essentials:
- A Google account (Gmail or Google Workspace)
- Internet-connected device (laptop, tablet, or phone)
- List of locations (addresses, names, coordinates, or place names)
- Optional: Descriptions, images, contact info, or links for each point
Step-by-Step Guide to Building Your Map
Follow this timeline to create a fully functional, multi-location map in under 30 minutes.
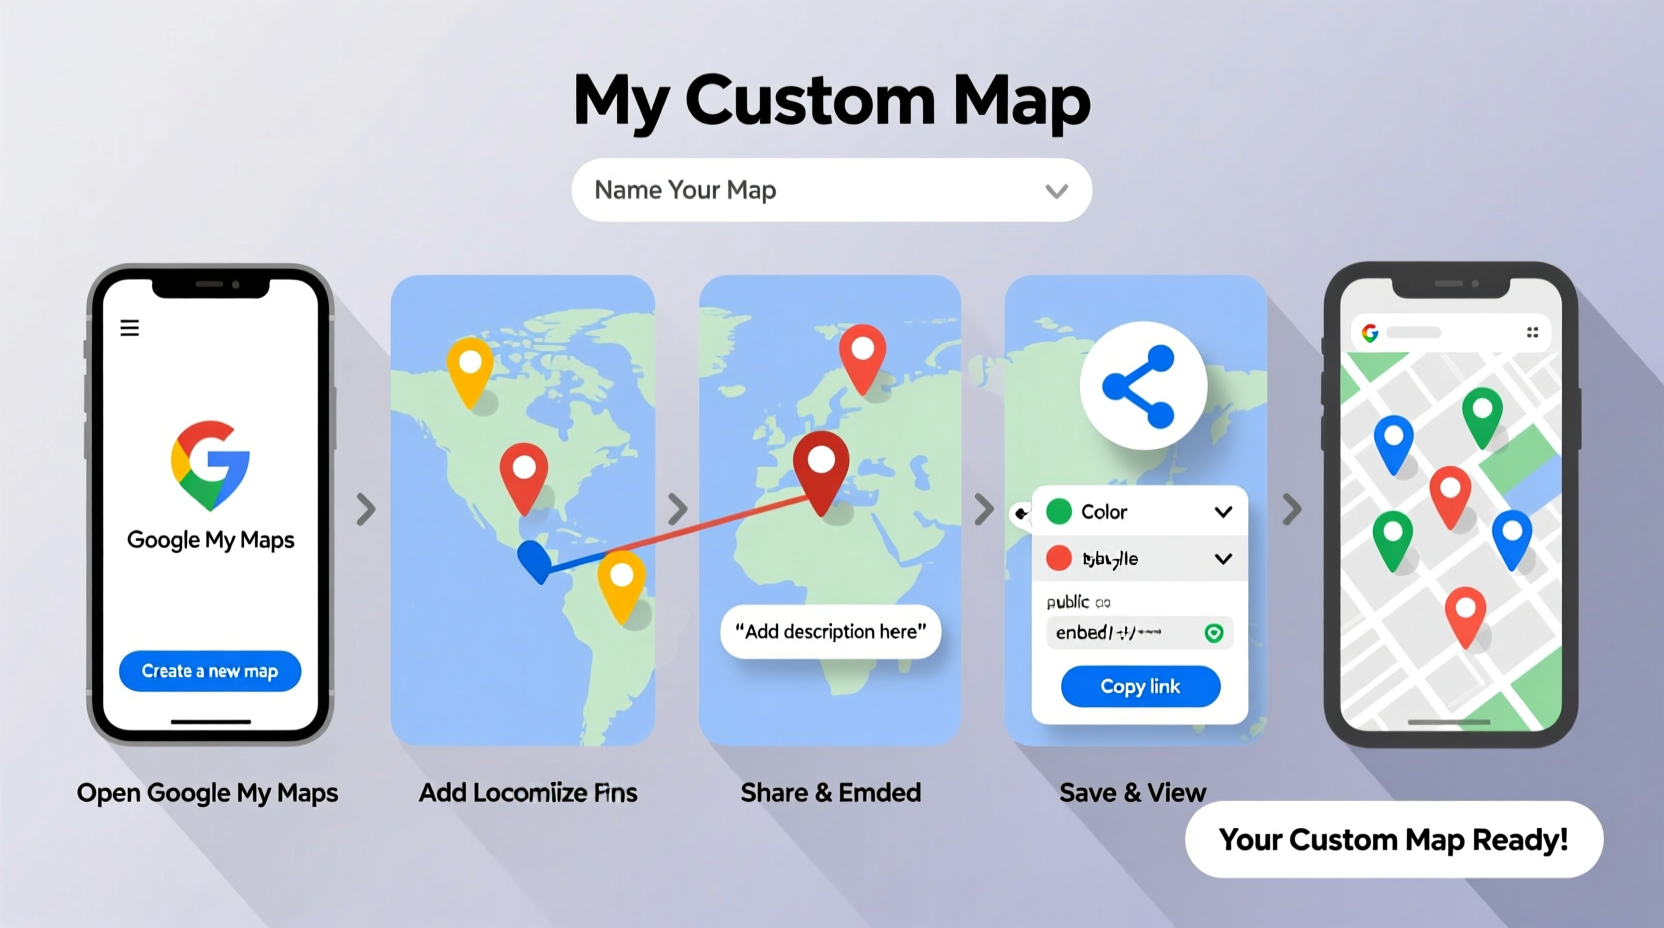
- Open Google My Maps: Go to https://www.google.com/maps/d/ and sign in with your Google account. Click “Create a New Map.”
- Rename Your Map: At the top left, replace \"Untitled map\" with a descriptive title like “NYC Coffee Shop Tour” or “Client Visit Schedule – Q3.” Add a short description below if needed.
- Add Your First Location: Click the red marker icon in the toolbar, then click anywhere on the map to drop a pin. A pop-up will appear where you can enter the location name and address. Click “Save.”
- Import Multiple Locations (Optional): If you have more than five places, skip manual entry. Click the three-dot menu > “Import” > upload a CSV or XLSX file. Match your spreadsheet columns to My Maps fields (e.g., Column A → Location, Column B → Name).
- Customize Markers: Each point appears as a default red pin. To differentiate types of locations, click any marker, then choose an icon from the style dropdown (e.g., restaurant, hotel, warehouse). You can also assign colors by category.
- Edit Info Windows: Click a marker, then edit the description box. Insert hyperlinks, phone numbers, business hours, or formatted text. For example:
Blue Bottle Coffee
Hours: 7am–6pm daily
(212) 555-0198
Visit website - Organize with Layers: Use layers to group related points. Click “Add layer,” name it (e.g., “Breakfast Spots”), and assign new or existing markers to it. Great for toggling visibility—like showing only vegan options or open-now locations.
- Draw Routes or Shapes: Use the line tool to trace driving paths between stops. Or draw polygons to highlight zones (e.g., delivery area boundaries). These don’t auto-calculate directions but provide visual clarity.
- Set Sharing Permissions: Click “Share” in the upper right. Choose “Anyone with the link can view” for public access, or restrict to specific emails for private collaboration.
- Publish and Embed (Optional): If publishing online, click “Embed on my site” to generate an iframe code. Paste it into your blog, internal wiki, or customer portal.
Real Example: Planning a Weekend Wine Tour
Sophie, a travel planner based in Sonoma, needed to coordinate a private wine-tasting tour for six guests. She had ten wineries to include, each with different reservation policies and tasting fees.
Instead of sending a PDF itinerary, she created a custom Google Map titled “Sonoma Valley Vineyard Experience.” She imported all addresses from her spreadsheet, color-coded pins by appointment time (morning = green, afternoon = gold), and added booking links and tasting menus inside each info window.
The result? Guests could open the map on their phones, see the day’s route, tap any vineyard for details, and navigate directly using Google Maps. Sophie updated one location last-minute due to a closure—and every guest saw the change instantly.
Best Practices and Common Pitfalls
To ensure your map remains useful and professional, follow these do’s and don’ts:
| Do | Don't |
|---|---|
| Use consistent naming conventions (e.g., “Joe’s Diner – Brooklyn”) | Name all markers “Location 1,” “Pin A,” etc. |
| Group similar places into layers (e.g., hotels, restaurants, attractions) | Put 50+ markers in a single unorganized list |
| Test the map on mobile before sharing | Assume desktop formatting works on phones |
| Include practical info: hours, contact, accessibility notes | Omit key details that require extra searches |
| Update regularly if used long-term (e.g., seasonal changes) | Create once and forget—even permanent spots may close |
FAQ
Can I add more than 10,000 locations to a single map?
Google My Maps supports up to 10,000 total points across all layers. If you exceed this, consider splitting the data into regional maps (e.g., “Northeast Clients” and “West Coast Clients”) or upgrading to Google Earth Pro for advanced needs.
Is it possible to collaborate with others in real time?
Yes. When you share editing rights, team members can add, move, or delete markers simultaneously. Changes sync instantly, similar to Google Docs. Ideal for logistics teams updating delivery stops during the day.
Will my custom map work offline?
The map itself cannot be downloaded for offline use within My Maps, but individual locations can be saved via Google Maps’ “Offline Areas” feature. Encourage users to save key points manually if internet access is unreliable.
Final Checklist Before Sharing
- ✅ Map has a clear, informative title
- Not just “My Map,” but something descriptive like “Charity Run Aid Stations – 2024”
- ✅ All locations are accurate and verified
- Double-checked against official sources or GPS coordinates
- ✅ Descriptions include actionable details
- Phone numbers, websites, hours, notes (“Enter through rear gate”)
- ✅ Icons or colors distinguish categories
- Red = urgent, blue = completed, star = recommended
- ✅ Sharing settings match audience
- Public link for customers, restricted access for internal staff
- ✅ Tested on both desktop and mobile
- Ensures usability across devices
Start Mapping Today
A custom Google Map transforms scattered information into a dynamic, user-friendly experience. Whether you're guiding tourists, optimizing field operations, or organizing community events, the ability to visualize multiple locations clearly saves time, reduces errors, and enhances engagement. The tools are free, the learning curve is gentle, and the impact is immediate.


 浙公网安备
33010002000092号
浙公网安备
33010002000092号 浙B2-20120091-4
Comments
No comments yet. Why don't you start the discussion?