
Setting up a new user account on your computer is essential for maintaining privacy, organizing workspaces, and ensuring system security—especially in shared environments like homes or small offices. Whether you're adding a family member, setting up an employee profile, or creating a guest account, the process should be straightforward and secure. This guide walks you through every step with clear instructions for both Windows and macOS systems, along with expert tips to avoid common pitfalls.
Why Create Separate User Accounts?
Many users rely on a single administrator account for all activities, but this can lead to data clutter, reduced performance, and increased vulnerability to malware. Separate user accounts allow each person to have their own desktop settings, documents, apps, and browser preferences without interfering with others.
From a security standpoint, limiting administrative privileges helps prevent accidental changes to system files or unauthorized software installations. According to cybersecurity expert Dr. Lena Patel, “User segregation is one of the most underutilized yet effective layers of defense in personal computing.”
“Every user should operate under a standard account unless they’re actively installing software or changing system settings.” — Dr. Lena Patel, Cybersecurity Analyst
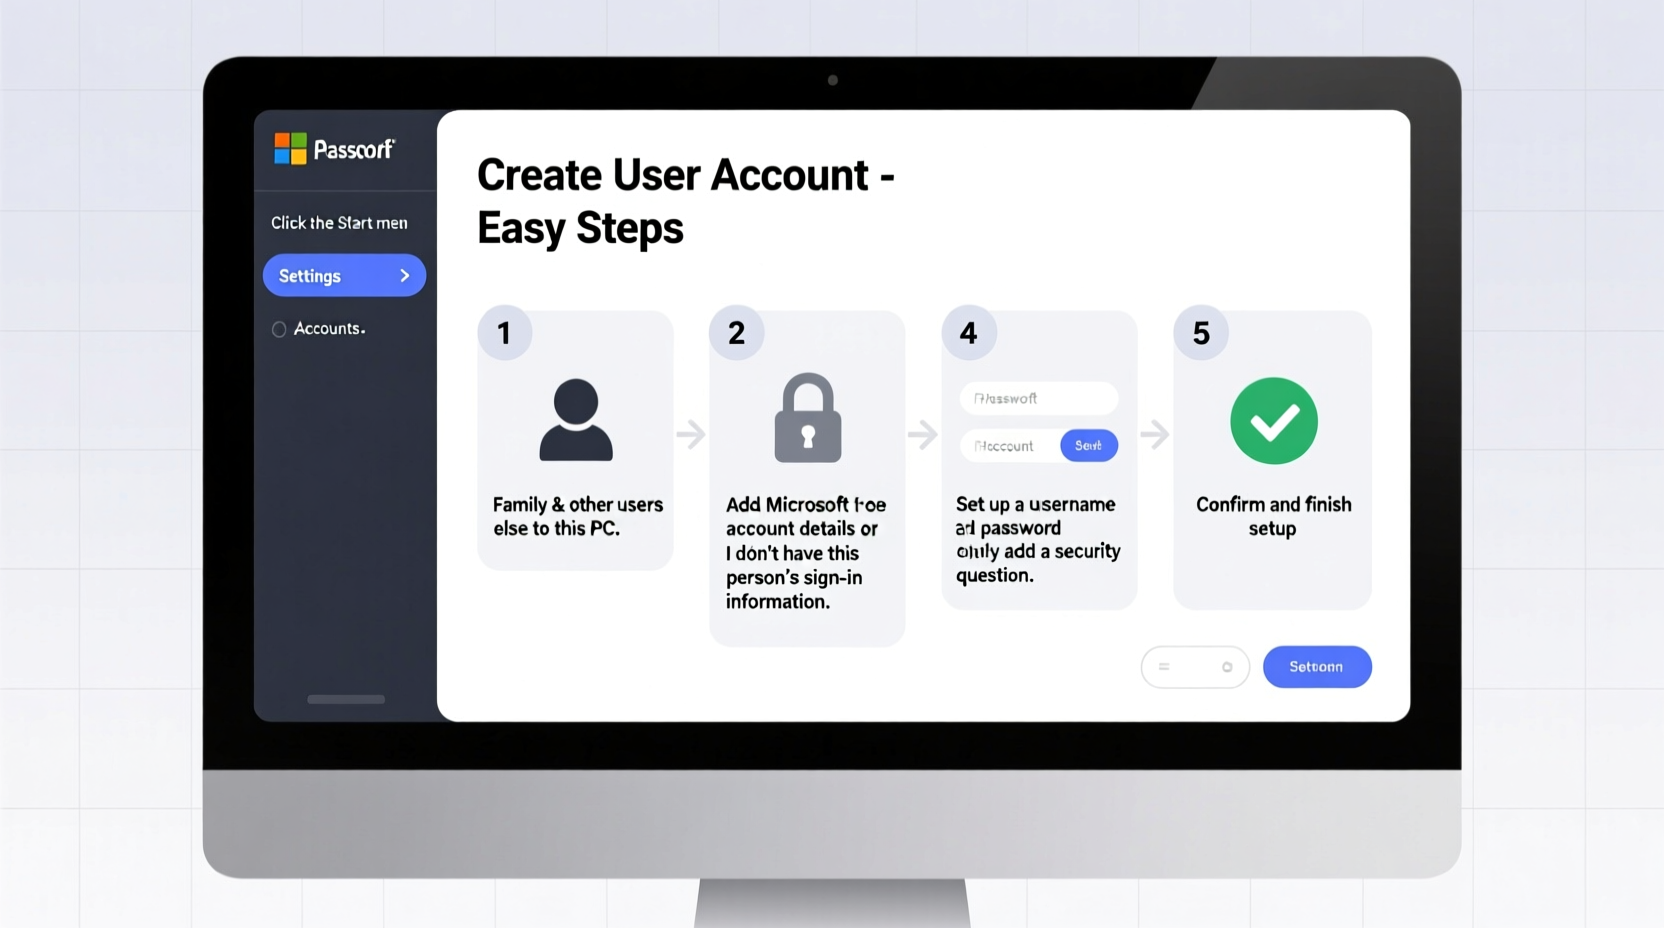
Creating a New User Account on Windows 10/11
Windows offers a streamlined interface for managing multiple users. Follow these steps to create a new account:
- Click the Start menu, then select Settings (gear icon).
- Navigate to Accounts > Family & other users.
- Under “Other users,” click Add account.
- Choose I don’t have this person’s sign-in information to set up a local account.
- Enter a username, full name, and password (optional but recommended).
- Click Next to complete the setup.
After creation, you can choose whether the user has Standard or Administrator rights. To change this:
- Go back to Family & other users.
- Select the new user and click Change account type.
- Choose between Standard User and Administrator.
Setting Up a New User on macOS
macOS provides robust user management through System Settings. The process varies slightly depending on your version, but general steps remain consistent.
- Open System Settings from the Apple menu.
- Select Users & Groups from the sidebar.
- Click the lock icon at the bottom and enter your admin password to unlock settings.
- Click the + button below the user list.
- Choose the account type: Administrator, Standard, Managed with Parental Controls, or Sharing Only.
- Enter the full name, account name, password, and hint.
- Click Create User.
The new user will appear in the login screen after restart. They can now log in with their credentials and customize their environment independently.
Best Practices When Creating macOS Accounts
- Avoid using spaces or special characters in the account name (used for file paths).
- Use strong passwords and enable FileVault encryption for added security.
- Consider enabling parental controls for younger users to restrict app usage and web content.
User Account Comparison: Windows vs. macOS
| Feature | Windows 10/11 | macOS |
|---|---|---|
| Default Account Types | Administrator, Standard, Child | Administrator, Standard, Managed, Sharing Only |
| Local Account Support | Yes (with option to skip Microsoft account) | Yes (local accounts fully supported) |
| Parental Controls | Microsoft Family Safety (online dashboard) | Built-in Screen Time and content restrictions |
| Encryption Integration | BitLocker (Pro edition only) | FileVault (available on all Macs) |
| Login Flexibility | PIN, password, biometrics (Windows Hello) | Password, Touch ID, Apple Watch unlock |
Real-World Example: A Small Business Setup
Jamie runs a home-based graphic design studio with two part-time assistants. Initially, everyone used her admin account, leading to accidental deletions and inconsistent software configurations. After reading about user isolation, she created separate standard accounts for each assistant via System Preferences on her MacBook Pro.
She assigned herself the only administrator role and enabled Time Machine backups for all profiles. Within a week, system crashes dropped by 70%, and file organization improved dramatically. “I didn’t realize how much chaos came from shared access,” Jamie said. “Now everyone has their space, and my main workflow stays untouched.”
Essential Checklist for Setting Up New Users
- ✅ Assigned appropriate account type (standard vs. admin)
- ✅ Set a strong password or PIN
- ✅ Configured automatic updates and backup access
- ✅ Disabled unnecessary login items for faster startup
- ✅ Reviewed privacy settings (camera, microphone, location access)
- ✅ Educated the user on basic security habits (e.g., not sharing passwords)
Frequently Asked Questions
Can I delete a user account without losing their files?
Yes, but proceed with caution. When deleting a user, most operating systems prompt you to save the home folder or documents. Always back up important data before removal. On Windows, files may be preserved in C:\\Users\\[Username]; on macOS, check /Users/[Username]. If unsure, copy the folder manually before deletion.
What’s the difference between a local and online account?
A local account stores credentials directly on the device and doesn’t require internet access. An online account (like a Microsoft or Apple ID) syncs settings, passwords, and preferences across devices. While convenient, online accounts introduce dependency on cloud services and potential privacy trade-offs. For maximum control, especially in private networks, local accounts are often preferred.
How do I switch between user accounts quickly?
On both Windows and macOS, click your profile icon in the top-right corner of the screen and select Switch User. Alternatively, press Ctrl + Alt + Del on Windows and choose “Switch user,” or on Mac, go to Apple menu > Log Out [Name] (without shutting down). Fast user switching allows multiple people to share a machine without closing applications.
Final Tips for Long-Term Account Management
Creating a user account is just the beginning. Ongoing maintenance ensures continued performance and security. Schedule monthly reviews of active accounts, remove outdated ones, and verify that permissions haven’t been escalated unintentionally.
Enable disk quotas if available (especially in business environments) to prevent one user from consuming excessive storage. Also, consider naming conventions—for example, using first names only or including department initials—to keep things organized as more users are added.
Conclusion: Take Control of Your Digital Environment
Managing user accounts isn’t just for IT departments—it’s a fundamental skill for anyone who uses a computer regularly. By setting up individual profiles correctly, you enhance security, improve usability, and protect your digital workspace from unnecessary risks. Whether you're on Windows or macOS, the tools are already built in; it just takes a few minutes to configure them properly.


 浙公网安备
33010002000092号
浙公网安备
33010002000092号 浙B2-20120091-4
Comments
No comments yet. Why don't you start the discussion?