
Crafting a woven leather dog charm keychain is more than just a weekend project—it’s a way to combine functionality with personal expression. Whether you're making one for yourself or as a heartfelt gift for a fellow dog lover, this handmade accessory carries warmth and character that mass-produced items often lack. With basic tools, quality leather strips, and a bit of patience, you can create a durable, stylish keychain that celebrates your bond with your pet. This guide walks you through every stage—from selecting materials to finishing touches—so you can produce a polished piece with confidence.
Gathering Your Materials and Tools
The foundation of any successful leathercraft project lies in preparation. Before you begin weaving, ensure you have all necessary supplies on hand. The right materials not only make the process smoother but also elevate the final product’s durability and aesthetic appeal.
- Leather strips (2mm thick, 3–5mm wide, approx. 60cm long)
- Key ring (stainless steel or brass, 25–30mm diameter)
- Dog-shaped metal or wooden charm
- Leather hole punch or awl
- Scissors or rotary cutter
- Ruler or measuring tape
- Beeswax or edge slicker (optional, for finishing)
- Glue (leather-specific or E6000 for securing ends)
- Clamps or clips (to hold pieces during drying)
The Four-Strand Woven Pattern Explained
The four-strand weave creates a tight, braided effect that mimics traditional knotwork while remaining accessible to beginners. Unlike simpler two- or three-strand braids, this pattern produces a fuller, more intricate look ideal for small accessories like keychains.
To visualize the weave, label the strands A, B, C, and D from left to right. The sequence follows a repeating cycle:
- Move strand D over C and under B to take B’s position.
- Move strand A over B and under C to take C’s position.
- Repeat steps 1 and 2 until the desired length is achieved.
This alternating cross-over motion forms a symmetrical braid that lies flat and resists twisting. Maintain even tension throughout to avoid lopsided sections. If a strand slips or knots form, gently unwind and reposition before continuing.
| Step | Action | Resulting Order |
|---|---|---|
| 1 | D over C, under B | A → B → D → C |
| 2 | A over B, under C | B → D → A → C |
| 3 | Repeat Step 1 | B → C → D → A |
| 4 | Repeat Step 2 | C → B → A → D |
Consistency in movement ensures uniformity. Practice the sequence on scrap fabric or yarn if needed before working with leather.
Step-by-Step Assembly Process
With materials ready and the weave pattern understood, follow this detailed timeline to assemble your keychain.
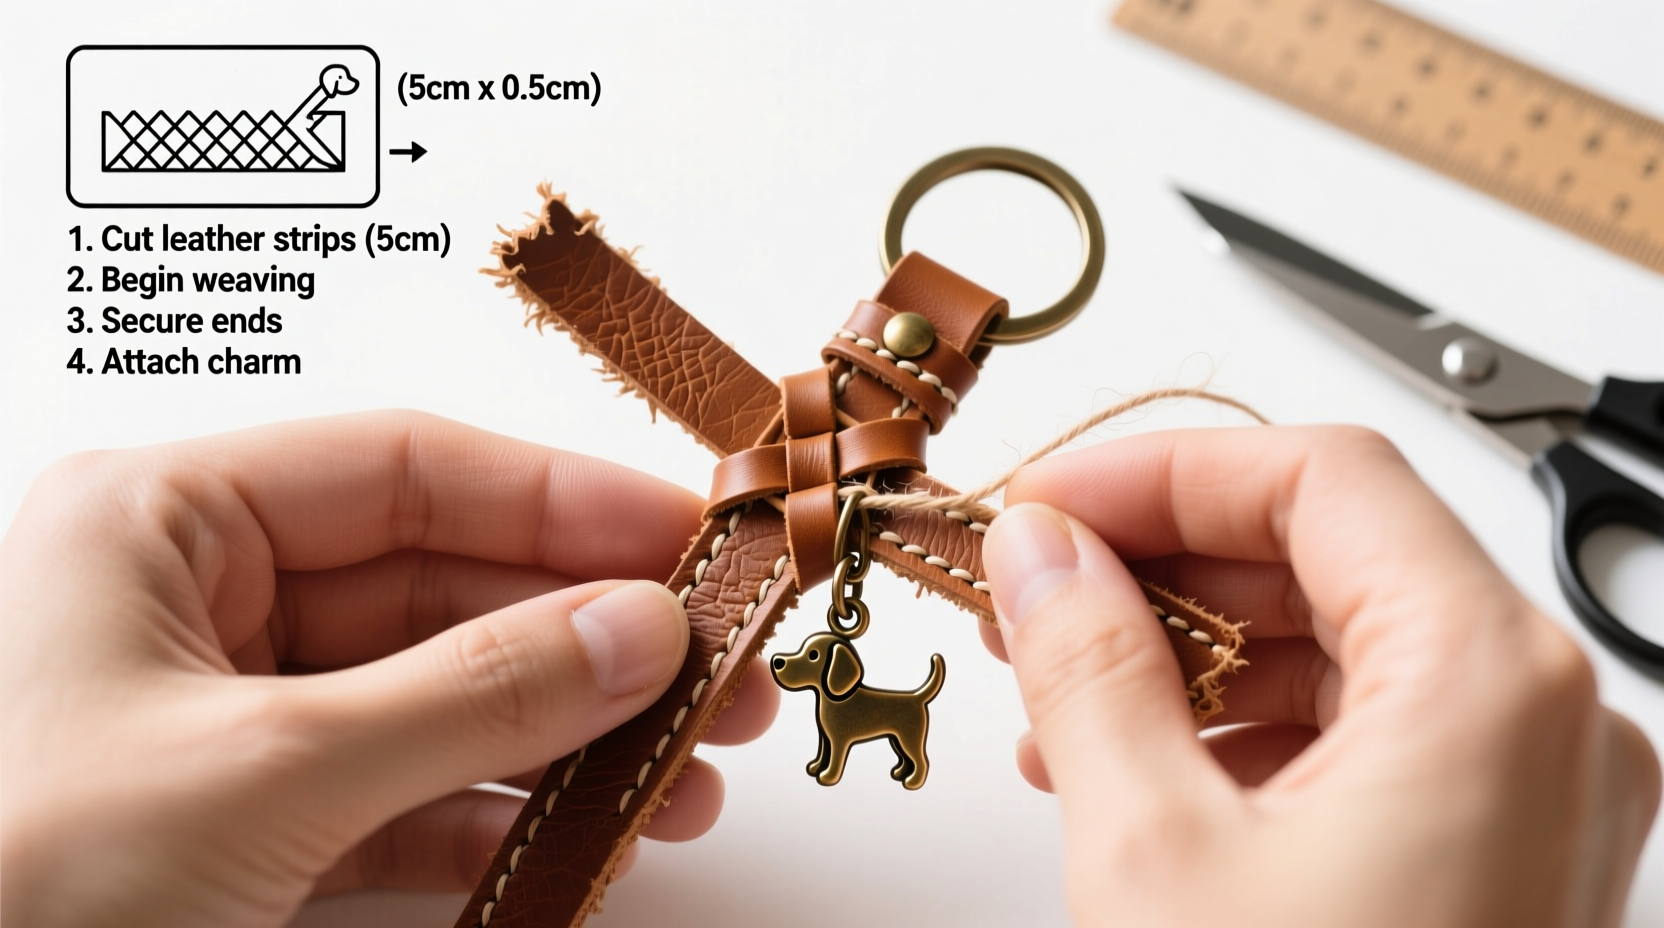
- Prepare the leather strips: Cut four equal-length strips (approx. 60cm). If edges are rough, lightly sand them or apply an edge beveler for smoothness.
- Attach to the key ring: Fold all four strips in half. Loop them through the key ring and pull the loose ends through the fold to secure with a lark’s head knot.
- Begin the weave: Arrange the eight hanging ends into four pairs. Untwist each pair and designate them as A, B, C, D from left to right.
- Weave steadily: Follow the four-strand sequence, advancing about 1–2cm at a time. Pause periodically to check alignment and adjust tension.
- Incorporate the charm: At the midpoint (or desired location), slide the dog charm onto the central two strands before continuing the weave. This anchors it securely within the braid.
- Finish the end: Once the woven section reaches 8–10cm, stop weaving. Trim excess leather, leaving 1cm tails. Apply a small drop of leather glue to each end and press flat against the braid to prevent fraying.
- Square off the tip (optional): For a clean finish, bind the last 5mm with waxed thread or wrap with thin strip and glue.
Real Example: Sarah’s Custom Keychain for Her Rescue Dog
Sarah, a hobbyist crafter from Portland, wanted a meaningful way to carry her rescue terrier Max with her every day. She chose dark brown leather for its earthy tone and began with 5mm-wide strips cut from a remnant piece. After practicing the weave on nylon cord, she transferred her skills to leather.
She added a small silver bone-shaped charm midway through the braid, symbolizing Max’s playful spirit. To personalize it further, she used a leather stamp to imprint “M” at the base before sealing the ends with beeswax. The entire process took under two hours, spread across an evening and morning. “It’s not perfect,” she said, “but every time I use my keys, I feel connected to him.” Her keychain has held up through months of daily use, proving both sentimental and functional value.
“Handmade leather goods gain character with age. Each scratch tells part of the story.” — Marcus Reed, Artisan Leatherworker & Instructor
Do’s and Don’ts of Leather Keychain Crafting
| Do | Don’t |
|---|---|
| Use consistent tension when weaving to maintain symmetry | Pull too tightly, which can distort the braid or stretch leather |
| Seal cut ends with glue or wax to prevent unraveling | Leave raw ends exposed—they’ll fray quickly |
| Choose charms with large enough openings to fit multiple strands | Force stiff leather through small charm holes, risking tears |
| Work in a well-lit, clutter-free space for precision | Rush the process—rushing leads to misalignment and frustration |
Frequently Asked Questions
Can I wash a leather keychain?
Leather should not be submerged or washed. If dirty, wipe gently with a slightly damp cloth and dry immediately. Avoid soaps or alcohol-based cleaners, which strip natural oils and cause cracking.
How long should the woven section be?
A length of 8–10cm provides visual balance without making the keychain unwieldy. Adjust based on charm size and personal preference, but keep total keychain length under 15cm for practicality.
Is it possible to add color or engraving?
Yes. Use leather dyes for coloring strips before weaving. For engraving, stamp initials or paw prints on wider sections using metal stamps and a mallet. Always test on scrap first.
Final Checklist Before You Begin
- Materials Ready?
-
☐ Leather strips cut and smoothed
☐ Key ring and charm selected
☐ Glue and finishing supplies available - Tools Checked?
-
☐ Scissors sharp and clean
☐ Hole punch or awl accessible
☐ Ruler on hand for measurements - Workspace Prepared?
-
☐ Clean, flat surface
☐ Good lighting
☐ Clamps or weights nearby
Conclusion: Craft Something That Lasts
Creating a woven leather dog charm keychain isn’t just about assembling parts—it’s about investing care into something tangible and lasting. Every stitch, every braid, and every choice of material becomes part of a narrative. Whether you’re honoring a beloved pet or crafting a thoughtful present, this project bridges tradition and personal meaning.


 浙公网安备
33010002000092号
浙公网安备
33010002000092号 浙B2-20120091-4
Comments
No comments yet. Why don't you start the discussion?