
Setting up an App Store account is the first step toward downloading apps, managing subscriptions, and syncing your digital life across Apple devices. While the process is straightforward for most users, small mistakes—like using incorrect email formats or skipping verification steps—can lead to delays or rejection. This guide walks you through each phase with precision, ensuring your account is created smoothly, securely, and in under 10 minutes.
Why a Properly Set Up App Store Account Matters
Your App Store account, tied to your Apple ID, is more than just a gateway to games and utilities—it’s central to iCloud, iMessage, FaceTime, and Apple’s ecosystem of services. A clean setup avoids future complications like being locked out during device transfers or losing access to purchased content.
Apple enforces strict validation rules to prevent fraud and protect user data. That means every detail—from your date of birth to payment method—must align with Apple’s requirements. Getting it right the first time saves hours of troubleshooting later.
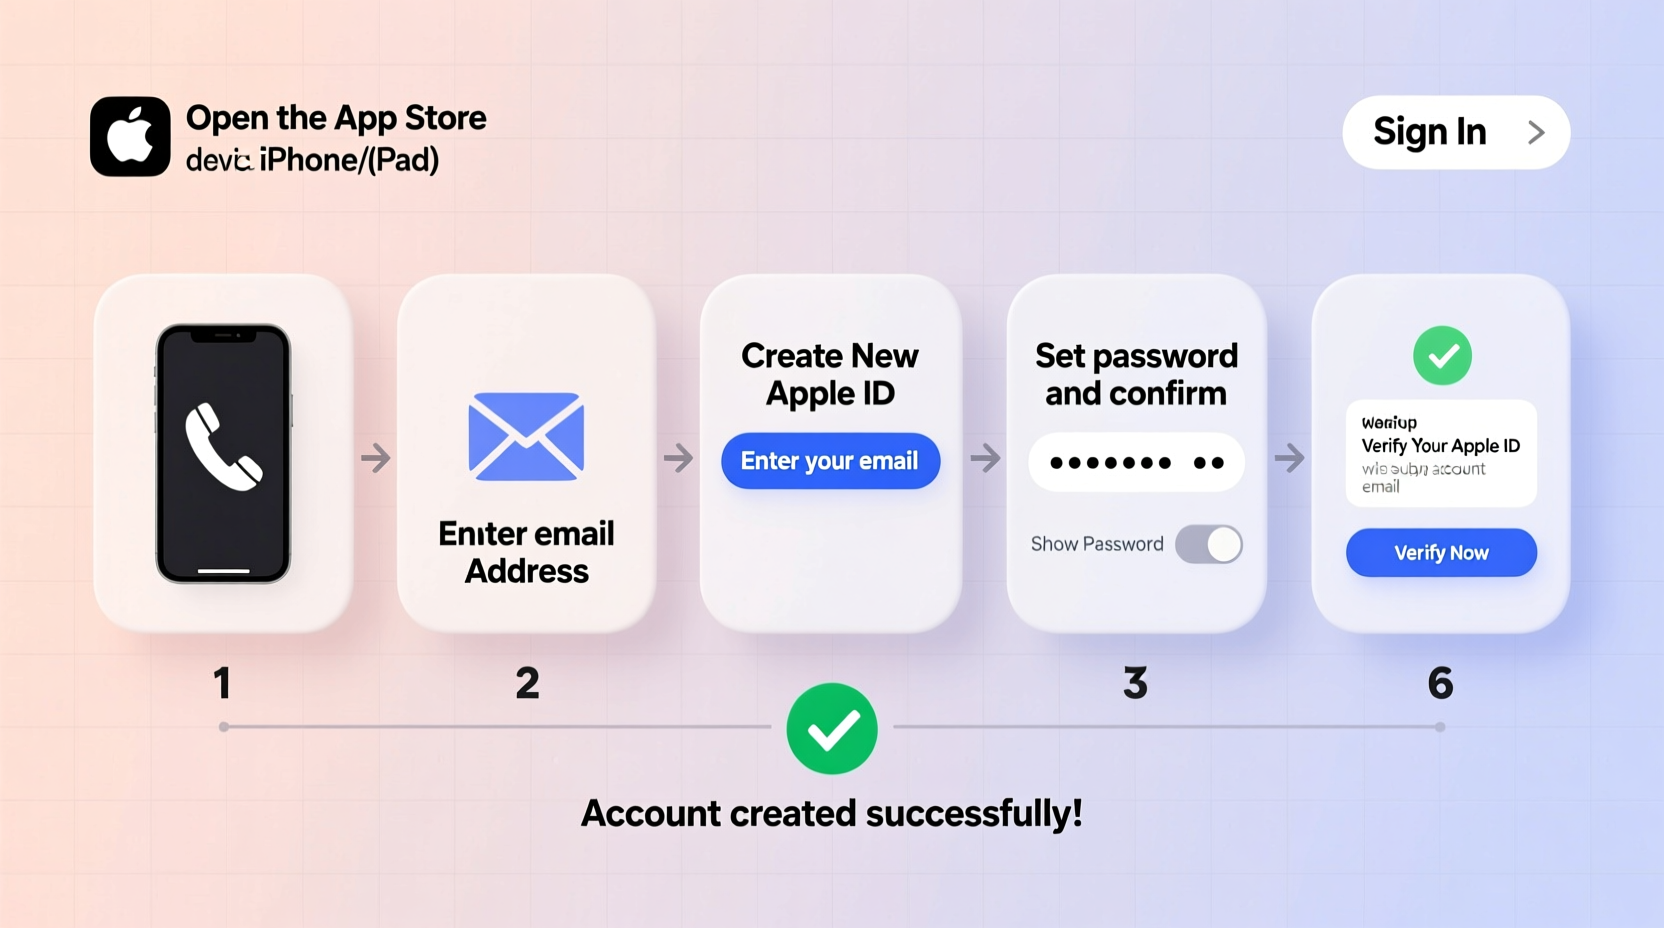
Step-by-Step: Creating Your App Store Account
- Ensure Device Compatibility: You’ll need an iPhone, iPad, or iPod touch running iOS 9 or later. Mac and Windows users can use iTunes, but on-device setup is faster and more reliable.
- Connect to Wi-Fi: Cellular networks sometimes interfere with Apple ID creation. Use a stable Wi-Fi connection to avoid timeouts.
- Open the App Store: Tap the blue App Store icon on your home screen.
- Select Any Free App: Choose any free app (e.g., WhatsApp) and tap “Get.” When prompted, select “Create New Apple ID.”
- Agree to Terms: Read and accept Apple’s Terms and Conditions. Skipping this won’t work—Apple requires explicit consent.
- Enter Personal Information: Provide your full name, a valid email address (or create a @icloud.com one), and a strong password (minimum 8 characters, including uppercase, lowercase, and a number).
- Set Security Questions: Choose three security questions and answers. Avoid obvious answers like “123” or “password.”
- Add Payment Method: Even if you only plan to download free apps, Apple requires a valid payment option. You can choose “None” only if your region supports it (e.g., United States, UK, Canada).
- Verify Your Email: Apple sends a confirmation link. Open your inbox, find the email from Apple, and click “Confirm Now.”
- Two-Factor Authentication: If enabled, enter the six-digit code sent to your trusted device or phone number.
Regional Requirements and Payment Options
Apple tailors account creation based on your selected country or region. This affects available apps, pricing, and required payment methods. Changing your region later requires clearing all balances and subscriptions, so choose wisely.
| Region | Payment Method Required? | Can Select \"None\"? | Verification Time |
|---|---|---|---|
| United States | Yes | Yes | Instant |
| India | Yes | No | Up to 24 hours |
| Germany | Yes | No | Within 1 hour |
| Canada | Yes | Yes | Instant |
| Brazil | Yes | No | Up to 48 hours |
If your country doesn’t allow “None” as a payment option, consider using a prepaid Apple Gift Card to fund future purchases without linking a card.
Common Pitfalls and How to Avoid Them
- Inconsistent Name Entry: The name you enter must match your payment method’s billing name. Mismatches trigger manual review.
- Using a Shared Email: Apple may flag accounts using emails shared across multiple devices or locations.
- Incorrect Date of Birth: Entering a birthdate that suggests you’re under 13 will block account creation.
- Skipping Email Verification: Without confirmation, your account remains inactive and cannot download apps.
“Over 30% of failed Apple ID setups stem from mismatched personal details or unverified emails. Accuracy is non-negotiable.” — Lisa Tran, Senior Support Analyst at Apple Authorized Service Provider
Mini Case Study: Sarah’s Smooth Setup
Sarah, a college student in Austin, wanted to install productivity apps for her new iPad. She attempted to create an account using a temporary email from a free provider. After three failed attempts, she received a message: “Could not create account.” Frustrated, she called Apple Support.
The agent explained that temporary emails are often flagged as high-risk. Sarah switched to a Gmail account she owned, re-entered her information carefully, selected “None” under payment options (eligible in the U.S.), and verified her email immediately. Her account was active within two minutes.
Key takeaway: Use a legitimate, personal email and double-check each field before submitting.
Essential Checklist Before You Begin
- ✔️ Stable Wi-Fi connection
- ✔️ Valid email address (not temporary)
- ✔️ Correct date of birth (must be 13 or older)
- ✔️ Payment method ready (credit card, PayPal, or gift card)
- ✔️ Phone number for two-factor authentication
- ✔️ Knowledge of your country/region’s App Store policies
Tips for Long-Term Account Health
Creating the account is just the beginning. Maintaining access and security matters just as much.
Regularly update your trusted devices and phone numbers. If you lose access to your primary device, recovery becomes significantly harder. Also, review your account settings annually—especially recovery contacts and security questions.
Store your Apple ID and password in a secure password manager. Never write it on paper or save it in unencrypted notes.
Frequently Asked Questions
Can I create an App Store account without a credit card?
Yes, if you're in a supported region like the U.S., UK, or Canada. During setup, select “None” as your payment method. Not all countries offer this option due to local financial regulations.
What should I do if my account creation fails?
First, ensure your internet connection is stable. Then, double-check that your email isn’t already linked to another Apple ID. Clear the Safari cache on your device, restart, and try again. If the error persists, wait 24 hours—Apple temporarily blocks repeated attempts to prevent abuse.
Can I change my Apple ID email after creating the account?
You can change the primary email associated with your Apple ID, but only if it’s an @icloud.com address. For third-party emails (Gmail, Outlook), you must update it through Apple ID settings online. Note: Changing your Apple ID doesn’t affect your App Store purchase history.
Final Steps and Ongoing Management
Once your account is verified, download a few free apps to confirm everything works. Go to Settings > [Your Name] > Media & Purchases to manage automatic downloads and family sharing.
Consider setting up Family Sharing to share purchases with up to five family members—without sharing passwords. Each member keeps their own Apple ID, preserving privacy while reducing costs.
Conclusion
Creating an App Store account doesn’t have to be frustrating. With accurate information, the right tools, and awareness of regional rules, you can complete the process seamlessly. Whether you're setting up your first iPhone or helping a family member get started, attention to detail makes all the difference.


 浙公网安备
33010002000092号
浙公网安备
33010002000092号 浙B2-20120091-4
Comments
No comments yet. Why don't you start the discussion?