
Creating crystal bead bracelets at home is more than a craft—it's a personal expression of style, energy, and intention. Whether you're drawn to the elegance of Swarovski crystals, the healing properties of natural gemstones, or simply the joy of making something beautiful with your hands, this guide walks you through every stage of crafting professional-quality bracelets from the comfort of your workspace. With the right materials, attention to detail, and a bit of patience, you can design pieces that rival those found in high-end boutiques.
Essential Tools and Materials You’ll Need
Before diving into design, gather the necessary supplies. Having everything organized ensures a smooth workflow and reduces frustration mid-project. Most items are affordable and reusable across multiple designs.
- Beads: Choose high-quality crystal beads such as Swarovski, Preciosa, or natural stones like amethyst, rose quartz, or lapis lazuli.
- Stringing material: Use elastic cord for stretch bracelets, or beading wire (like SoftFlex or Accu-Flex) for clasped styles.
- Clasps: Lobster clasps, toggle clasps, or magnetic closures depending on design preference.
- Crimps and crimping pliers: For securing wire ends when using clasps.
- Beading needle and thread: Optional for intricate patterns or smaller beads.
- Scissors or wire cutters: Sharp tools dedicated to jewelry making.
- Beading mat: Prevents beads from rolling away and protects surfaces.
- Ruler or measuring tape: Ensures accurate sizing.
Design Principles for Visually Appealing Bracelets
A beautiful bracelet balances symmetry, color harmony, and proportion. Consider these foundational elements before stringing a single bead:
- Color Palette: Stick to 2–4 complementary colors. Analogous schemes (e.g., pink, red, burgundy) create soft transitions; contrasting pairs (blue and gold) add drama.
- Pattern Rhythm: Repeat sequences (e.g., large-small-medium, A-B-A) to establish visual flow. Avoid randomness unless intentionally chaotic.
- Focal Points: Include one standout element—a larger centerpiece bead, charm, or pendant—to anchor the design.
- Texture Variation: Mix faceted, matte, and metallic beads for depth without clutter.
| Design Element | Do’s | Don’ts |
|---|---|---|
| Size Proportion | Match bead size to wrist thickness (e.g., 4–6mm for delicate wrists) | Overload with oversized beads that dominate the arm |
| Spacing | Use spacers or small metal beads between clusters | Crowd beads so tightly they can’t move |
| Durability | Double-knot elastic; seal with clear nail polish | Use single knots that may loosen over time |
Step-by-Step Guide to Assembling Your First Crystal Bead Bracelet
This timeline outlines how to build a classic 7-inch stretch bracelet using elastic cord and mixed crystal beads. Adjust measurements based on wrist size.
- Measure Your Wrist: Wrap a flexible tape around the widest part of your hand (thumb to pinky). Add 1 inch for ease. Standard adult size: 6.5–7.5 inches.
- Cut the Cord: Cut 12 inches of 1mm elastic cord—extra length allows for knotting.
- Plan the Layout: Arrange beads on a mat in your desired pattern. Take a photo as a reference.
- Begin Stringing: Thread beads slowly onto the cord, following your layout. Use a needle if beads have tiny holes.
- Check Fit: Once strung, gently press the ends together around your wrist to test fit before tying.
- Tie the Knot: Tie a surgeon’s knot (double overhand with an extra loop). Pull tight but not enough to break the cord.
- Secure & Seal: Add a drop of clear jewelry glue or nail polish to the knot. Let dry 10 minutes.
- Trim Ends: Cut excess cord close to the knot, leaving no frayed edges.
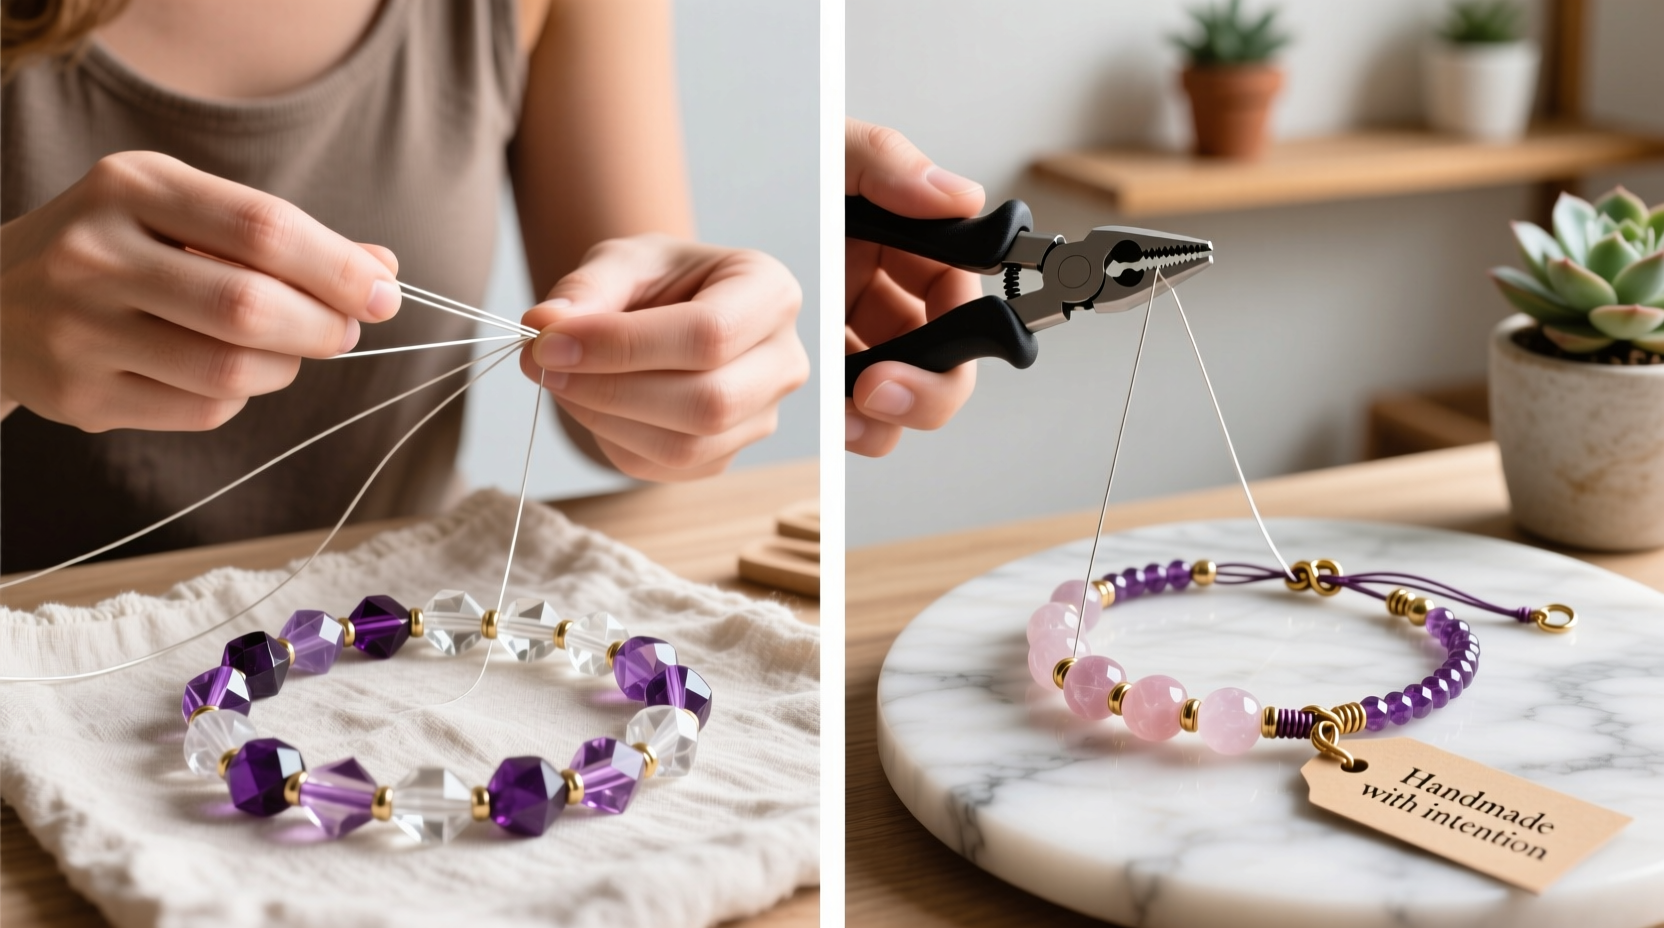
Real Example: Sarah’s Healing Energy Bracelet Project
Sarah, a yoga instructor from Portland, wanted to create personalized bracelets for her students using intention-based crystals. She selected rose quartz for love, amethyst for calm, and clear quartz for clarity. After sketching designs, she used silver-plated spacers and 2mm elastic cord for durability. Each bracelet followed a repeating pattern: [rose quartz – spacer – amethyst – spacer – clear quartz]. She added a tiny silver lotus charm as a focal point. After sealing each knot with UV resin, the bracelets lasted over a year with daily wear. Her students reported feeling more centered, and several asked for custom sets—turning a hobby into a small side business.
Expert Insight on Craftsmanship and Intention
“Handmade jewelry carries the energy of its maker. When you craft with focus and care, that intention becomes part of the piece.” — Lena Torres, Artisan Jewelry Designer & Author of *The Mindful Mosaic*
Torres emphasizes that precision in knotting and symmetry enhances both aesthetic appeal and energetic integrity, especially for those who value crystal healing properties. “A well-made bracelet doesn’t just look good—it feels balanced,” she says.
Common Challenges and How to Solve Them
Even experienced crafters face setbacks. Here’s how to troubleshoot frequent issues:
- Elastic breaks during tying: Use thicker cord (1.5mm) or switch to nylon-coated beading wire with a clasp.
- Beads won’t stay aligned: Work on a non-slip mat and use a bead stopper or tape to block one end while stringing.
- Knots come undone: Always double-knot and apply adhesive. Practice tension control—too loose invites slippage.
- Uneven spacing: Use uniform spacer beads or measure intervals with calipers for precision.
FAQ
Can I make waterproof crystal bead bracelets?
Most crystals tolerate occasional water exposure, but prolonged soaking can damage porous stones like opal or selenite. Use sealed cords and avoid showering or swimming with your bracelet.
How do I choose the right bead size?
For everyday wear, 4–6mm beads offer comfort and visibility. Larger beads (8mm+) make bold statements but may feel heavy. Match scale to wrist size and outfit style.
Are there eco-friendly options for materials?
Yes. Opt for recycled glass beads, sustainably sourced gemstones, and biodegradable cotton-wrapped elastic. Some suppliers now offer plant-based cord alternatives.
Final Checklist Before You Begin
Run through this quick checklist to ensure readiness:
- ✅ Measured wrist and calculated correct length
- ✅ Selected beads with consistent hole sizes
- ✅ Prepared workspace with mat and lighting
- ✅ Tested cord strength with a pull test
- ✅ Planned design layout visually or on paper
- ✅ Have glue, scissors, and sealing product ready
Conclusion: Start Creating Today
Making crystal bead bracelets at home blends creativity, mindfulness, and craftsmanship into wearable art. Every piece you design reflects your taste, intention, and attention to detail. Whether you're crafting a gift, building a collection, or exploring a new creative outlet, the process itself is rewarding. With the steps, tips, and insights shared here, you’re fully equipped to begin. Gather your materials, lay out your first pattern, and string your way toward something truly beautiful.


 浙公网安备
33010002000092号
浙公网安备
33010002000092号 浙B2-20120091-4
Comments
No comments yet. Why don't you start the discussion?