
Creating personalized glow in the dark tumblers doesn’t require expensive sublimation equipment or a professional studio. With basic crafting supplies and a few proven techniques, you can design vibrant, functional drinkware that glows after dark—perfect for gifts, parties, or small-batch sales. This guide walks through practical, cost-effective methods to achieve durable, eye-catching results using hand-painting, adhesive vinyl, and glow-in-the-dark mediums.
Why Skip Sublimation?
Sublimation printing produces high-quality, permanent designs but demands a specialized printer, heat press, and polyester-coated tumblers. For hobbyists, crafters on a budget, or those testing product ideas, this setup is often impractical. Fortunately, alternative methods deliver impressive results with materials available at craft stores or online.
Hand application techniques offer flexibility, lower startup costs, and the ability to work at your own pace. They’re ideal for limited runs, seasonal designs, or experimenting with glowing effects before investing in larger equipment.
“Many successful craft businesses started with simple painting and sealing methods. The key isn’t the tool—it’s consistency and attention to detail.” — Dana Reeves, DIY Product Designer & Etsy Seller
Materials You’ll Need
Before starting, gather all necessary supplies. Most items are reusable across multiple projects, keeping long-term costs low.
| Material | Purpose | Recommended Brand/Type |
|---|---|---|
| Stainless steel tumbler (smooth finish) | Base product for customization | Any no-coat tumbler (e.g., generic 20 oz double-wall) |
| Glow-in-the-dark paint (acrylic-based) | Creates luminescent effect | Paints like Liquitex or Craftola Glow Acrylics |
| Clear epoxy resin (bar top finish) | Seals design and adds durability | ArtResin, EasyCast, or TotalBoat TableTop |
| Fine-tip paintbrushes or sponge brushes | Application tools | Synthetic bristles for smooth finishes |
| Painter’s tape or stencil film | Design masking | Frosted stencil vinyl or 3M blue tape |
| Isopropyl alcohol (70% or higher) | Cleaning surface before painting | Standard pharmacy-grade |
| Lint-free cloth | Wiping down tumbler | Microfiber or coffee filters |
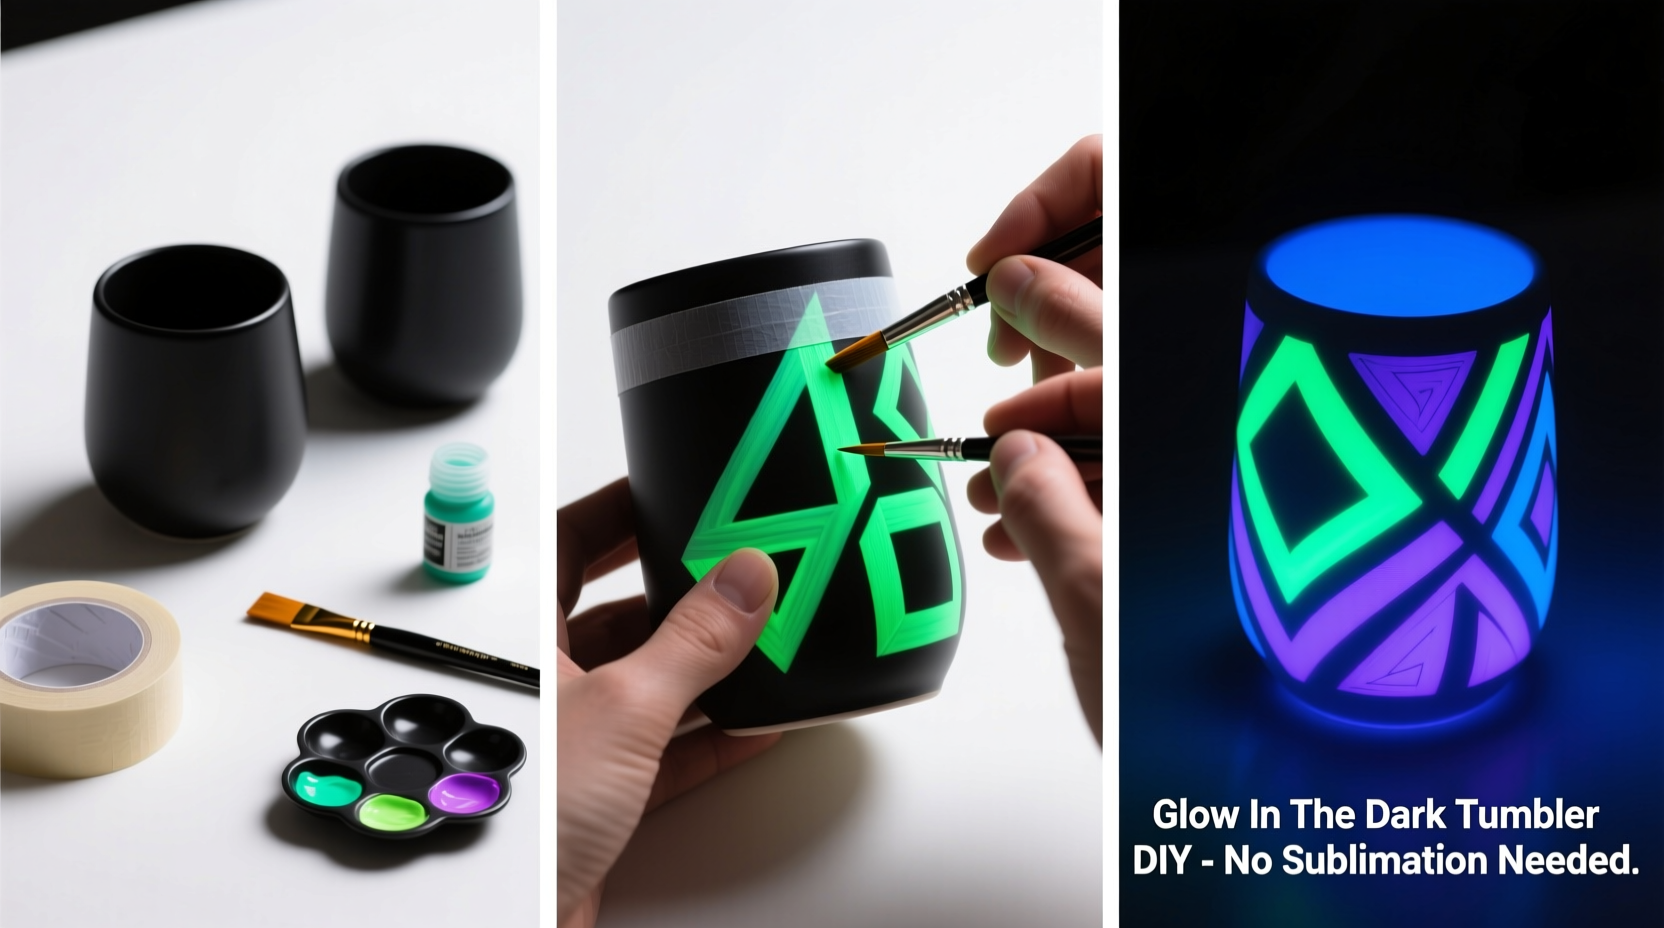
Step-by-Step Process: Hand-Painted Glow Design
This method allows full creative control and works best for abstract patterns, constellations, or custom lettering. Follow these steps carefully for a professional result.
- Clean the tumbler thoroughly. Wipe the exterior with isopropyl alcohol and a lint-free cloth. Let dry completely. Any oil or dust will prevent paint from adhering properly.
- Create or apply your stencil. Use painter’s tape to block off areas, or cut a custom stencil from adhesive vinyl. Press edges firmly to avoid paint bleed.
- Apply glow paint in thin layers. Use a fine brush or sponge applicator. Allow each coat to dry for 15–20 minutes before adding the next. Two to three coats typically yield strong glow intensity.
- Remove stencil carefully. Lift straight up to avoid smudging. Wait until paint is fully dry to prevent lifting.
- Let the paint cure for 24 hours. Avoid handling during this time to ensure stability before sealing.
- Pour epoxy resin over the painted area. Mix resin according to manufacturer instructions. Pour slowly and spread evenly with a disposable brush or heat gun to remove bubbles.
- Cure flat for 24–72 hours. Keep the tumbler in a dust-free environment. Do not cap or store until fully hardened.
The resin creates a glass-like finish that protects the glow paint from scratches, washing, and wear. Once cured, the tumbler is safe for light hand-washing (avoid soaking).
Alternative Method: Glow Vinyl Application
For crisp logos, text, or geometric shapes, adhesive glow vinyl offers precision and ease. While most glow vinyl is designed for crafts, not tumblers, proper sealing makes it durable.
- Choose flexible, outdoor-rated glow vinyl (e.g., ORACAL 651 with phosphorescent coating).
- Use a cutting machine (like Cricut or Silhouette) or hand-cut your design.
- Transfer the design onto the cleaned tumbler using transfer tape.
- Smooth out air bubbles with a squeegee or credit card.
- Seal the entire vinyl design with 2–3 layers of liquid epoxy, ensuring full edge coverage to prevent peeling.
Vinyl is less forgiving than paint when wrapping curved surfaces, so practice alignment on a similar object first. Curved areas may require segmenting the design.
Real Example: Weekend Crafter Launches Side Hustle
Sarah M., a teacher from Austin, wanted to sell custom tumblers at local markets but couldn’t afford a sublimation setup. She experimented with glow paint and epoxy on five tumblers, testing different brands and curing times. After two weekends of trial and error, she perfected a starry night design using stenciled constellations and blue-green glow paint.
She priced each tumbler at $28 and sold 30 units at her first market. Customers loved the unique glow effect and durability. Within three months, she reinvested profits into a vinyl cutter and expanded her line. “I started with just $40 in supplies,” she said. “The hand-painted ones still get the most compliments.”
Do’s and Don’ts of Non-Sublimation Tumbler Customization
| Do’s | Don’ts |
|---|---|
| Always clean the tumbler with alcohol before applying anything | Don’t skip the curing time between paint and resin layers |
| Use thin, even coats of glow paint for better adhesion | Don’t use regular nail polish or craft sealants—they won’t hold up |
| Seal edges completely when using vinyl | Don’t put sealed tumblers in the dishwasher or microwave |
| Work in a well-ventilated space when using epoxy | Don’t mix glow paint with non-compatible mediums (check labels) |
Frequently Asked Questions
How long does the glow effect last?
A high-quality glow paint can emit light for 2–4 hours after full charging under bright light. Brightness fades gradually. Performance depends on pigment concentration and prior exposure to light.
Can I wash these tumblers?
Yes, but only with gentle hand-washing. Avoid soaking, scrubbing near the design, or using abrasive cleaners. Dishwashers generate too much heat and pressure, which can degrade the seal over time.
Will the epoxy yellow over time?
UV-resistant epoxy formulas minimize yellowing. Avoid prolonged direct sunlight exposure to extend clarity. Most modern resins remain clear for 1–2 years under normal use.
Final Checklist Before You Start
- ✅ Clean tumbler with alcohol
- Ensure zero residue for optimal adhesion.
- ✅ Test glow paint on sample surface
- Check color, brightness, and drying time.
- ✅ Prepare workspace with drop cloth and ventilation
- Epoxy fumes require fresh air; protect surfaces from spills.
- ✅ Apply thin, even paint layers
- Build opacity gradually to avoid cracking.
- ✅ Seal completely with food-safe epoxy
- Full coverage prevents chipping and moisture damage.
- ✅ Cure undisturbed for recommended time
- Rushing curing leads to soft spots or cloudiness.
Bring Your Vision to Light
Creating custom glow in the dark tumblers without sublimation opens creative possibilities for makers at every level. Whether you're designing for fun, gifting, or launching a small business, the techniques outlined here provide a reliable, affordable path to standout results. No special machinery is required—just patience, quality materials, and attention to detail.


 浙公网安备
33010002000092号
浙公网安备
33010002000092号 浙B2-20120091-4
Comments
No comments yet. Why don't you start the discussion?