
Creating a custom bedazzled dog collar is more than a craft—it’s an expression of love for your pet and a chance to showcase creativity. Whether you're making one as a gift, for a special occasion, or simply to give your pup a standout look, handmade collars offer unmatched personalization. With the right materials and techniques, you can produce a durable, safe, and dazzling accessory that turns heads on every walk.
This guide walks you through the entire process—from choosing the right base collar to securing embellishments without compromising comfort or safety. No prior crafting experience is required, just attention to detail and a passion for pets.
Materials You’ll Need
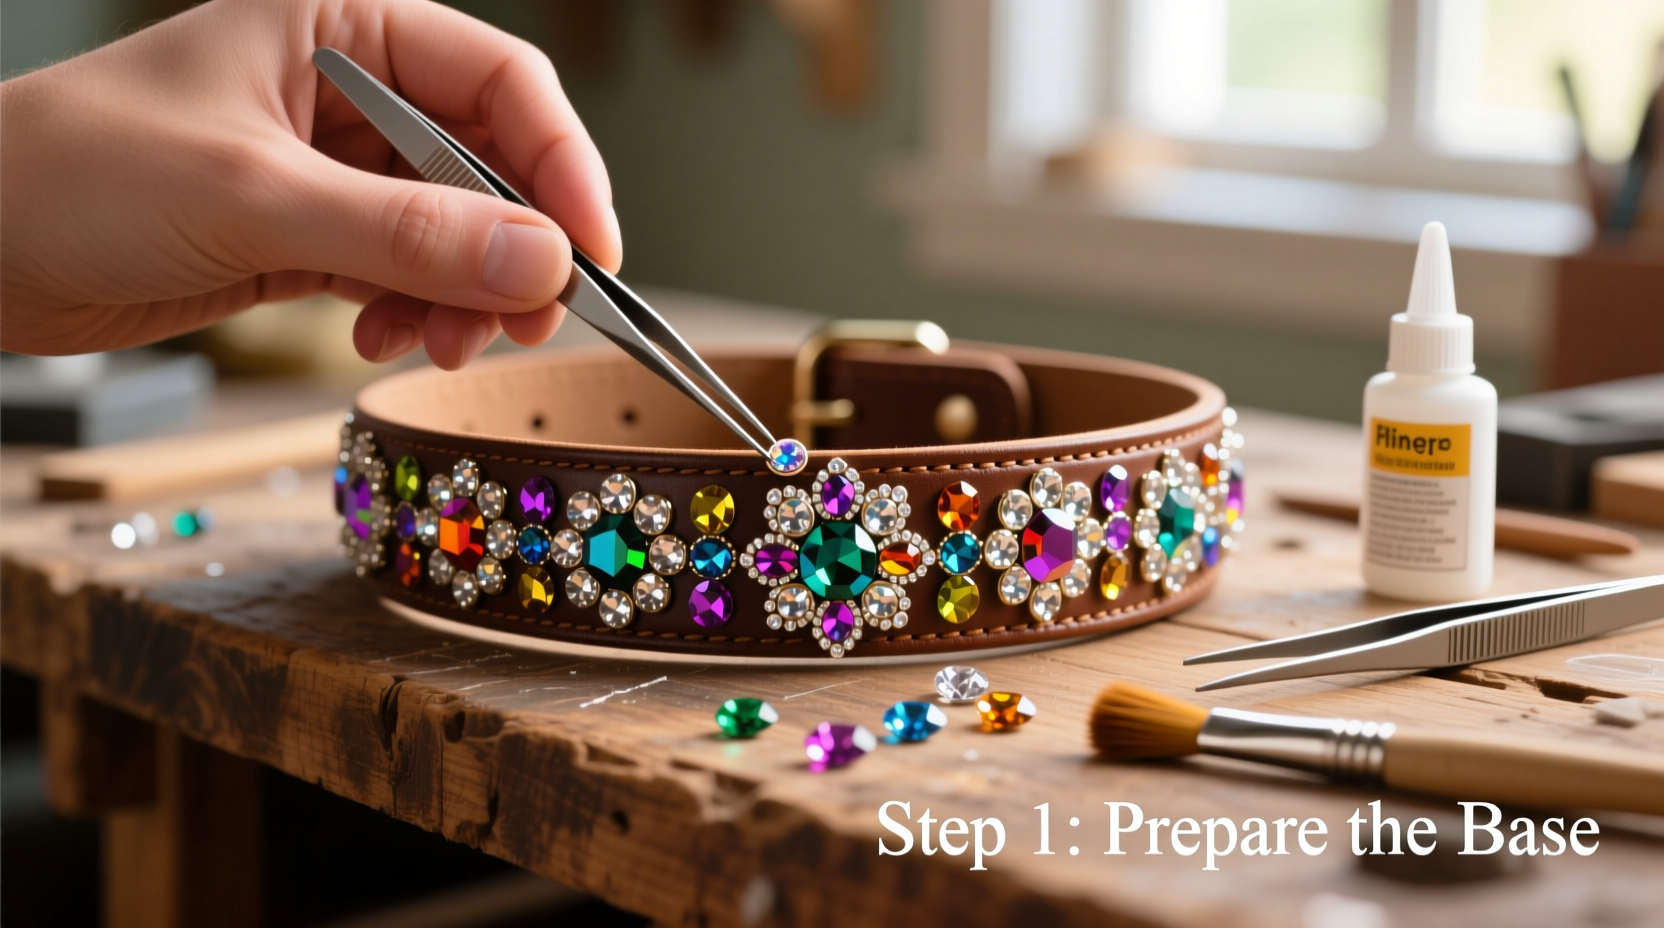
The foundation of a successful project lies in preparation. Gather all supplies before starting to ensure a smooth workflow. Below is a checklist of essential items:
- Durable nylon or leather dog collar (adjustable, with a secure buckle)
- Hot-fix or flat-back rhinestones, crystals, or sequins
- E6000 or Gem-Tac strong adhesive (pet-safe when cured)
- Tweezers or a wax pencil for precise stone placement
- Ruler or measuring tape
- Pencil or fabric marker (erasable)
- Clear nail polish or jewelry resin (for sealing)
- Protective gloves and well-ventilated workspace
- Optional: Stencils, masking tape, glue gun (for larger accents)
Step-by-Step Guide to Designing Your Collar
- Choose the Right Base Collar: Select a collar that fits your dog snugly—one finger should fit between the collar and neck. Avoid overly thick or rigid materials that may hinder movement.
- Clean the Surface: Wipe the collar with rubbing alcohol to remove oils or residue. This ensures better glue adhesion.
- Plan Your Design: Sketch your pattern on paper first. Popular options include symmetrical rows, paw prints, initials, or themed arrangements (e.g., stars, hearts).
- Mark Placement Lightly: Use a fabric marker or chalk to lightly outline where each stone will go. For straight lines, use masking tape as a guide.
- Apply Adhesive Carefully: Squeeze a small amount of E6000 onto a disposable surface. Use a toothpick or applicator to dab glue precisely where each stone will sit.
- Set Each Stone: Using tweezers, place the rhinestone into the glue. Press gently but firmly. Allow 30 seconds for initial hold.
- Work in Sections: Focus on one area at a time. Complete one side before moving to the other to maintain symmetry.
- Cure Overnight: Let the glued stones set undisturbed for at least 12–24 hours in a dust-free environment.
- Seal for Durability: Once dry, apply a thin coat of clear nail polish or jewelry-grade resin over the stones to lock them in place and protect against moisture.
- Final Inspection: Check for loose stones and ensure no sharp points are exposed. Trim excess material if needed.
Design Inspiration and Practical Considerations
Aesthetic appeal matters, but so does functionality. A collar must remain comfortable, safe, and practical for daily wear. Consider these design principles:
- Balanced Embellishment: Avoid covering the entire collar. Leave breathing room near the buckle and contact points to reduce chafing.
- Weight Distribution: Heavy stones or dense patterns can make the collar cumbersome. Limit large crystals to accent areas.
- Wear Context: Save heavily bedazzled collars for events. Use simpler designs for everyday walks to minimize wear and tear.
- Dog’s Temperament: Active dogs may dislodge stones during play. Opt for stronger adhesives and fewer protruding elements.
| Design Style | Best For | Adhesive Tip |
|---|---|---|
| Minimalist (single row of stones) | Daily wear, sensitive dogs | Gem-Tac for flexibility |
| Full-wrap sparkle | Photoshoots, parties | E6000 + resin sealant |
| Initials or monogram | Personalized gifts | Use stencils for alignment |
| Themed (holiday, sports team) | Seasonal events | Combine colors strategically |
Real Example: Bella’s Birthday Collar
Sarah, a dog lover from Portland, wanted to surprise her Shih Tzu Bella on her fifth birthday. She chose a soft pink nylon collar and designed a heart-shaped cluster of rose-gold rhinestones near the buckle, spelling “Bella” in cursive with micro-crystals. She used a printed stencil taped in place, applied Gem-Tac with a precision tip, and sealed the design with two coats of UV-resistant resin. The result was a lightweight, eye-catching collar that survived several outdoor parties—with only one stone needing reattachment after three months of occasional use.
“It wasn’t perfect the first time,” Sarah admitted, “but the effort made it meaningful. Bella gets compliments every time we go to the park.”
“Handmade pet accessories succeed when beauty meets safety. Always prioritize non-toxic materials and structural integrity over sheer sparkle.” — Dr. Lena Reyes, Veterinary Dermatologist & Pet Product Advisor
Frequently Asked Questions
Can I wash a bedazzled dog collar?
Spot clean only. Submerging the collar can weaken the adhesive and loosen stones. Use a damp cloth with mild soap around the embellished areas, then air dry completely.
Are rhinestones safe for dogs?
Yes, if securely attached and free of sharp edges. Monitor your dog closely during the first few wears to ensure they don’t chew or scratch at the stones.
How long do homemade bedazzled collars last?
With proper sealing and care, expect 3–6 months of regular use. Occasional-use collars can last over a year. Reapply sealant every few months to extend life.
Pro Checklist Before Wearing
- ✅ All stones are firmly glued and sealed
- ✅ No exposed sharp edges or loose parts
- ✅ Collar fits comfortably—not too tight
- ✅ Buckle and D-ring function normally
- ✅ Dog shows no signs of irritation after test wear
Making It a Sustainable Hobby
Once you’ve mastered the basics, consider turning this into a creative habit or even a small business. Many pet owners seek unique accessories that reflect their dog’s personality. By refining your technique, sourcing eco-friendly crystals, and offering customization, you can build a loyal audience.
Keep a log of what works—adhesive types, drying times, popular designs. Over time, you’ll develop a signature style and faster workflow.
Conclusion
Creating a stunning bedazzled dog collar at home blends craftsmanship with affection. With careful planning, quality materials, and attention to safety, you can design a piece that’s both beautiful and functional. Every stone you place becomes part of a story—a tribute to the bond between you and your pet.


 浙公网安备
33010002000092号
浙公网安备
33010002000092号 浙B2-20120091-4
Comments
No comments yet. Why don't you start the discussion?