
There’s a quiet luxury in wearing or carrying something handmade—especially when it carries the timeless elegance of pearls. A pearl chain keychain blends sophistication with practicality, turning an everyday object into a statement piece. The good news? You don’t need professional jewelry skills to create one. With basic tools and a little patience, you can craft a delicate, personalized accessory right at your kitchen table. This guide walks you through every stage—from selecting materials to adding the final clasp—with precision and care.
Why Make Your Own Pearl Keychain?
Store-bought pearl accessories often come with a premium price tag, not because of the materials, but due to branding and markup. By making your own, you control quality, design, and cost. Whether you're crafting a gift for a loved one or elevating your everyday carry, a handmade pearl keychain offers customization that mass-produced items can't match. Plus, the process itself is meditative and rewarding, connecting you to the artistry behind fine accessories.
Materials and Tools You’ll Need
Before beginning, gather all necessary supplies. Having everything ready ensures a smooth workflow and prevents mid-project interruptions.
Essential Materials
- Freshwater pearls (4–6mm recommended for balance)
- Sterling silver or gold-plated chain (approx. 12–18 inches)
- Jewelry clasp (lobster or spring ring)
- Jump rings (4mm, 2–3 pieces)
- Crimp beads (size 2mm)
- Beading wire (0.5mm, nylon-coated for flexibility)
- Keyring (stainless steel or brass)
Tools Required
- Chain-nose pliers
- Wire cutters
- Crimping tool (or flat-nose pliers as substitute)
- Measuring tape or ruler
- Soft cloth (to protect pearls during handling)
“Handcrafting jewelry allows personal expression in ways off-the-rack items rarely do.” — Lila Monroe, Artisan Jewelry Designer
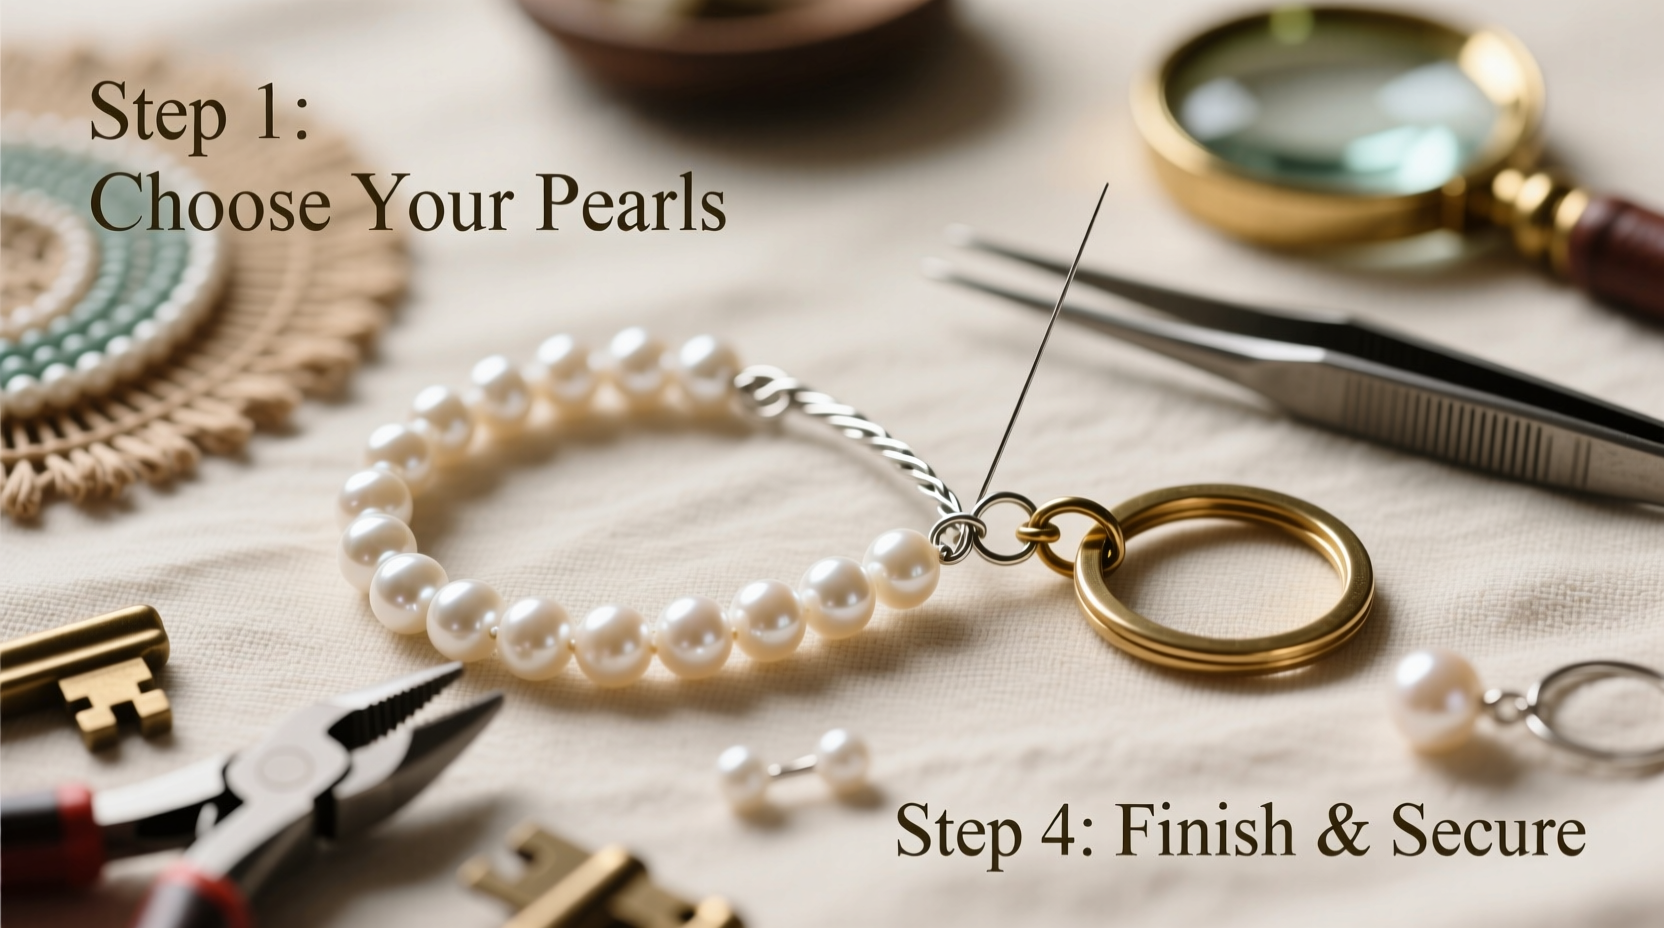
Step-by-Step Assembly Process
Follow these steps carefully to ensure durability and elegance in your finished piece.
- Measure and Cut the Chain: Decide on your desired length—typically 12 to 16 inches works best for a dangling keychain. Use wire cutters to trim the chain precisely. File any sharp ends gently.
- Attach the Clasp: Open a jump ring using pliers (twist sideways, never pull apart). Slide one end onto the clasp and the other end onto the chain. Close securely. Repeat on the opposite end with a second jump ring, but leave it unattached for now.
- String the Pearls: Cut a 20-inch piece of beading wire. Thread on a crimp bead, then pass the wire through the open jump ring on the chain. Loop the wire back through the crimp bead and tighten slightly, leaving no slack. Crimp the bead using the crimping tool to secure it in place. Trim excess wire.
- Create the Pearl Strand: Begin threading pearls onto the wire. For symmetry, aim for an odd number—7 or 9 pearls create balanced visual rhythm. Keep spacing even (about 1–2mm between each) for a refined look.
- Secure the End: After the last pearl, add another crimp bead. Pass the wire through the second jump ring (still unattached), then back through the final crimp bead. Pull taut and crimp firmly. Trim excess wire close to the crimp.
- Add the Keyring: Open the second jump ring again and slide on the keyring along with the free end of the chain. Close securely with pliers.
- Final Check: Gently tug on all connections. Ensure the clasp opens and closes smoothly and that pearls move freely without snagging.
Design Variations and Customization Ideas
Your keychain doesn’t have to follow a single template. Personalize it to reflect taste or occasion.
| Style | Features | Best For |
|---|---|---|
| Classic Elegance | White pearls, silver chain, minimal clasp | Daily wear, office use |
| Luxury Glamour | Rosé pearls, gold chain, crystal accent bead | Gifts, evening events |
| Boho Chic | Mixed pearl sizes, leather-wrapped chain section | Casual outings, creative personalities |
| Monogrammed | Initial charm added near clasp | Personalized presents |
You can also incorporate small charms—a tiny heart for a romantic gift, a star for someone ambitious, or a birthstone for a meaningful touch. Just attach them to a separate jump ring and integrate them into the chain near the clasp.
Common Mistakes and How to Avoid Them
Even simple projects can go awry without attention to detail. Here are frequent pitfalls and their solutions.
- Using weak wire: Thin or non-coated wire frays easily. Always opt for beading wire rated for stringing, not thread.
- Skipping crimps: Knots aren’t secure enough. Crimp beads provide lasting hold when properly compressed.
- Over-tightening pliers: This can scratch metal or crush pearls. Apply gentle, even pressure.
- Uneven spacing: Measure consistently. Use a spacer tool or cut a small cardboard gauge for accuracy.
“A well-made keychain should feel substantial, not flimsy. Every connection must withstand daily jostling.” — Rafael Kim, Micro-Jewelry Artisan
Mini Case Study: Sarah’s Bridal Shower Gift
Sarah wanted to give her best friend a unique keepsake for her bridal shower. Instead of another candle or robe, she decided to make personalized pearl keychains for each guest—and one extra special version for the bride. She used ivory freshwater pearls, rose-gold chains, and attached tiny “love” stamped charms. Each came in a velvet pouch with a handwritten note. Guests were moved by the thoughtfulness, and the bride later told Sarah she uses hers every day—“It reminds me of my favorite people.”
The total cost per keychain was under $8, and Sarah completed all seven in a single Sunday afternoon. Her success came from pre-measuring components and laying out each set before assembly.
Care and Maintenance Tips
To preserve luster and function, treat your pearl keychain with care.
- Wipe pearls gently with a soft, damp cloth after use to remove oils.
- Store separately in a fabric-lined box to prevent scratches.
- Avoid exposure to perfume, hairspray, or chlorine.
- Inspect jump rings monthly for signs of wear or loosening.
FAQ
Can I use fake pearls instead of real ones?
Yes. High-quality simulated pearls (like those made by Majorica) offer excellent shine and durability at lower prices. They’re ideal for beginners or outdoor use.
How long does it take to make one keychain?
For a first-time maker, allow 30–45 minutes. With practice, you can complete one in under 20 minutes.
Is this safe to wash or clean with water?
No. Water can weaken glue in clasps and damage pearl coatings. Spot-clean only with a dry or slightly damp cloth.
Conclusion: Craft Beauty in the Everyday
A keychain is more than a tool—it’s a small canvas for self-expression. Creating your own pearl chain version transforms a mundane object into a piece of wearable art. With accessible materials, clear technique, and a few hours of focused time, you can produce something both functional and beautiful. Whether worn by you or gifted to someone special, this handmade creation carries a story: that care, craftsmanship, and elegance begin at home.


 浙公网安备
33010002000092号
浙公网安备
33010002000092号 浙B2-20120091-4
Comments
No comments yet. Why don't you start the discussion?