
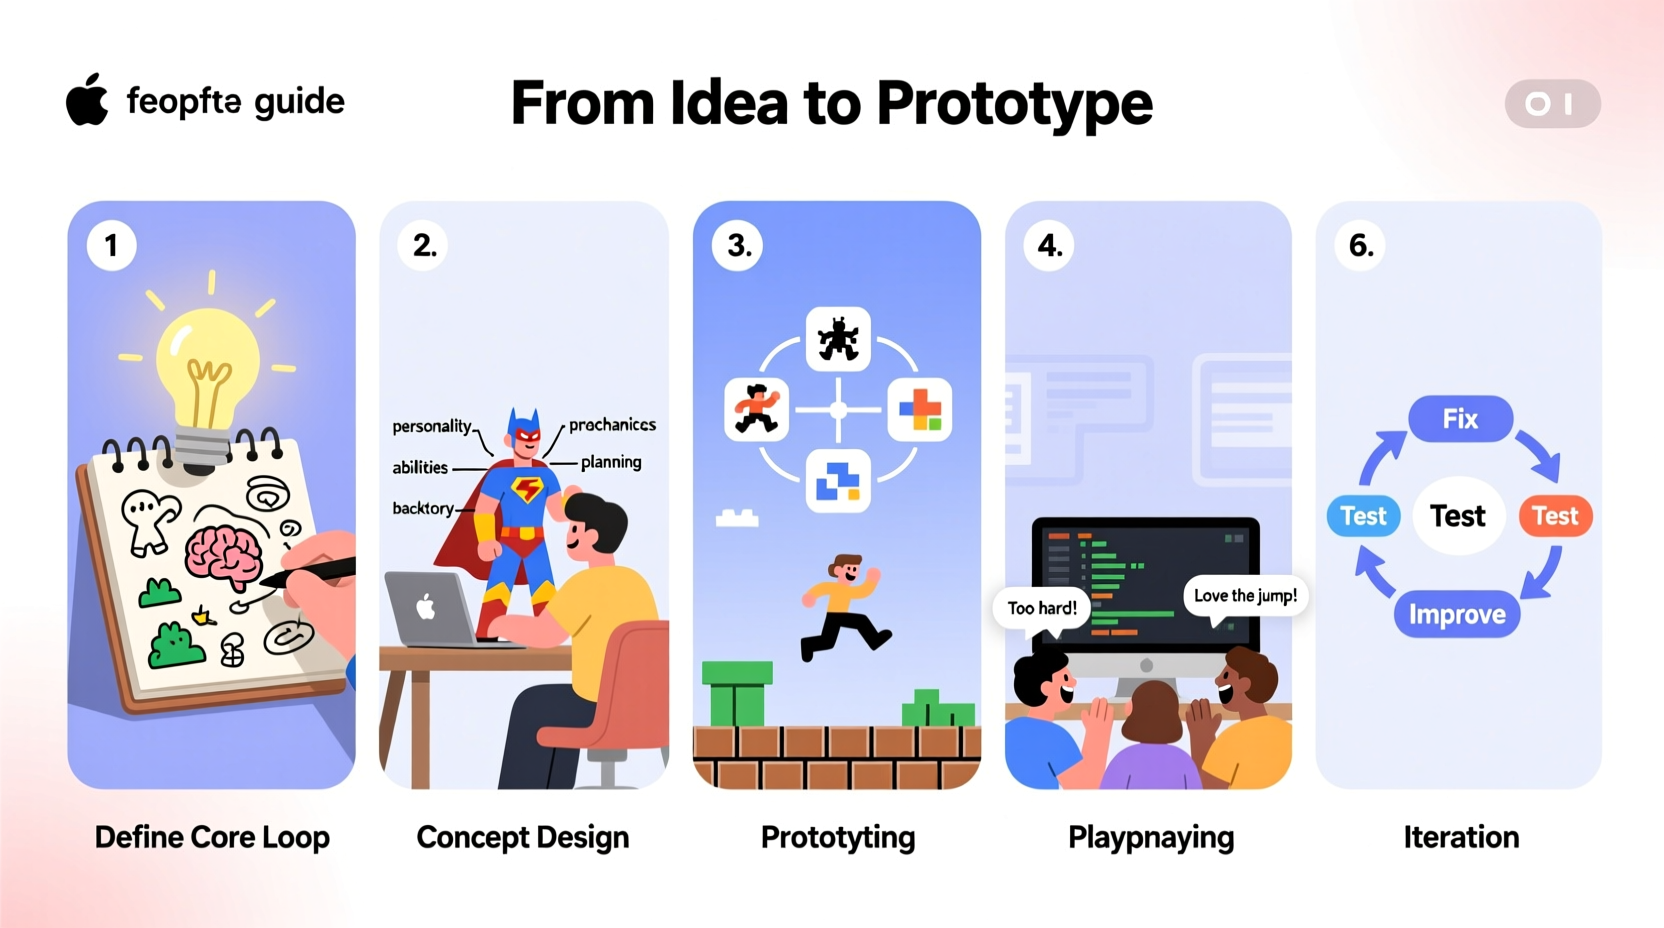
Creating a video game may seem like a monumental task, especially for beginners. But every major studio started with a single idea and a working prototype. The key is breaking the process into manageable steps. From brainstorming mechanics to building a functional demo, this guide walks through the essential stages of game development with clarity and purpose. Whether you're an indie developer or a hobbyist, following this structured approach will help you turn your vision into a playable experience.
1. Define Your Game Concept
The foundation of any successful game begins with a clear, focused idea. Avoid vague notions like “an epic adventure” and instead ask specific questions: What does the player do? What makes it fun? What’s the core challenge? Start by writing a one-sentence pitch. For example: “A puzzle-platformer where time rewinds when you jump.” This forces clarity and helps you evaluate whether the concept is compelling enough to pursue.
Focus on a minimal viable concept—one that can be tested quickly without requiring hundreds of assets or complex systems. Many successful games began as small experiments. Consider limitations as creative tools rather than obstacles.
Ask These Questions Before Proceeding:
- What genre am I targeting?
- Who is my ideal player?
- What emotion or experience should the game evoke?
- Is there a unique mechanic or twist?
2. Design Core Mechanics and Rules
Once you have a concept, define the core gameplay loop—the sequence of actions players repeat throughout the game. Is it jump-shoot-dodge? Collect-upgrade-explore? Map this out early. Then identify the primary mechanics: movement, interaction, combat, progression, etc.
Write down the rules clearly. For instance: “The player loses health if hit by enemies,” or “Coins collected unlock new levels.” These rules form the backbone of your design document, which doesn’t need to be lengthy—a single page with bullet points and sketches often suffices at this stage.
“Prototyping fast and failing early saves months of wasted effort.” — Rami Ismail, co-founder of Vlambeer and advocate for indie game development
Essential Elements to Document:
- Player controls and abilities
- Win/lose conditions
- Scoring or progression system
- Enemy or obstacle behavior (if applicable)
- Basic level structure
3. Choose Tools and Build a Prototype
Selecting the right tools is critical. You don’t need expensive software to start. Free engines like Godot, Unity, or Construct offer robust environments for 2D and 3D prototypes. For beginners, Godot is lightweight and open-source; Unity has extensive tutorials but a steeper learning curve.
Your goal isn’t a polished product—it’s a playable version that tests your core mechanic. Use placeholder graphics (simple shapes), basic sounds, and minimal UI. Focus on making the central gameplay feel responsive and fun. Can the player jump accurately? Does the puzzle logic hold up? Iterate based on immediate feedback.
| Tool | Best For | Learning Curve | Cost |
|---|---|---|---|
| Godot | 2D platformers, top-down games | Moderate | Free |
| Unity | 3D games, cross-platform builds | High | Free (with revenue threshold) |
| Construct | Beginners, no-code prototyping | Low | Free trial, paid license |
| GameMaker Studio | Rapid 2D development | Low to Moderate | Free trial, paid export |
Prototype Development Timeline (2–4 Weeks):
- Week 1: Set up project, implement basic movement
- Week 2: Add core mechanic (e.g., shooting, jumping, solving)
- Week 3: Create one complete level or scenario
- Week 4: Test, fix bugs, gather feedback
4. Playtest and Iterate
No amount of planning replaces real player feedback. Share your prototype with friends, online communities, or fellow developers. Observe how they interact with the game. Do they understand the objective? Are they frustrated by unclear controls? Take notes without defending your design—listen, learn, and revise.
Common issues in early prototypes include unresponsive controls, confusing UI, or lack of engagement. Fix one problem at a time. Small adjustments—like increasing jump height or adding visual cues—can dramatically improve the experience.
Mini Case Study: \"Ledge Leap\"
A developer created a platformer where players had to precisely time jumps between disappearing platforms. Early testers consistently failed within seconds. After observation, the issue wasn’t difficulty—it was feedback. Players couldn’t predict when platforms would vanish. By adding a brief fade animation before disappearance, success rates doubled. The mechanic remained challenging, but now it felt fair. This highlights how subtle design changes impact playability more than complex features.
5. Expand Toward a Complete Experience
With a solid prototype, you can begin expanding. Add more levels, refine visuals, polish sound effects, and introduce secondary mechanics. But avoid scope creep—don’t add multiplayer or a crafting system unless it directly supports your core loop.
Break development into milestones: “Complete three levels,” “Implement score tracking,” “Add menu screen.” Use free asset stores for temporary art and music, or create simple pixel graphics using tools like Piskel or Aseprite.
Checklist: From Prototype to Playable Demo
- ✅ Core mechanic implemented and tested
- ✅ At least one complete level designed
- ✅ Basic UI showing score, lives, or progress
- ✅ Sound feedback for key actions (jump, collect, die)
- ✅ Exported build for others to test
- ✅ Feedback gathered and top issues addressed
Frequently Asked Questions
Do I need to know how to code to make a game?
Not necessarily. Tools like Construct, GDevelop, or Bitsy allow you to create games visually, using drag-and-drop logic. However, learning basic scripting (e.g., C# for Unity, GDScript for Godot) gives you far greater control and flexibility as your project grows.
How long does it take to build a prototype?
A simple playable prototype can take anywhere from 3 days to 4 weeks, depending on complexity and your familiarity with the tools. The key is starting small and focusing only on what’s essential to test your idea.
What if my game isn’t fun?
That’s normal. Most prototypes aren’t fun at first. Identify what’s missing—feedback, pacing, challenge—and tweak iteratively. Sometimes removing features creates more enjoyment than adding them.
Conclusion
Creating a game from scratch is a journey of iteration, creativity, and problem-solving. By starting with a clear concept, building a lean prototype, and refining through feedback, you lay the groundwork for something truly engaging. The difference between dreaming about a game and making one lies in taking that first actionable step—opening a game engine, coding a moving square, testing a single jump.


 浙公网安备
33010002000092号
浙公网安备
33010002000092号 浙B2-20120091-4
Comments
No comments yet. Why don't you start the discussion?