
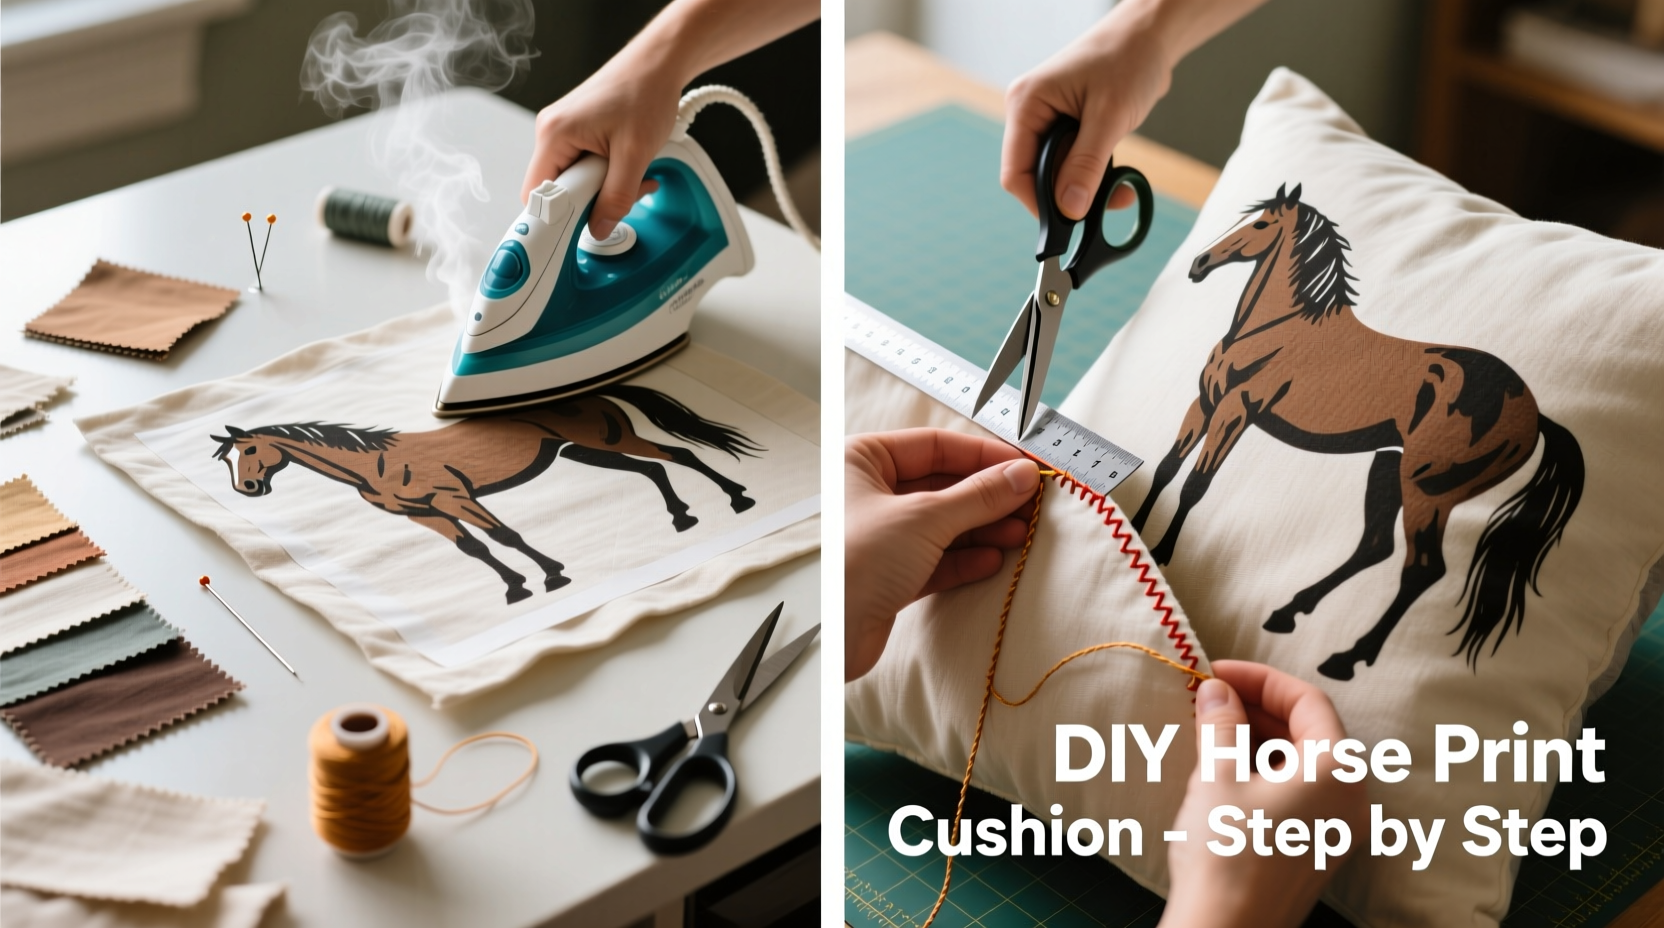
Creating a custom horse print cushion cover is a rewarding DIY project that adds a personal touch to your living space, bedroom, or stable-themed room. Whether you're an equestrian enthusiast, a horse lover, or simply drawn to the elegance of equine art, this guide walks you through every stage—from choosing the right fabric to sewing the final stitch. The result is a one-of-a-kind decorative piece that reflects your style and passion, all made in your own home with minimal tools.
Selecting the Right Materials
The foundation of a high-quality cushion cover lies in the materials you choose. Fabric selection affects durability, appearance, and ease of printing. For a horse print design, cotton-linen blends or 100% cotton are ideal due to their print receptivity and soft texture. These natural fibers accept ink well when using transfer methods and hold up over time with proper care.
Fabric weight matters too. A medium-weight fabric (around 4.5–6 oz per square yard) offers structure without being too stiff. Avoid overly thin materials as they may wrinkle or tear easily. If you plan to wash the cover frequently, pre-wash the fabric before starting to prevent shrinkage later.
You’ll also need:
- A cushion insert (typically 16x16 or 18x18 inches)
- Sewing machine or needle for hand stitching
- Matching thread
- Scissors or rotary cutter
- Pins or clips
- Iron and ironing board
- Measuring tape
Designing and Printing Your Horse Art
The visual impact of your cushion comes from the printed image. You can use a photograph of your own horse, a classic equestrian painting, or a stylized vector illustration. Ensure the image resolution is at least 300 DPI for clarity when enlarged to fit the cushion front.
There are two main methods for transferring your horse print onto fabric:
- Inkjet Transfer Paper: Print your mirrored image onto special transfer paper using an inkjet printer, then iron it onto cotton fabric. This method works best for small batches and detailed artwork.
- Sublimation Printing: Requires sublimation ink, a compatible printer, and polyester-blend fabric. Heat transfers the dye permanently into the fibers, resulting in vibrant, long-lasting prints.
If you don’t own a printer, many local print shops offer fabric printing services. Upload your digital file and select cotton or poly-cotton material for optimal results.
| Printing Method | Best For | Durability | Cost Estimate |
|---|---|---|---|
| Inkjet Transfer | Home projects, cotton fabrics | Good (may fade over time) | $15–$30 |
| Sublimation | Bright colors, polyester blends | Excellent (colorfast) | $25–$50 (setup included) |
| Professional Fabric Print | High-detail images, no equipment | Very Good | $30–$60 |
Sewing the Cushion Cover
With your printed fabric ready, it’s time to assemble the cover. This version includes an envelope closure on the back, eliminating the need for zippers or buttons while maintaining a clean look.
- Cut two rectangles: one for the front (featuring the horse print) and one or two for the back. Each should be 1 inch larger than your cushion insert on all sides. For a 16x16 inch insert, cut 18x18 inch squares.
- If using two back panels, cut one to 18x12 inches and another to 18x8 inches. These will overlap to form the envelope.
- Place the front and back pieces together with the right (printed) sides facing inward. Pin around the edges.
- Sew a ½-inch seam along all four sides. Reinforce corners with backstitching.
- Trim excess fabric and clip corners diagonally to reduce bulk.
- Turn the cover right-side out through the open back (or between overlapping panels).
- Use a blunt tool like a chopstick to push out corners neatly.
- Press the seams flat with an iron on low heat, especially along edges.
- If using overlapping back panels, fold the inner edges under ½ inch and press, then topstitch in place for a clean finish.
Real Example: Sarah’s Equestrian Bedroom Makeover
Sarah, a dressage rider from Vermont, wanted to personalize her guest room with a horse theme. She selected a black-and-white photo of her mare mid-canter, resized it to 17x17 inches, and used iron-on transfer paper with her home printer. After testing on a scrap piece, she applied the image to a pre-washed cotton-linen blend. She sewed the envelope-back cover by hand during evenings after work, finishing in three sessions. The final product became a conversation starter, admired by guests and fellow riders alike. “It feels more meaningful than buying something generic,” she said. “Every time I see it, I remember that perfect moment in the arena.”
Expert Insight on Fabric Artistry
“Transferring personal imagery onto textiles transforms functional items into emotional keepsakes. The key is preparation—clean fabric, correct image orientation, and secure seams.” — Lena Torres, Textile Artist & DIY Instructor
Checklist: Create Your Horse Print Cushion Cover
- ☐ Choose a high-resolution horse image (300 DPI minimum)
- ☐ Select and pre-wash fabric (cotton or cotton blend recommended)
- ☐ Print the image using transfer paper, sublimation, or professional service
- ☐ Cut front and back fabric pieces (1 inch larger than insert)
- ☐ Pin front and back with right sides together
- ☐ Sew around edges with ½-inch seam allowance
- ☐ Trim corners and turn right-side out
- ☐ Press seams flat with iron
- ☐ Insert cushion and enjoy your handmade creation
Frequently Asked Questions
Can I wash the printed cushion cover?
Yes, but with care. Turn the cover inside out and use cold water on a gentle cycle. Air dry or tumble dry on low to preserve the print. Avoid bleach and strong detergents.
What if I don’t have a sewing machine?
You can hand-sew the cover using a backstitch for strength. It will take longer, but the results are just as durable. Use a thimble to protect your fingers and keep stitches even at about 8–10 per inch.
How do I prevent the print from cracking over time?
After applying an iron-on transfer, lightly press a parchment paper over the image and iron again to seal the ink. Avoid folding directly on the printed area during storage.
Final Thoughts
Making your own horse print cushion cover combines creativity, craftsmanship, and sentiment. It’s more than a decor project—it’s a way to celebrate your connection with horses in a tangible, everyday object. With accessible tools and a clear process, anyone can create something beautiful and lasting. The satisfaction of seeing your design come to life on a cozy, functional piece is unmatched by store-bought alternatives.


 浙公网安备
33010002000092号
浙公网安备
33010002000092号 浙B2-20120091-4
Comments
No comments yet. Why don't you start the discussion?