
Crocheting is more than just a craft—it’s a creative outlet that turns simple yarn into wearable art, home décor, and charming accessories. Among the most delightful beginner projects is the mini ice cream keychain: small, playful, and surprisingly simple to make. With just a few basic stitches and minimal materials, you can create a whimsical accessory that doubles as a gift, bag charm, or personal keepsake. This guide walks you through every stage of making your own crochet ice cream keychain, even if you’ve never held a hook before.
What You’ll Need to Get Started
Before diving into the pattern, gather the essential supplies. The beauty of this project lies in its simplicity—most items are affordable and widely available at craft stores or online.
- Yarn: Use light worsted weight (category 3) cotton or acrylic yarn. Choose soft pastel colors like pink, mint, or yellow for the ice cream; brown or beige for the cone.
- Crochet Hook: A 3.5 mm (E/4) hook works best with this yarn weight.
- Stitch Marker: A small ring or piece of scrap yarn to mark the beginning of each round.
- Tapestry Needle: For weaving in ends and sewing parts together.
- Scissors: Sharp fabric scissors for clean cuts.
- Keychain Ring: A metal or plastic split ring (about 1 inch in diameter).
- Fiber Fill (optional): If you want a slightly puffy ice cream scoop.
Mastering the Basic Stitches
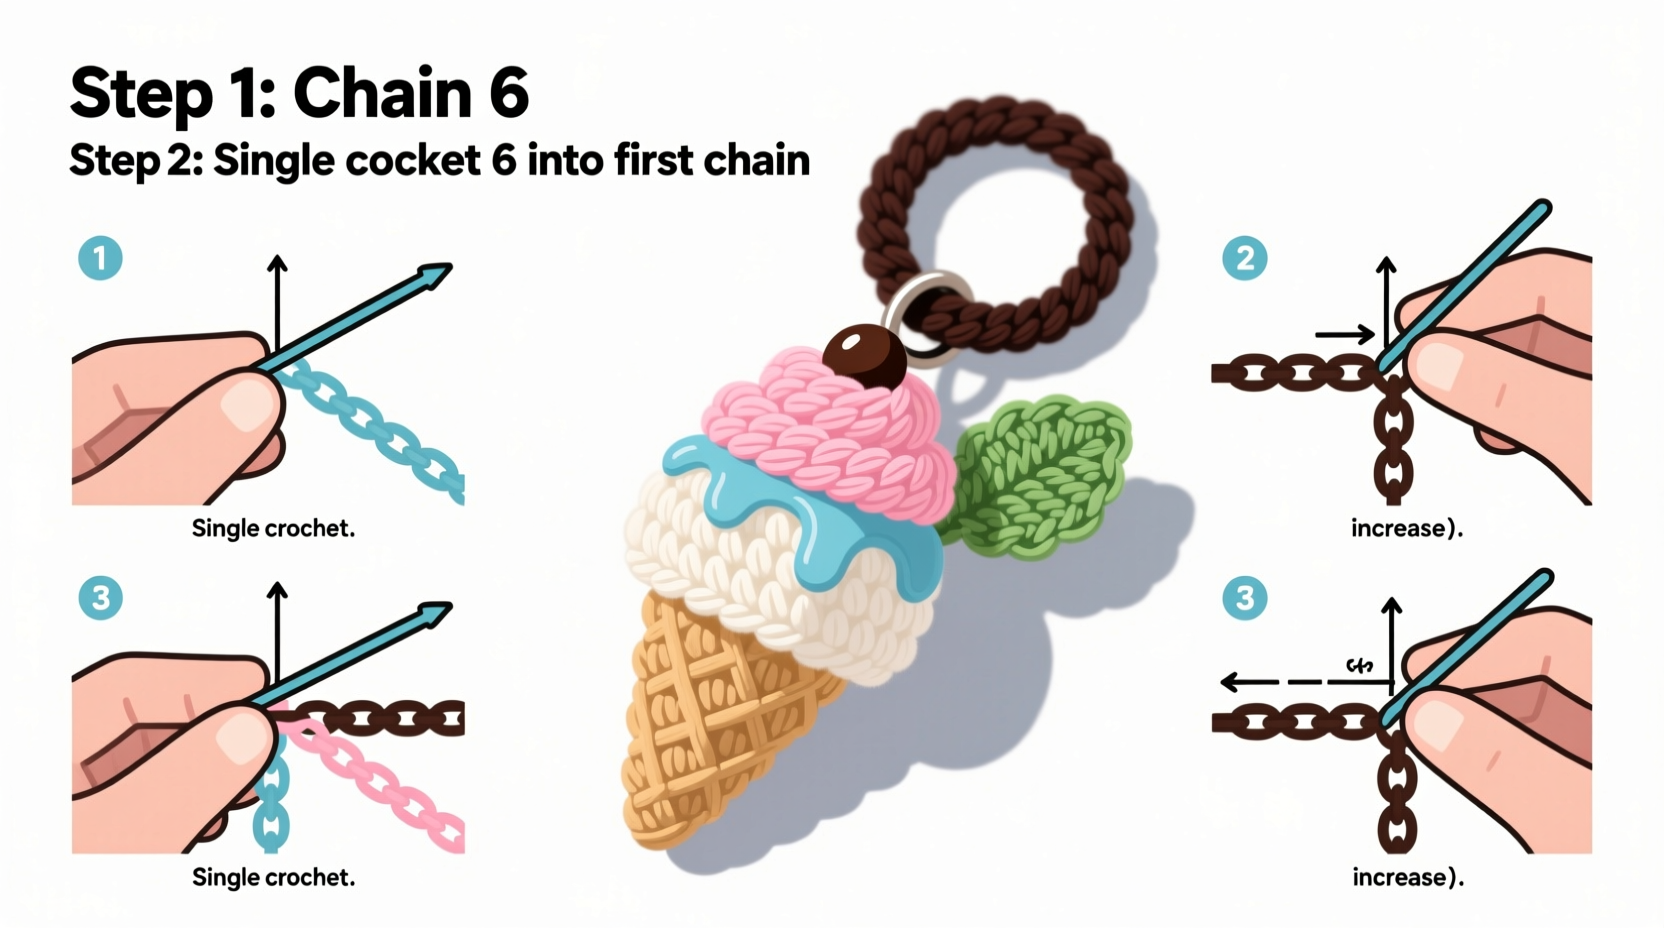
This project uses only two fundamental stitches: the single crochet (sc) and the magic ring (also called adjustable ring). No prior experience? No problem.
The single crochet is compact and tight, ideal for amigurumi-style pieces that hold shape. Insert the hook into the stitch, yarn over, pull up a loop (two loops on hook), yarn over again, and pull through both loops.
The magic ring creates a closed center circle—essential for starting rounds without leaving a hole. Wrap yarn around your fingers, form a loop, insert the hook, pull up a loop, chain one, then work the specified number of single crochets into the loop. Pull the tail to tighten the center.
“Amigurumi teaches patience and precision. Starting with small projects like keychains builds muscle memory and confidence.” — Lena Park, Fiber Arts Instructor
Step-by-Step Construction
Follow this clear sequence to assemble your mini ice cream keychain. Work in continuous rounds using the spiral method (do not join unless specified). Use a stitch marker to track the first stitch of each round.
Part 1: The Ice Cream Scoop (Pink or Chosen Color)
- Round 1: Make a magic ring, 6 sc into the ring. (6)
- Round 2: Inc in each stitch around. (12)
- Round 3: *Sc in next stitch, inc in next*; repeat around. (18)
- Round 4: *Sc in next 2 stitches, inc in next*; repeat around. (24)
- Rounds 5–6: Sc in each stitch around. (24)
- Optionally, add a small pinch of fiber fill now for volume.
- Round 7: *Sc in next 2 stitches, dec (single crochet two together)*; repeat around. (18)
- Round 8: *Sc in next stitch, dec*; repeat around. (12)
- Fasten off, leaving a 6-inch tail for sewing.
Part 2: The Cone (Brown or Beige)
- Round 1: Magic ring, 6 sc. (6)
- Round 2: Inc in each stitch. (12)
- Round 3: *Sc in next stitch, inc*; repeat around. (18)
- Rounds 4–5: Sc in each stitch around. (18)
- Do not stuff. Flatten slightly to mimic a real waffle cone.
- Fasten off, leave a 6-inch tail.
Assembly
- Align the top of the cone with the bottom edge of the ice cream scoop.
- Using the tapestry needle and leftover tails, sew the two pieces together with whip stitches around the rim.
- Weave in all remaining ends securely.
- Attach the keychain ring by threading it through the top of the ice cream scoop before closing the final stitches—or use yarn to tightly bind the ring to the top.
Customization Ideas and Creative Variations
Once you’ve completed your first keychain, experiment with variations to personalize your design:
- Flavors: Try mint chocolate chip (green with black speckles), cookies and cream (black with white “chunks”), or strawberry swirl (pink with white ribbons).
- Sprinkles: Use embroidery floss to add tiny French knots on top for colorful sprinkles.
- Double Scoops: Make two scoops and stack them with a thin layer of stuffing in between.
- Seasonal Themes: Red and green for holiday treats, orange for pumpkin spice, or pastel shades for spring.
| Variation | Materials Needed | Difficulty Level |
|---|---|---|
| Single Scoop | One color, basic yarn | Beginner |
| Swirl Cone | Two cone colors, striping technique | Easy |
| Ice Cream Sandwich | Brown for cookies, white filling | Intermediate |
| Glow-in-the-Dark Scoop | Specialty phosphorescent yarn | Beginner |
Common Pitfalls and How to Avoid Them
Even simple projects come with common mistakes. Being aware of these helps you finish strong.
- Hole in the center of Round 1
- Use a magic ring instead of chaining two and working into the first chain. Pull tight after completing the round.
- Uneven tension
- Keep your yarn grip consistent. If stitches feel too tight, switch to a slightly larger hook.
- Ice cream won’t sit flat on the cone
- Ensure both pieces have the same stitch count on the joining edge. Adjust shaping if needed during assembly.
- Keychain ring comes loose
- Secure it with multiple wraps of yarn and a double knot. Consider adding a drop of fabric glue for extra hold.
Real-Life Example: Sarah’s First Crochet Success
Sarah, a college student with no crafting background, picked up crocheting during finals week as a stress-relief tool. She found a video tutorial but felt overwhelmed—until she discovered mini keychain patterns. Her first attempt at the ice cream keychain had loose stitches and a lopsided cone, but she persisted. By her third try, her tension improved, and she added rainbow sprinkles with embroidery floss. She now makes them for friends as birthday gifts and sells a few at campus craft fairs. “It started as a distraction,” she says, “but now I feel proud every time someone clips one onto their backpack.”
Beginner Checklist: Your First Keychain Project
Stay organized with this quick-reference checklist:
- ☑ Gather yarn, hook, needle, scissors, and keychain ring
- ☑ Practice single crochet and magic ring on scrap yarn
- ☑ Count stitches carefully each round
- ☑ Use a stitch marker to track rounds
- ☑ Sew pieces neatly and weave in all ends
- ☑ Attach the keychain ring securely
- ☑ Take a photo and celebrate your creation!
Frequently Asked Questions
Can I wash my crochet keychain?
Yes, but gently. Hand wash with mild soap and lay flat to dry. Avoid wringing or machine washing, which can distort the shape.
I’m left-handed—can I still follow this pattern?
Absolutely. Crochet is adaptable. Many left-handed crafters mirror the techniques or use tutorials filmed from alternate angles. The stitches function the same regardless of hand dominance.
What if I run out of yarn mid-project?
If you need more yarn, try to match the dye lot. For such a small item, even a different brand in the same color can work discreetly, especially for the cone.
Final Thoughts and Next Steps
Creating a mini ice cream keychain is more than just a craft—it’s a gateway into the world of crochet. Each stitch builds confidence, focus, and creativity. What begins as a five-inch charm can spark a lifelong hobby. Once you’ve mastered this pattern, consider branching out to other amigurumi figures: cupcakes, fruits, animals, or seasonal icons. The skills you develop here—tension control, shaping, and assembly—are foundational for more complex projects.


 浙公网安备
33010002000092号
浙公网安备
33010002000092号 浙B2-20120091-4
Comments
No comments yet. Why don't you start the discussion?