
Personalizing everyday items transforms them from functional objects into expressions of individuality. A 20oz stainless steel cup is not just a reliable companion for coffee, tea, or water—it’s a blank canvas waiting for creativity. Adding custom cartoon designs elevates its appeal, making it a standout piece for personal use or as a thoughtful handmade gift. With the right tools and approach, anyone can create a long-lasting, professional-looking design at home. This guide walks you through every phase, from concept to final seal, ensuring durability and visual impact.
Selecting the Right Materials
The foundation of a successful customization project lies in choosing appropriate supplies. Not all markers, paints, or adhesives bond well with stainless steel, especially when exposed to moisture and temperature changes. Begin by gathering the following essentials:
- 20oz stainless steel tumbler (preferably with a smooth, matte finish)
- High-quality oil-based paint pens (e.g., Posca, Sharpie Oil-Based Paint Markers)
- Fine-tip detailing brushes (size 0 or 1)
- Isopropyl alcohol (70% or higher) and lint-free cloth
- Pencil and eraser (for light sketching)
- Printed cartoon reference image (optional)
- Clear waterproof sealant (epoxy resin or food-safe polyurethane spray)
- Painter’s tape (if creating clean borders)
Design Planning and Transfer
Before applying any permanent marks, plan your cartoon design carefully. Consider the curvature of the cup—elements may appear distorted if not adjusted. Choose a character or scene that fits within the vertical space, typically 5–6 inches tall on a 20oz tumbler.
Start by printing or digitally resizing your cartoon reference. Use tracing paper or the “grid method” to scale the image proportionally. Lightly sketch the outline onto the cup using a pencil. Stainless steel doesn’t erase cleanly, so apply minimal pressure and refine lines only after confirmation.
“Sketching lightly allows room for correction without damaging the surface. Precision at this stage saves time during painting.” — Jordan Lee, DIY Craft Specialist
If freehand drawing isn't your strength, consider printable vinyl decals. Print your cartoon design on waterslide decal paper, cut it out, and adhere it to the cup following manufacturer instructions. This method offers crisp detail and consistency, ideal for complex characters.
Step-by-Step Painting Process
Once the sketch is finalized, begin painting with control and patience. Follow this timeline for best results:
- Day 1 – Surface Prep: Clean the cup thoroughly with isopropyl alcohol. Wipe dry with a lint-free cloth. Avoid touching the surface afterward to prevent oil transfer.
- Day 1 – Base Colors: Apply broad areas of color using paint pens or thin brush layers. Allow 2–3 hours to dry before adding details.
- Day 2 – Detailing: Use fine-tipped pens or small brushes to add facial features, outlines, shading, and highlights. Work under good lighting to maintain precision.
- Day 3 – Touch-Ups: Review the design in natural light. Correct inconsistencies and reinforce faded sections. Let dry completely for 24 hours before sealing.
For layered effects, build colors gradually. Thin coats prevent smudging and allow better control. If using paint pens, cap them immediately after use to avoid drying.
| Paint Type | Pros | Cons |
|---|---|---|
| Oil-Based Paint Pens | Durable, precise, wide color range | Requires curing; some brands fade over time |
| Acrylic Paint + Medium | Customizable, affordable | Poor adhesion without primer; may chip |
| Enamel Paint | High gloss, scratch-resistant | Long drying time; strong fumes |
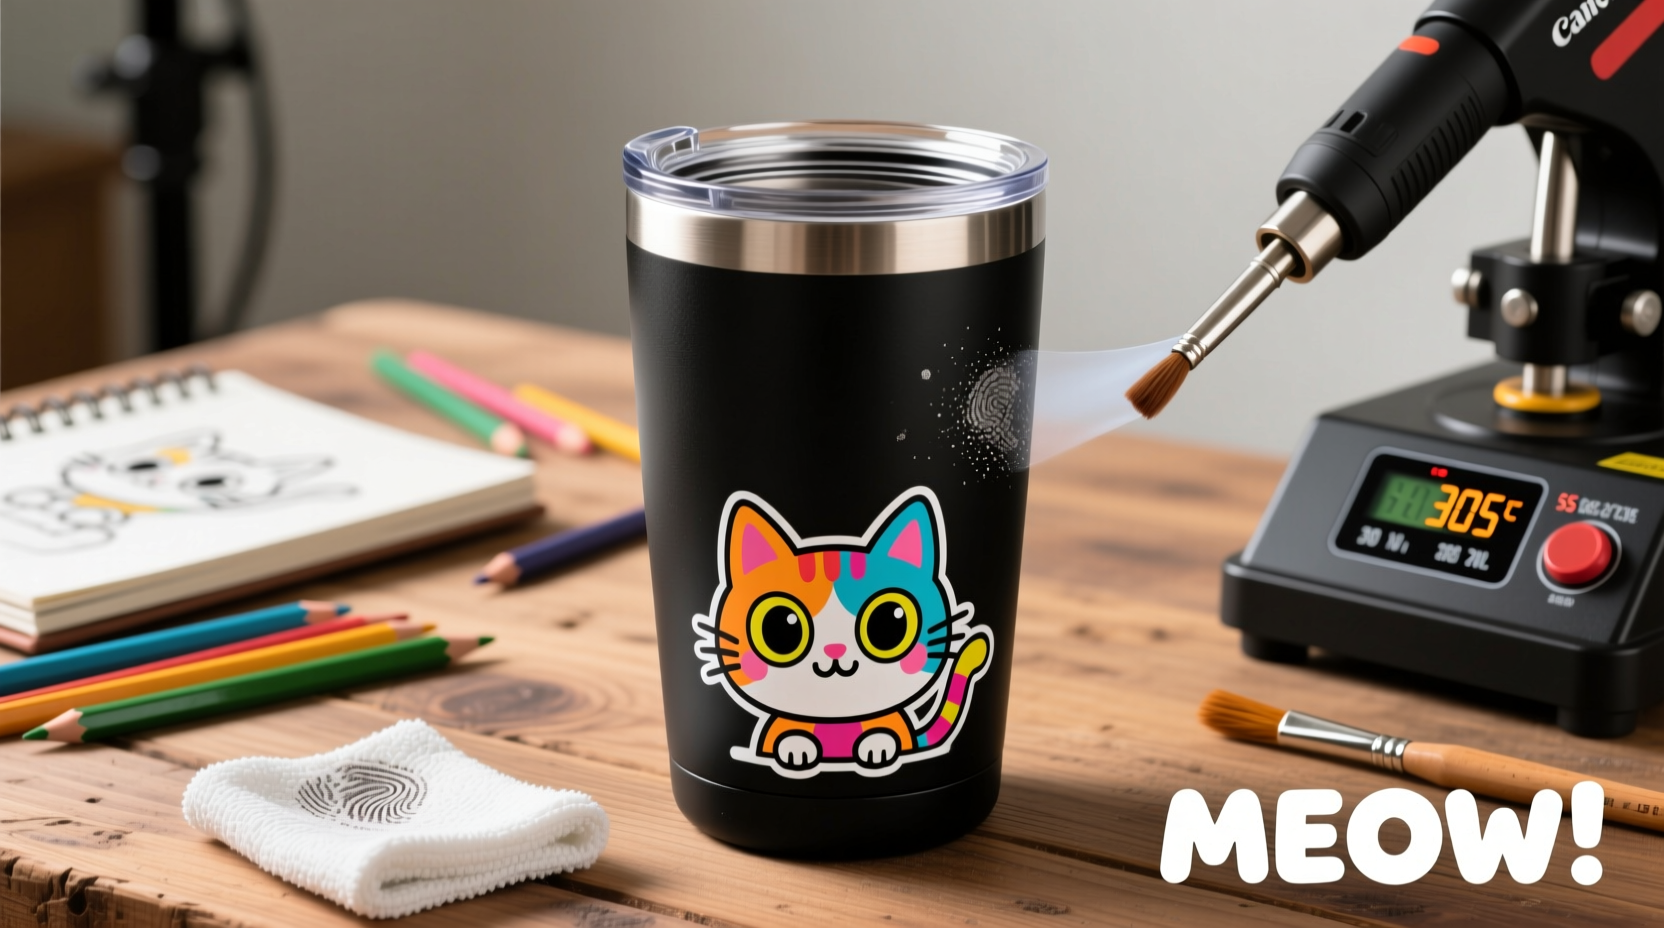
Curing and Sealing for Longevity
A painted design is vulnerable until properly sealed. To withstand washing and daily wear, apply a waterproof topcoat. Two effective options are epoxy resin and spray-on polyurethane.
Epoxy resin creates a glass-like finish that enhances vibrancy and protects against scratches. Mix according to instructions, pour a thin layer over the design, and let it self-level. Use a heat gun or torch briefly to remove bubbles. Cure for 24–48 hours in a flat, dust-free space.
Spray sealants offer easier application. Choose a food-safe, UV-resistant formula. Hold the can 8–10 inches from the cup and apply 2–3 light coats, allowing 15 minutes between layers. Full cure takes 72 hours.
“Without proper sealing, even the most detailed artwork will degrade within weeks. The sealant is non-negotiable for durability.” — Maria Tran, Handcrafted Home Goods Artisan
Avoid submerging the cup in water or placing it in the dishwasher, even after sealing. Hand wash gently with a soft sponge to preserve the design.
Real Example: Custom Cup for a Birthday Gift
Samantha wanted to surprise her niece with a personalized cup featuring her favorite anime character. She started with a plain matte black tumbler and printed a high-resolution image of the character in a dynamic pose. Using the grid method, she scaled the face and upper body to fit the cup’s front panel.
She sketched lightly with a white pencil (visible on dark metal), then used white and pastel-colored paint pens for base tones. Fine black liners defined the eyes and hair. After two days of drying and touch-ups, she applied three coats of glossy spray sealant. The final result was vibrant, sharp, and resistant to fingerprints. Her niece used it daily for over six months with no fading or peeling.
Common Mistakes to Avoid
- Rushing the drying process between layers, causing smears
- Using water-based markers that don’t adhere to metal
- Skipping surface cleaning, leading to poor paint adhesion
- Applying thick sealant coats that drip or cloud the design
- Exposing the cup to heat or moisture before full cure
FAQ
Can I put my customized cup in the dishwasher?
No. Even with sealing, repeated exposure to high heat and detergents will degrade the paint and coating over time. Always hand wash gently.
How long does the entire customization process take?
Active work spans 3–5 hours across several days, but total time including drying and curing is 3–5 days. Patience ensures longevity.
Will the cartoon design fade in sunlight?
Direct, prolonged UV exposure can cause fading. Store the cup away from windows or use a UV-protective sealant to minimize damage.
Checklist: Customize Your Cartoon Cup Successfully
- ☐ Choose a smooth, clean 20oz stainless steel cup
- ☐ Select a cartoon design and scale it appropriately
- ☐ Gather paint pens, brushes, alcohol, and sealant
- ☐ Clean the cup surface thoroughly
- ☐ Lightly sketch the design with a pencil
- ☐ Apply base colors and let dry for 2–3 hours
- ☐ Add details and outlines the next day
- ☐ Perform touch-ups after 48 hours
- ☐ Seal with epoxy or spray polyurethane
- ☐ Allow 72 hours for full cure before use
Conclusion
Transforming a standard stainless steel cup into a personalized art piece is both accessible and rewarding. With attention to material selection, careful execution, and proper sealing, your cartoon design can remain vivid and intact for years. Whether you're crafting for yourself or creating a heartfelt gift, the process fosters creativity and ownership over everyday objects. Each sip becomes a reminder of effort, personality, and joy.


 浙公网安备
33010002000092号
浙公网安备
33010002000092号 浙B2-20120091-4
Comments
No comments yet. Why don't you start the discussion?