
Coffee tumblers are more than just drinkware—they’re personal accessories that reflect individual style. While many people opt for pre-designed models, creating a custom pattern allows you to craft something truly original. Whether you're making a gift or elevating your daily routine, a hand-designed tumbler becomes an extension of your personality. This guide walks through the entire process—from concept to final seal—with practical advice, expert insights, and proven techniques.
Understand Your Tumbler Surface and Materials
Before sketching a single line, it’s essential to understand the surface you're working with. Most insulated coffee tumblers are made from stainless steel with a smooth powder-coated or glossy finish. This surface accepts certain mediums better than others. Acrylic paint pens, oil-based markers, and vinyl wraps perform well, while watercolors or chalk typically don’t adhere properly.
The curvature of the tumbler also affects design placement. A 360-degree wrap requires seamless continuity, whereas a front-focused design can be more contained. Consider both the material compatibility and the ergonomic shape when planning your artwork.
Plan Your Design Concept and Layout
Start with inspiration. Browse nature, fashion, architecture, or cultural motifs for visual cues. Geometric symmetry, floral repeats, abstract brushwork, or typography-based designs all work well on cylindrical surfaces.
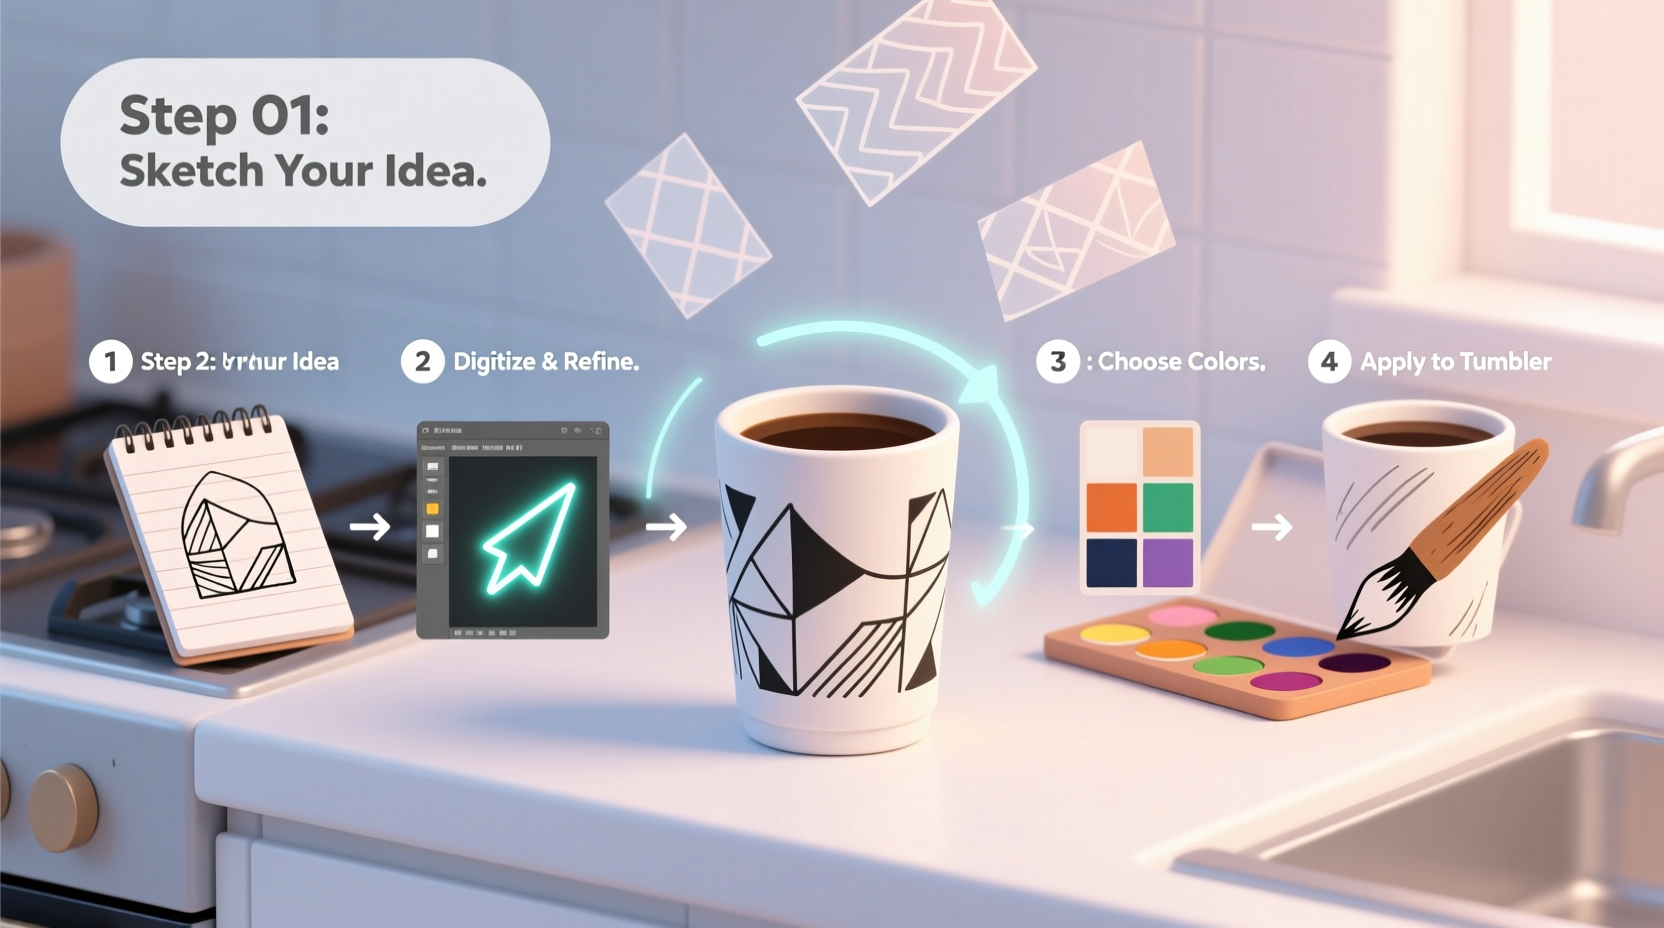
Sketch your ideas on paper or use digital tools like Procreate, Adobe Illustrator, or free alternatives such as Inkscape. Focus on balance—avoid overcrowding one side while leaving another bare. For repeating patterns, create a tileable unit that flows naturally when wrapped around the curve.
“Design isn’t just about aesthetics—it’s about rhythm and repetition. A good pattern guides the eye in a loop.” — Lena Torres, Industrial Designer at Vessel Form Studio
Key Design Principles to Apply
- Repetition: Use consistent shapes, lines, or colors to build cohesion.
- Contrast: Pair bold elements with negative space for visual impact.
- Flow: Align your design with the tumbler’s vertical axis to enhance ergonomics.
- Scalability: Ensure details remain clear even when viewed up close.
Step-by-Step Guide to Applying Your Custom Pattern
Follow this structured approach to transfer and apply your design accurately and durably.
- Prepare the tumbler: Wash thoroughly with rubbing alcohol to remove oils and dust. Let dry completely.
- Create a template: Print or draw your design on paper. Wrap it around the tumbler and secure with tape. Use a pin or fine needle to poke through key points, transferring them as guide dots.
- Sketch the outline: Use a pencil or removable marker to connect the dots and finalize the layout.
- Apply base colors: Start with light shades and build toward darker tones. Allow each layer to dry before adding detail.
- Add depth and texture: Use stippling, hatching, or gradients to give dimensionality.
- Seal the design: Once fully dry (after 24 hours), apply 2–3 thin coats of food-safe, waterproof sealant spray. Hold 8–10 inches away and let each coat cure.
| Tool/Supply | Purpose | Recommended Brands |
|---|---|---|
| Acrylic Paint Pens | Detail work and outlining | Posca, Molotow, Arteza |
| Rubbing Alcohol | Surface cleaning | Any 70%+ isopropyl |
| Painter’s Tape | Masking sections for clean edges | FrogTape, ScotchBlue |
| Clear Sealant Spray | Protects against wear and washing | Krylon UV-Resistant Clear, Mod Podge Dishwasher-Safe |
| Graph Paper or Digital Grid | Planning symmetrical patterns | Canva, Sketchpad.io |
Case Study: Creating a Boho-Inspired Repeat Pattern
Sophie, a graphic designer in Portland, wanted a tumbler that matched her earthy wardrobe. She began by collecting references—Moroccan tiles, desert sunsets, and vintage textiles. Using a grid in Canva, she designed a 3-inch square motif featuring interlocking triangles, tiny dots, and arched lines in terracotta, sage, and cream.
To transfer the design, she printed four copies of the tile and taped them into a strip that wrapped around her 20 oz tumbler. After tracing the key junctions, she used Posca paint pens to ink the pattern. She started with the largest shapes, filled in textures, then sealed it with three coats of Krylon. The result was a cohesive, handcrafted look that survived weekly dishwasher cycles (top rack only) for over six months.
Avoid Common Pitfalls: Do’s and Don’ts
Mistakes can compromise both appearance and durability. Follow these guidelines to protect your effort.
| Do | Don’t |
|---|---|
| Use light pressure with paint pens to avoid scratching the coating | Apply thick, gloopy layers of paint that may crack |
| Let each color dry fully before adding adjacent details | Rush the process and smudge wet ink |
| Cure sealant for 48–72 hours before regular use | Wash or handle aggressively too soon |
| Store vertically to prevent rolling and edge wear | Leave in direct sunlight, which fades colors |
| Touch up minor chips with matching pen and reseal | Ignore scratches—they can spread under moisture |
Frequently Asked Questions
Can I wash a custom-designed tumbler in the dishwasher?
Yes, but only on the top rack and after applying a dishwasher-safe sealant. Hand washing is still recommended for longevity, especially within the first month after sealing.
How long does a hand-painted design last?
With proper sealing and care, most designs last 6–12 months under daily use. Exposure to abrasion, UV light, or harsh detergents shortens lifespan. Re-sealing every 3–4 months helps maintain vibrancy.
Can I use vinyl instead of painting?
Absolutely. High-quality adhesive vinyl (like Oracal 651) can be cut into patterns and applied smoothly. It’s faster than painting and offers precision, but lacks the organic feel of hand-drawn art. Always seal the edges with clear tape or mod podge to prevent peeling.
Final Checklist Before You Begin
Use this checklist to ensure you're fully prepared before starting your project:
- ☐ Tumbler is clean and degreased with rubbing alcohol
- ☐ Design is finalized and scaled to fit the tumbler’s circumference
- ☐ Transfer method (template, stencil, freehand) is chosen
- ☐ All paint pens, brushes, and tools are ready and tested
- ☐ Workspace is well-lit, ventilated, and protected from spills
- ☐ Clear sealant is available and suitable for metal surfaces
- ☐ Curing time (24–72 hours) is scheduled before use
Make It Yours—And Share What You Create
Designing a custom pattern isn’t just about decoration—it’s an act of personal expression. Every line, color choice, and repeated shape tells a story. Whether you lean toward minimalist geometry or vibrant maximalism, the process sharpens creativity and deepens connection to everyday objects.
Once your tumbler is complete, take a photo in natural light and share it online. Tag artists whose work inspired you, join DIY communities, or gift it to someone who appreciates handmade touches. The best designs aren’t just seen—they spark conversation.


 浙公网安备
33010002000092号
浙公网安备
33010002000092号 浙B2-20120091-4
Comments
No comments yet. Why don't you start the discussion?