
Finding the right fit for your Apple Watch is essential—not just for comfort, but also for accurate health tracking and long-term wearability. The metal link bracelet, known officially as the Milanese Loop or Stainless Steel Link, offers a premium look and customizable fit. However, many users hesitate to adjust it themselves, fearing damage or complexity. The truth is, adjusting a metal iWatch bracelet is straightforward when you know the correct method. This guide walks you through every step with precision, offering expert insights, real-world examples, and practical tips to ensure a flawless fit.
Understanding Your Metal iWatch Bracelet
Apple’s metal bracelets come in two primary styles: the Milanese Loop (magnetic mesh) and the Stainless Steel Link (interlocking links with pins). While both are considered “metal,” only the Stainless Steel Link requires physical link removal or addition for sizing. The Milanese Loop adjusts via a magnetic closure along its length, making it more flexible out of the box. This guide focuses on the Stainless Steel Link model, which most users need to resize upon first use.
The Stainless Steel Link bracelet consists of individual metal segments connected by small pins. These pins can be partially removed to shorten the band or reinserted to extend it. Each pin has a tapered end that allows it to slide out with gentle pressure. No permanent tools are required—though a small pointed tool helps—but care must be taken to avoid scratching the watch or losing components.
Step-by-Step Guide to Resizing Your Stainless Steel Link Bracelet
Resizing your iWatch bracelet doesn’t require a trip to the store or professional help. With patience and attention to detail, you can achieve a custom fit at home. Follow this timeline-based process carefully.
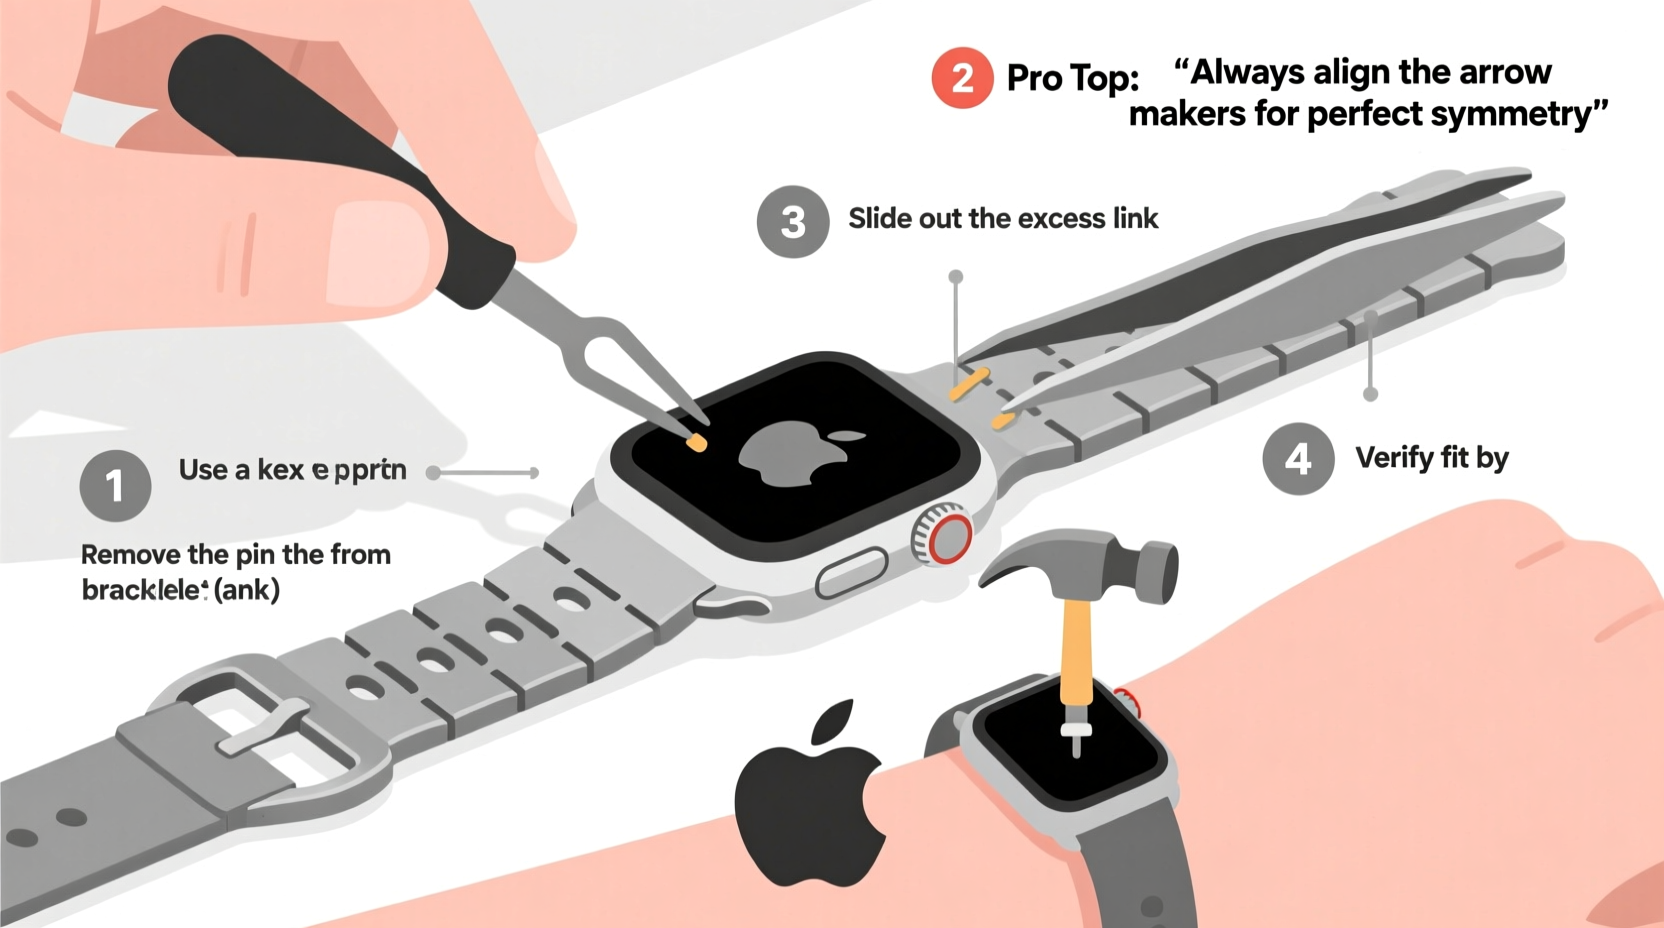
- Prepare Your Workspace: Lay out a clean, well-lit area. Use a microfiber cloth or towel to protect the watch face. Gather a small pointed tool—a paperclip, pushpin, or Apple’s official pin removal tool.
- Determine the Correct Size: Wear the watch and fasten it at the loosest setting. Identify how many links need to be removed based on where the clasp sits. Ideally, the clasp should rest just past the center of your wrist bone.
- Locate the Pin Direction Arrows: Flip the bracelet over. On the inner side of each link, you’ll see tiny arrows stamped near the pin ends. These indicate the direction the pin must be pushed to remove it. Never force a pin against the arrow.
- Remove the Pins: Insert your tool into the hole at the base of the pin head. Apply steady, even pressure in the direction of the arrow. The pin will slide out partially. Use tweezers or your fingers to pull it the rest of the way once it clears the link.
- Remove Excess Links: Once pins are extracted, separate the unwanted links. Keep them in a labeled container—they may be needed later if your wrist size changes.
- Reconnect the Remaining Links: Align the open ends of the bracelet. Slide the pin back in from the direction indicated by the arrow. Tap gently with a non-metallic object (like a plastic pen cap) if needed.
- Test the Fit: Put on the watch. The band should feel secure without pinching. You should be able to slide one finger comfortably underneath.
This entire process takes 10–15 minutes for first-time users. With practice, it becomes quicker and more intuitive.
Do’s and Don’ts When Adjusting Your iWatch Band
| Do’s | Don’ts |
|---|---|
| Work slowly and deliberately to avoid misalignment | Rush the process or apply excessive force |
| Keep removed pins and links in a secure container | Leave small parts on an open desk where they can roll away |
| Use a magnifying glass if you have trouble seeing the arrows | Ignore the directional arrows on the links |
| Clean the band with a lint-free cloth after adjustment | Use harsh chemicals or submerge the band in water |
| Double-check pin security before wearing | Wear the watch immediately without testing stability |
Real-World Example: Sarah’s First-Time Adjustment
Sarah purchased her Apple Watch Series 9 with a Stainless Steel Link bracelet, excited about its sleek design. Upon wearing it, she noticed the clasp hung nearly off her wrist, and the band slid around during workouts. She visited a retailer, but they quoted a 30-minute wait and $15 service fee. Instead, she decided to try adjusting it herself using online instructions.
Using a straightened paperclip and a folded towel, she followed the steps outlined above. After removing two links—carefully noting the pin direction—she reassembled the band. The difference was immediate: the watch sat snugly, tracked her heart rate more consistently, and stayed in place during yoga. “I wish I’d done this sooner,” she said. “It feels like it was made for my wrist now.”
“Proper fit isn’t just about comfort—it directly impacts sensor accuracy and daily usability.” — James Lin, Wearable Technology Specialist
Essential Tips for Long-Term Comfort and Maintenance
Once your iWatch band is properly sized, maintaining it ensures lasting performance and appearance. Metal bracelets accumulate skin oils, sweat, and debris, especially with daily wear.
- Clean the band weekly with a dry, soft cloth. For deeper cleaning, lightly dampen the cloth with water and wipe each link.
- Avoid wearing the watch in chlorinated pools or saltwater, as prolonged exposure can corrode the finish.
- Check pin tightness monthly. Over time, vibrations from movement can loosen connections.
- If you experience skin irritation, consider whether metal allergies (particularly nickel) may be a factor. Stainless steel contains nickel, and sensitive users might prefer titanium bands.
FAQ: Common Questions About Adjusting Metal iWatch Bands
Can I add links back if the band becomes too tight?
Yes, provided you’ve kept the original links and pins. Reinserting links follows the same directional principles as removal. Align the holes, insert the pin from the correct side, and push until flush.
Is it safe to adjust the band without Apple’s official tool?
Absolutely. While Apple sells a dedicated pin removal tool, household items like paperclips or pushpins work effectively. Just ensure the tip is narrow enough to fit the pin hole without bending.
How do I know if my band is too tight?
If you experience numbness, discoloration, or indent marks on your skin after removing the watch, the band is likely too tight. There should be slight movement, allowing airflow and circulation.
Final Checklist Before Wearing Your Adjusted iWatch
- ✅ Pins are fully seated and cannot be wiggled loose
- ✅ Clasp closes securely and aligns with the band
- ✅ Band lies flat against the wrist without twisting
- ✅ One finger fits comfortably between the band and wrist
- ✅ Watch sensors remain unobstructed and in contact with skin
Conclusion
A well-fitted Apple Watch enhances both function and comfort. Taking the time to properly adjust your metal bracelet transforms it from a generic accessory into a personalized extension of your lifestyle. Whether you're streamlining your morning routine, improving fitness tracking accuracy, or simply enjoying a sleeker look, the effort pays off daily. Now that you have the knowledge and confidence, don’t hesitate to fine-tune your fit whenever needed.


 浙公网安备
33010002000092号
浙公网安备
33010002000092号 浙B2-20120091-4
Comments
No comments yet. Why don't you start the discussion?