
A well-fitted watch doesn’t just look better—it feels more comfortable and stays secure throughout the day. The Clover Groove chain watch band, known for its sleek design and flexible metal links, offers a modern twist on classic timepiece style. However, like many adjustable metal bands, it requires precise sizing to match your wrist perfectly. Too loose, and it slides around; too tight, and it becomes uncomfortable or difficult to put on. Fortunately, adjusting it doesn’t require professional tools or expertise. With a few basic supplies and careful attention, you can resize your Clover Groove band at home in under 30 minutes.
Understanding the Clover Groove Chain Band Design
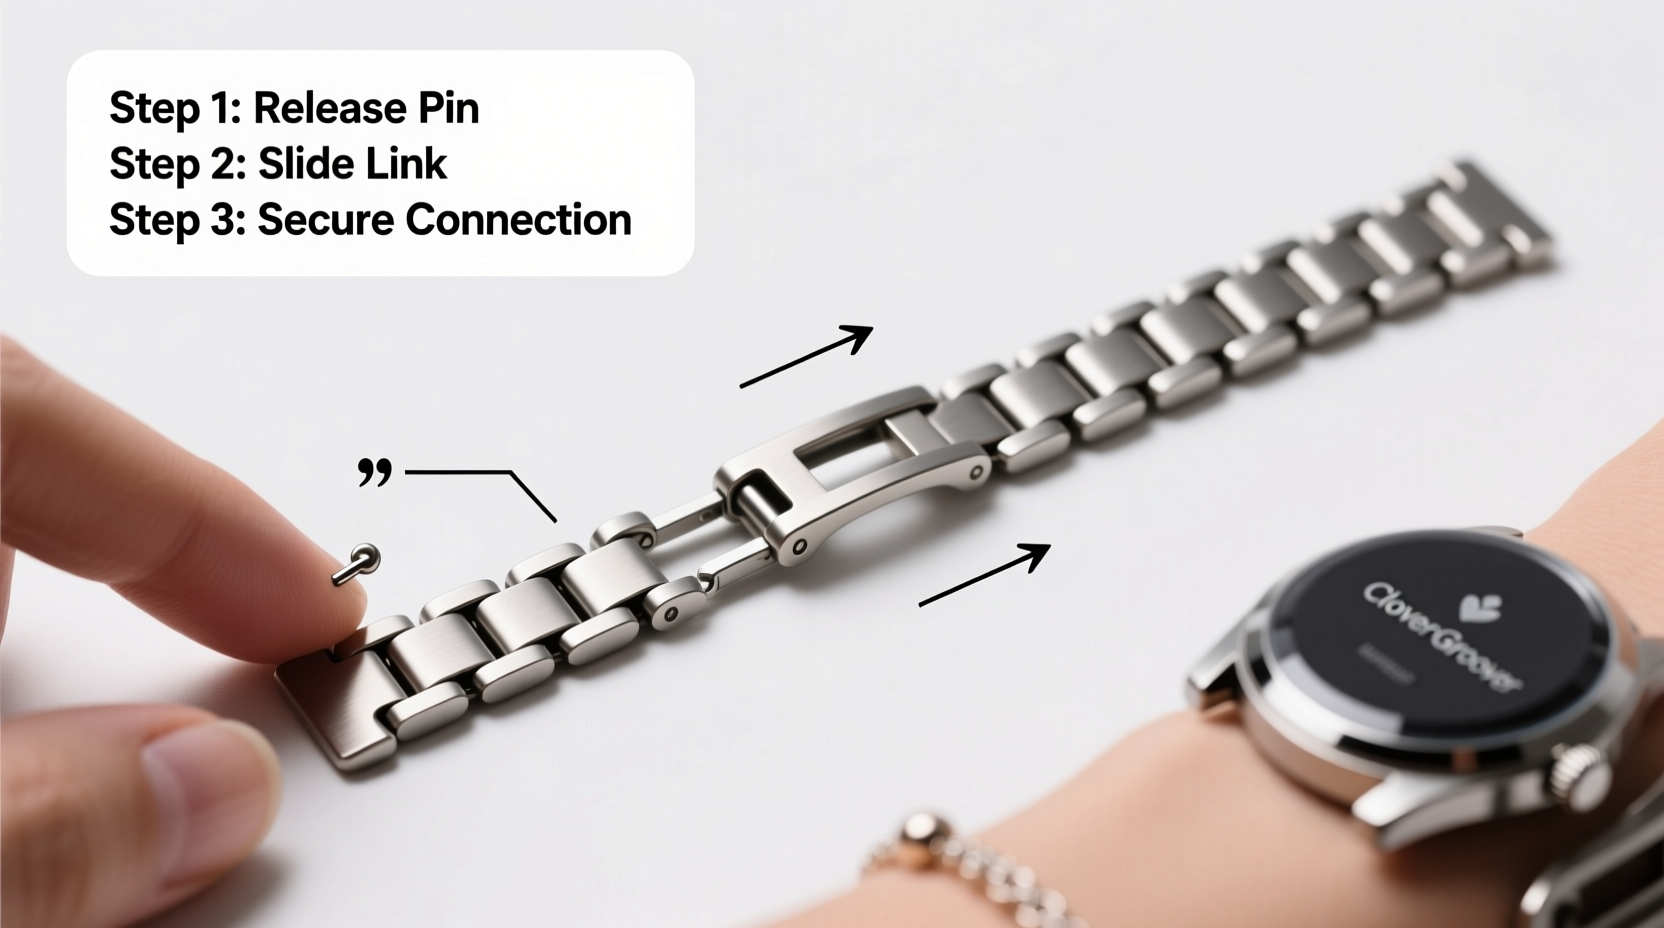
The Clover Groove chain band is constructed from interlocking metal links that form a continuous loop, secured with tiny pins or screws. Unlike traditional solid-link bracelets that use removable pins, many Clover Groove models feature a micro-adjustable clasp system or screw-in end links that allow incremental changes without removing entire sections. This design provides flexibility but demands a different approach than standard watch bands.
Before making any adjustments, identify whether your model uses push pins, threaded screws, or a fold-over clasp with micro-holes. Most current versions include a hidden screw mechanism accessible via a small pin hole near the clasp. These screws hold the end links in place and can be loosened or tightened using a precision tool.
“Properly fitted metal bands should sit snugly against the wrist without pressing into the skin or rotating during movement.” — Daniel Reyes, Watch Fit Specialist
Step-by-Step Guide to Adjusting Your Clover Groove Band
Follow this clear, sequential process to resize your band safely and effectively. This method works for both tightening and loosening, depending on your needs.
- Measure Your Wrist
Use a soft measuring tape to determine your exact wrist circumference. Wrap it snugly around the bone, not too tight. Note the measurement in millimeters. Most Clover Groove bands fit wrists between 150mm and 210mm. - Gather the Necessary Tools
You’ll need:- Small Phillips-head screwdriver (preferably 0.8mm or 1.0mm)
- Precision tweezers or needle-nose pliers
- Soft cloth to protect the watch face
- Magnifying glass (optional, for better visibility)
- Inspect the Clasp Mechanism
Lay the watch on a clean, soft surface with the band fully extended. Examine the clasp ends where the band connects to the watch head. Look for tiny holes with visible screws inside. If present, these are adjustment points. - Loosen the Screws Slightly
Insert the screwdriver into each hole and turn counterclockwise just enough to release tension—about a quarter to half a turn per side. Do not remove the screws completely unless instructed by your model’s manual. Over-loosening may cause loss of small parts. - Slide the Links to Adjust Length
Once the screws are loosened, gently pull or push the band through the clasp to shorten or extend it. Some models have preset notches; align the inner ridge of the band with the desired notch for stability. - Re-Tighten the Screws
After achieving the correct length, carefully tighten both screws clockwise until firm. Avoid over-tightening, which can strip the threads. The band should move smoothly but stay securely in place. - Test the Fit
Put the watch on and fasten the clasp. It should rest flat against your wrist, allowing one finger to slide underneath comfortably. Check for twisting or sagging during normal hand movements.
Do’s and Don’ts When Adjusting Your Band
| Do’s | Don’ts |
|---|---|
| Use the correct size screwdriver to prevent slippage | Use excessive force when turning screws |
| Clean the band before adjustment to remove debris | Adjust the band while wearing rings or jewelry that could scratch it |
| Check alignment after tightening to ensure symmetry | Leave screws partially loose overnight |
| Store extra links and screws in a labeled container | Ignore signs of thread wear or corrosion |
Real-Life Example: Fixing an Oversized Band
Samantha purchased a Clover Groove watch as a gift for her partner, Leo. Though the style was perfect, the band was too large for his slender wrist, slipping constantly and requiring frequent readjustment. After reading online forums and watching tutorial videos, she decided to resize it herself. Using a precision screwdriver from a phone repair kit, she carefully loosened the clasp screws, retracted the band by 15mm, and resecured the hardware. The result? A snug, elegant fit that stayed in place all day. Leo now wears the watch daily, appreciating both the comfort and the thoughtful personalization.
Essential Checklist for Successful Adjustment
- ✅ Measure wrist size accurately
- ✅ Identify the clasp type (screw-based or pin-based)
- ✅ Use appropriate tools—never substitute with knives or nails
- ✅ Loosen screws only slightly before sliding
- ✅ Align band properly within the clasp mechanism
- ✅ Tighten both screws evenly and securely
- ✅ Test mobility and comfort before regular use
- ✅ Store removed components safely in case of future resizing
Frequently Asked Questions
Can I adjust the Clover Groove band without tools?
No. Unlike some quick-release silicone straps, the Clover Groove chain band requires a precision screwdriver to access the internal screws. Attempting to adjust it without proper tools risks damaging the finish or stripping the hardware.
How often should I check the band’s fit?
It’s wise to inspect the band every 2–3 months, especially if worn daily. Temperature changes, weight fluctuations, or mechanical stress can loosen screws over time. A quick monthly visual check ensures longevity and safety.
What if my band still feels loose after adjustment?
If full tightening doesn’t solve the issue, your model may have additional micro-adjustment holes inside the clasp. Alternatively, consider visiting a jeweler who can permanently remove excess links if your version allows it. Not all Clover Groove bands support link removal—verify compatibility first.
Final Tips for Long-Term Comfort and Care
Once adjusted, maintain your band’s performance with regular care. Wipe it down weekly with a dry microfiber cloth to remove oils and sweat. For deeper cleaning, use a mild soap solution and a soft toothbrush around the links and clasp, then dry thoroughly. Avoid exposing the band to chlorinated water or harsh chemicals, which can corrode the metal and degrade screw integrity.
Conclusion
Adjusting your Clover Groove chain watch band doesn’t have to be intimidating. With the right tools and a methodical approach, you can achieve a custom fit that enhances both comfort and style. Whether you’re tailoring a new purchase or refreshing an old favorite, taking control of your watch’s fit empowers you to enjoy it fully—every hour of every day. Take a few quiet moments this week to assess your band’s fit and make any needed tweaks. Your wrists will thank you.


 浙公网安备
33010002000092号
浙公网安备
33010002000092号 浙B2-20120091-4
Comments
No comments yet. Why don't you start the discussion?