
Dog crates serve as more than just containment—they offer a den-like sanctuary where your pet can relax, sleep, and feel secure. When properly assembled and set up, a dog crate becomes a cornerstone of training, travel safety, and daily comfort. Yet many pet owners struggle with confusing instructions or suboptimal setups that compromise safety and usability. This comprehensive guide walks you through every phase of assembling your dog crate correctly, ensuring it’s stable, functional, and tailored to your dog’s needs.
Why Proper Crate Assembly Matters
A poorly assembled crate can pose serious risks: loose panels may collapse, latches might fail during transport, or sharp edges could injure your pet. Beyond safety, an unstable structure reduces your dog’s sense of security. A wobbly crate signals unpredictability—something animals instinctively avoid. On the other hand, a securely built crate supports behavioral training, minimizes anxiety, and provides a reliable retreat during loud events like thunderstorms or fireworks.
“Dogs thrive on routine and defined spaces. A well-assembled crate mimics the den environment they’re naturally drawn to.” — Dr. Laura Simmons, DVM, Canine Behavior Specialist
Step-by-Step Guide to Assembling Your Dog Crate
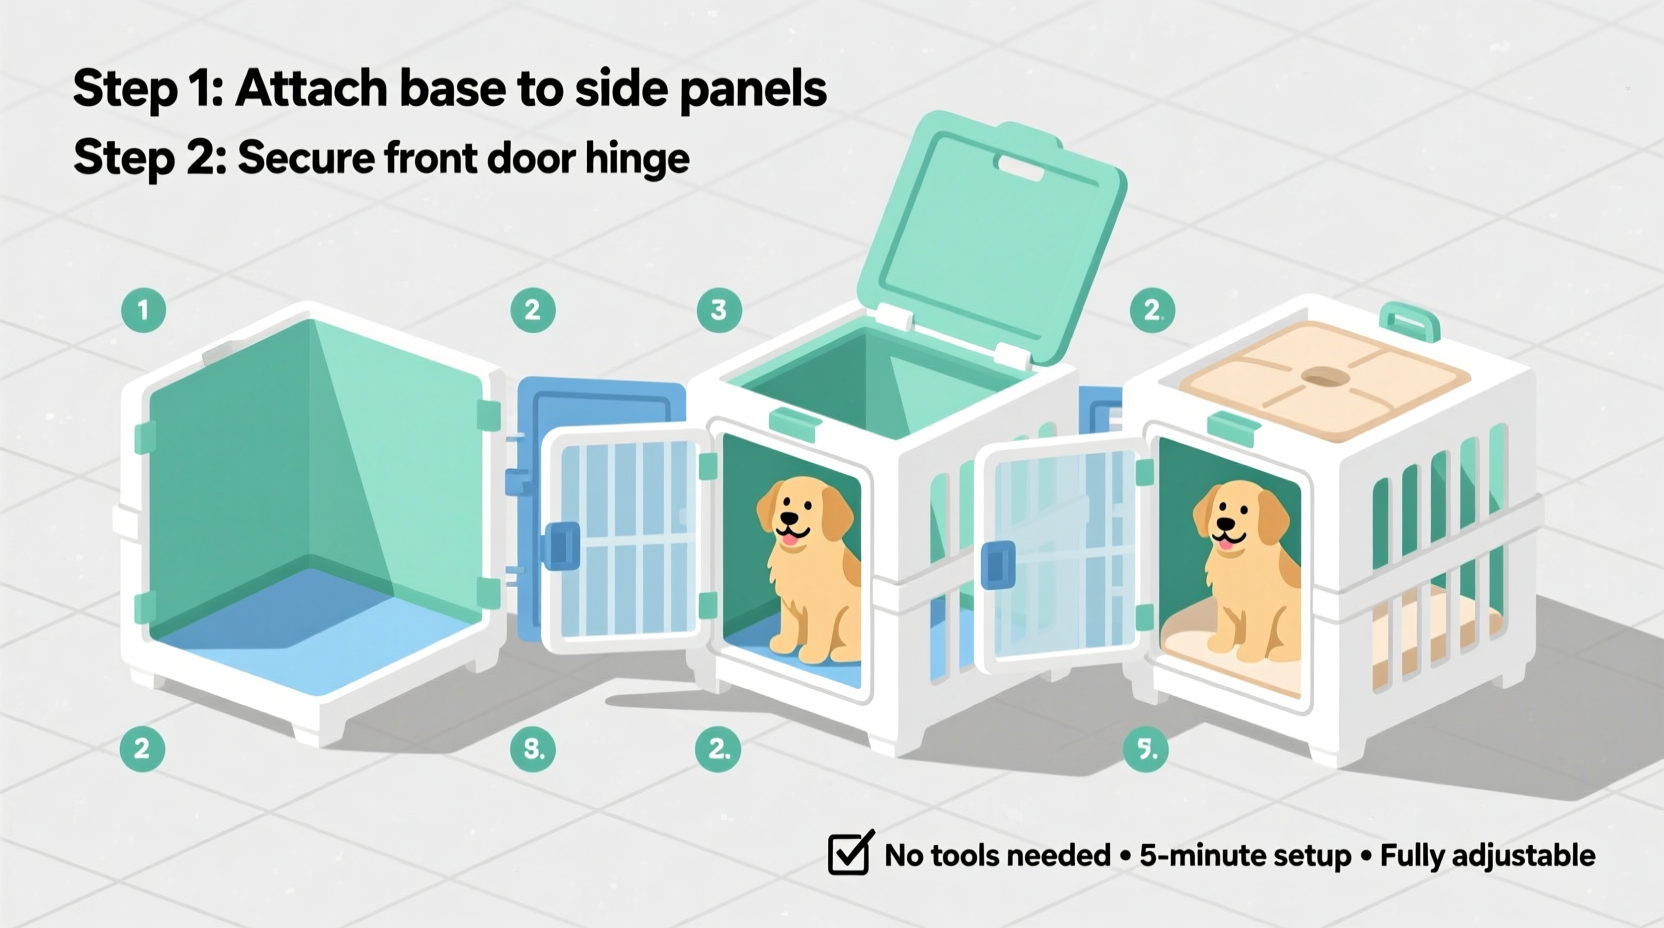
Most wire and plastic dog crates come in flat-packed kits requiring basic assembly. Follow this timeline-tested sequence to build your crate efficiently and safely.
- Unbox and inventory all parts: Lay out each component on a clean surface. Check against the manual for included items—typically side panels, top/bottom grates, door panel, bolts, clips, and rubber feet.
- Identify directional pieces: Note which panel has the door hinge, locking mechanism, or ventilation cutouts. Misalignment here leads to instability later.
- Connect long side panels to end caps: Align the grooves or bolt holes. For wire crates, slide connectors into sockets; for plastic, use provided screws.
- Attach the base: Slide or screw the bottom tray or grate into place. Ensure it locks flush with no gaps where paws could slip through.
- Secure the top: Wire crates often have removable tops for easy access. Snap or bolt them last to complete the enclosure.
- Install the door mechanism: Test the latch operation multiple times. It should open smoothly but remain locked under light pressure.
- Add rubber feet or skid pads: Attach non-slip pads to the bottom corners to prevent sliding and reduce floor scratches.
- Inspect for sharp edges or protrusions: Run your hands along seams and joints. File down any burrs using fine sandpaper.
Essential Checklist Before Use
Before introducing your dog, verify these critical points:
- ✅ All latches and hinges operate smoothly and lock securely
- ✅ No exposed wires, sharp metal edges, or broken welds
- ✅ Floor is solid and elevated slightly from ground (if applicable)
- ✅ Crate sits level on the floor without rocking
- ✅ Ventilation holes are unobstructed (especially important for plastic airline-style crates)
- ✅ Door swings freely without catching on adjacent furniture
- ✅ Size allows your dog to stand, turn, and lie down comfortably
Choosing the Right Location and Setup
Even a perfectly assembled crate won’t work if placed incorrectly. The ideal spot balances accessibility, quietness, and integration into household activity.
Avoid isolating the crate in basements or garages. Dogs are social animals; placing the crate in a family area like the living room or bedroom helps them feel included while still having personal space. Keep it away from direct sunlight, heating vents, or drafty windows to maintain a consistent temperature.
| Do | Don't |
|---|---|
| Place near family activity but out of high-traffic walkways | Put in noisy areas like laundry rooms or next to dishwashers |
| Elevate slightly off cold concrete floors with a mat or tray | Leave on wet or uneven surfaces |
| Use soft bedding that’s chew-resistant and washable | Overfill with pillows or fluffy materials that could be ingested |
| Add a cover or crate tent to create a den-like feel | Block airflow with thick blankets over ventilation zones |
Real Example: Max’s First Night Home
Sophia adopted Max, a 10-month-old Australian Shepherd, from a local shelter. Excited but overwhelmed, she set up his wire crate in the hallway—away from the living area “so he could rest.” That night, Max whined continuously, pawed at the bars, and refused to settle.
After consulting her trainer, Sophia reassembled the crate in the living room, added a breathable cotton pad, and placed a ticking clock wrapped in a towel nearby (to mimic a heartbeat). She also ensured the door was secured with a secondary clip after noticing the primary latch sometimes bounced open when Max leaned against it.
By the third night, Max entered the crate willingly after dinner. Within a week, he used it as a voluntary retreat during busy family gatherings. The difference wasn’t just location—it was stability, proper assembly, and environmental comfort working together.
Frequently Asked Questions
How long does it take to assemble a standard dog crate?
Most wire crates take 10–20 minutes with basic tools. Plastic crates may require 25–40 minutes due to screw-based assembly. Always allow extra time for inspection and adjustments.
Can I modify my crate for better comfort?
Yes, but with caution. Adding padding or covers is safe if they don’t obstruct airflow or create chew hazards. Never remove structural components like crossbars or ventilation panels.
Is it safe to stack crates or mount accessories?
Only if the manufacturer explicitly approves it. Most standard crates aren’t designed for stacking. Mounting bowls or toys inside should use non-tip, chew-proof attachments.
Final Tips for Long-Term Success
Your dog’s crate isn’t a one-time project—it evolves with their behavior and lifestyle. Recheck hardware every few months, especially if you travel frequently or have a strong-chewing dog. Clean the tray weekly and disinfect monthly. Rotate bedding to prevent odor buildup.
Remember: a well-built crate isn’t just about physical safety. It’s emotional support disguised as structure. When your dog chooses to nap in their crate with the door open, you’ll know you’ve done it right.
“The best crates disappear into a dog’s life—they don’t dominate it. They become a natural part of their world.” — Karen Patel, Certified Pet Trainer
Take Action Today
Whether you're bringing home a new puppy or upgrading an old crate, now is the time to ensure your dog’s personal space is built to last. Review your current setup, follow the steps outlined here, and make adjustments where needed. A few minutes of attention today can lead to years of comfort, safety, and trust.


 浙公网安备
33010002000092号
浙公网安备
33010002000092号 浙B2-20120091-4
Comments
No comments yet. Why don't you start the discussion?