
A 5 in 1 hair styling set is a versatile tool that combines multiple functions—typically including a flat iron, curling wand, volumizer, round brush, and sometimes a diffuser—into one compact device. This convenience makes it a favorite among home stylists and professionals alike. However, frequent use leads to product buildup, heat residue, and mechanical wear. Without proper care, performance declines, and the lifespan shortens. Regular cleaning and maintenance not only preserve functionality but also protect your hair from damage caused by dirty or poorly maintained tools.
Why Maintenance Matters for Multi-Function Styling Tools
Unlike single-purpose tools, a 5 in 1 styling set undergoes more varied stress. Each attachment heats up, comes into contact with hair products, and may be exposed to moisture or oils. Over time, hairspray, serums, and natural scalp oils accumulate on plates, barrels, and heating elements. This residue can cause uneven heating, increase friction on hair strands, and even emit unpleasant odors when heated. Additionally, misaligned attachments or loose connections reduce efficiency and pose safety risks.
Proper maintenance ensures consistent heat distribution, prevents corrosion, and keeps attachments securely functioning. It also minimizes the risk of bacterial growth, especially if used on damp hair. Experts agree: a well-maintained styling tool performs better and lasts significantly longer than a neglected one.
“Multi-functional styling tools require more frequent attention because each component has different cleaning needs. A few minutes of care after each use can extend the life of your device by years.” — Lena Torres, Professional Stylist & Appliance Technician
Step-by-Step Cleaning Process
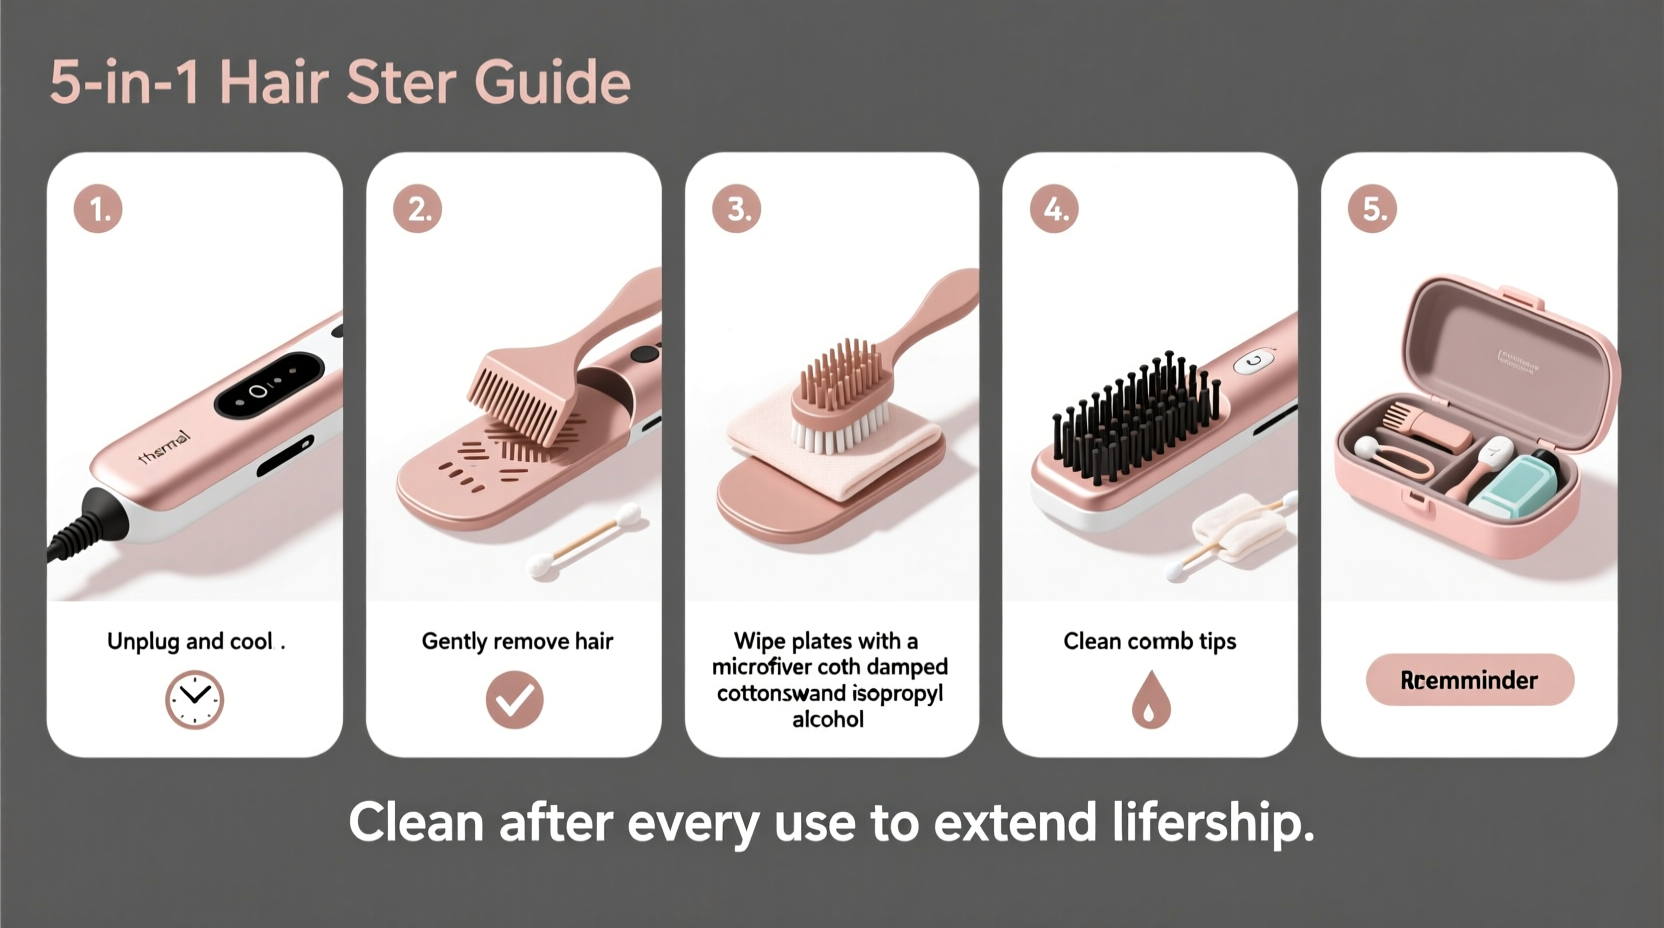
Cleaning your 5 in 1 hair styling set doesn’t need to be complicated, but it must be thorough. Follow this timeline-based routine to keep every component in optimal condition.
- Let the device cool completely – Never attempt to clean any part while hot. Wait at least 30–45 minutes after use.
- Detach all components – Carefully remove each attachment according to the manufacturer’s instructions. Lay them out in order to avoid confusion during reassembly.
- Wipe down the main handle and base – Use a dry microfiber cloth to remove surface dust. For smudges, lightly dampen the cloth with water (never spray directly).
- Clean metal plates and barrels – Dip a cotton pad or soft toothbrush in isopropyl alcohol (70% concentration). Gently scrub the ceramic or tourmaline surfaces to dissolve residue. Avoid abrasive pads or harsh chemicals.
- Tackle stubborn buildup – If product gunk persists, apply a small amount of specialized heat plate cleaner or a paste of baking soda and water. Rub gently in circular motions, then wipe clean with a dry cloth.
- Inspect vents and joints – Use a soft-bristled brush or compressed air to remove lint and hair trapped near heating vents or connection points.
- Sanitize brushes and combs – Wash removable brush heads with mild shampoo and warm water. Rinse thoroughly and air-dry completely before reattaching.
- Reassemble only when dry – Ensure all parts are fully dry to prevent internal moisture damage. Reconnect attachments firmly until they click into place.
Essential Maintenance Checklist
To stay consistent, follow this checklist weekly and monthly:
- ✅ After each use: Wipe plates and barrels with a dry microfiber cloth
- ✅ Weekly: Inspect attachments for looseness or discoloration
- ✅ Bi-weekly: Clean all metal surfaces with alcohol swab
- ✅ Monthly: Deep clean brush heads and check cord integrity
- ✅ Every 3 months: Test temperature accuracy and reset auto-shutoff function (if applicable)
- ✅ As needed: Replace damaged or warped attachments promptly
Do’s and Don’ts: Maintenance Best Practices
| Do’s | Don’ts |
|---|---|
| Use a heat-resistant mat when placing hot tools | Immerse the main unit or cord in water |
| Store attachments in a protective pouch or case | Wrap the cord tightly around the handle |
| Unplug immediately after use | Use metal scrapers or razor blades on plates |
| Check for firmware updates (for smart models) | Leave the device plugged in overnight |
| Apply a drop of silicone lubricant to rotating joints quarterly | Ignore frayed wires or flickering lights |
Real Example: How Sarah Extended Her Styler’s Life by 3 Years
Sarah, a freelance makeup artist based in Austin, uses her 5 in 1 styler daily for client appointments. After two years, she noticed inconsistent curls and a faint burning smell. Instead of replacing the unit, she followed a strict cleaning regimen: wiping after every session, deep-cleaning monthly, and storing each piece separately in a padded organizer. She also replaced the curling barrel once after noticing micro-scratches.
Three years later, her styler still heats evenly and holds attachments securely. “I’ve saved over $150 by maintaining it instead of buying new,” she says. “Clients comment on how smooth my tools look—it reflects professionalism.”
Storage Tips to Prevent Damage
Improper storage is a leading cause of premature wear. Heat, humidity, and physical pressure degrade both electronics and materials.
- Use a heat-resistant storage case – Protects against dust, drops, and accidental activation.
- Avoid bathroom counters – Steam and moisture can corrode internal circuits.
- Keep cords loosely coiled – Use a velcro strap instead of tight rubber bands to prevent wire strain.
- Store upright or flat – Never hang by the cord, as this stresses the plug connection.
Frequently Asked Questions
Can I use household cleaners on my styling attachments?
No. Avoid ammonia, bleach, or window cleaners, as they can strip protective coatings and damage sensitive surfaces. Stick to isopropyl alcohol, specialized plate wipes, or mild soap solutions.
How often should I replace the attachments?
With proper care, most attachments last 12–18 months under regular use. Signs it’s time to replace include chipped plates, inconsistent heat, or wobbling connections. Always purchase OEM (original equipment manufacturer) parts for compatibility.
Is it safe to clean the device while plugged in?
Never. Always unplug the device and let it cool completely before cleaning. Even residual power can pose electrical hazards when moisture is involved.
Final Thoughts
Your 5 in 1 hair styling set is an investment in convenience, versatility, and confidence. Treating it with consistent care ensures it delivers professional results every time you use it. From daily wipe-downs to quarterly inspections, each step plays a role in preserving performance and safety. By integrating these habits into your routine, you’re not just extending the life of a tool—you’re enhancing your styling experience.


 浙公网安备
33010002000092号
浙公网安备
33010002000092号 浙B2-20120091-4
Comments
No comments yet. Why don't you start the discussion?