
Garage door remotes are a small convenience that make a big difference in daily life. When they stop working, the frustration is immediate—especially when you're returning home with groceries or in poor weather. The good news? Most issues aren’t due to hardware failure but rather a loss of synchronization between the remote and the garage door opener. Reprogramming your garage remote is often a quick, tool-free fix that takes less than ten minutes. Whether your remote stopped responding after a power outage, battery replacement, or simply over time, this guide walks you through every step to restore seamless access.
Why Reprogramming Is Often Necessary
Modern garage door openers use rolling code technology—a security feature that changes the access code each time the remote is used. While this prevents unauthorized entry, it also means the remote and opener must stay in sync. Events like power surges, dead batteries, or interference from nearby electronic devices can disrupt this connection. When codes fall out of alignment, the remote won’t trigger the door, even if the LED lights up. Reprogramming resets the communication channel and re-establishes the secure link.
“Over 70% of garage remote failures are due to lost pairing, not defective units. A simple re-sync resolves most cases.” — James Ralston, Residential Automation Technician with 15 years of field experience
Step-by-Step Guide to Reprogram Your Garage Remote
Follow this universal process to reprogram most major brands, including Chamberlain, LiftMaster, Genie, and Craftsman. While models vary slightly, the core steps remain consistent across 95% of systems manufactured since 2005.
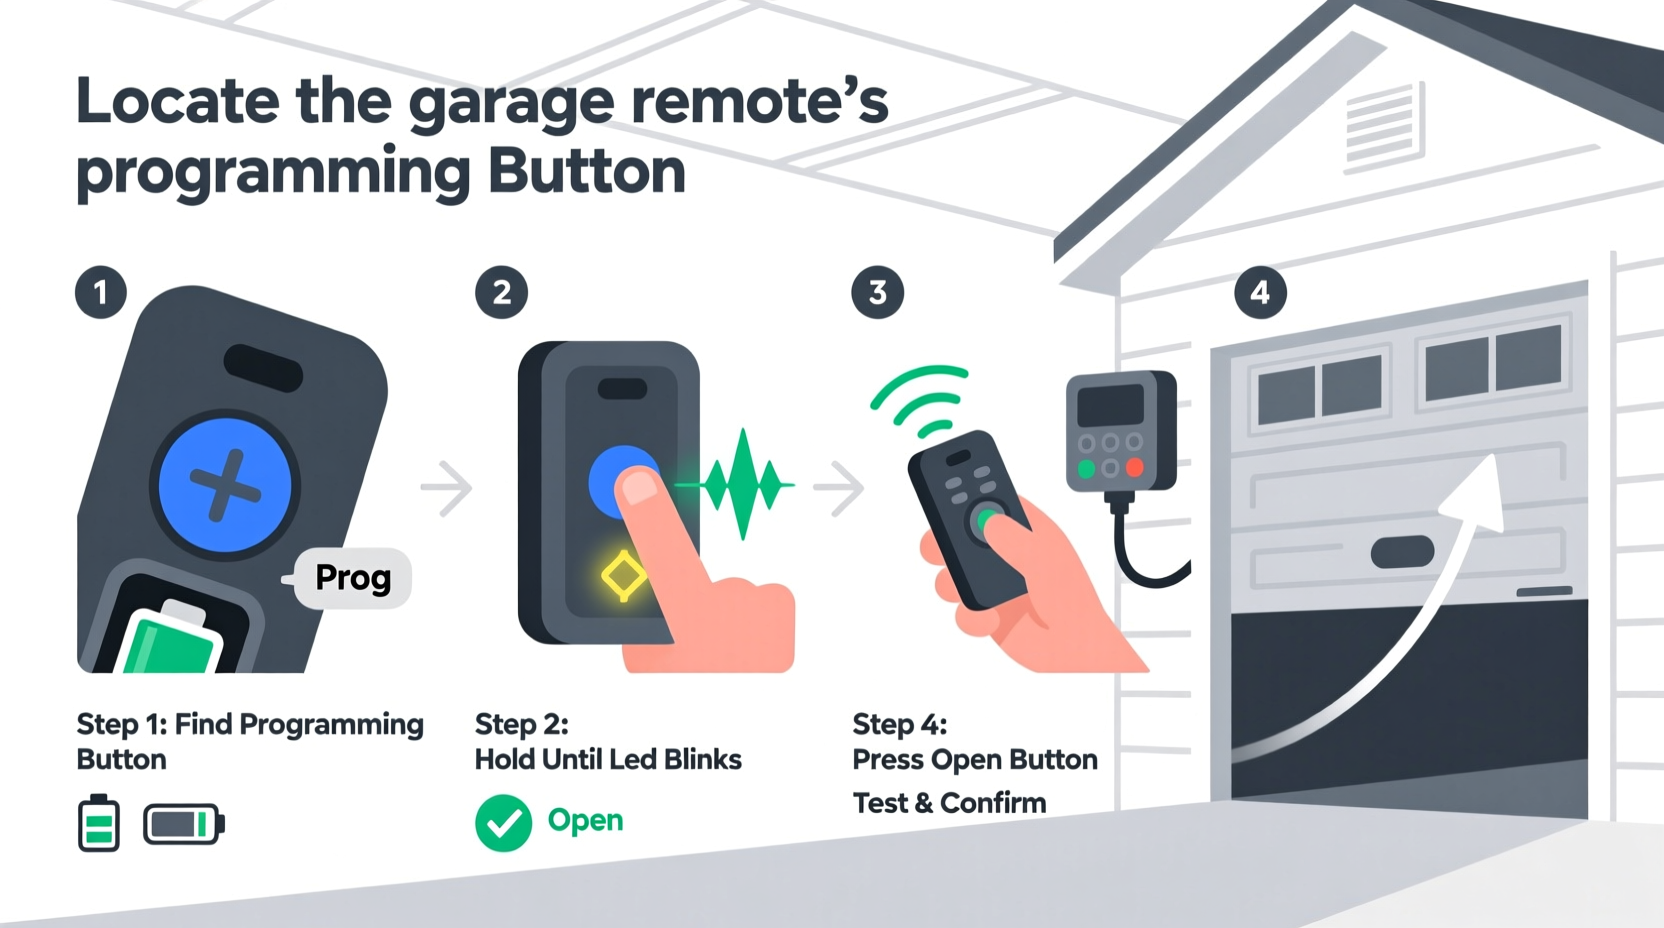
- Locate the “Learn” Button on the Garage Door Opener Motor Unit
This button is typically found near the light lens or antenna wire on the ceiling-mounted motor. It may be labeled “Learn,” “Smart,” or have a colored LED indicator (usually red, orange, or purple). - Press and Release the “Learn” Button
You’ll see the LED light flash or glow steadily, indicating the system is now in programming mode. It remains active for 30 seconds. - Press and Hold the Remote Button
Within 30 seconds, press and hold the button on your handheld remote. For multi-button remotes, choose the one you want to program. Hold for about two seconds until the opener’s lights blink or flash rapidly. - Test the Remote
Step away from the motor unit and press the remote button. The garage door should respond immediately. If not, repeat the process—sometimes signal interference requires a second attempt. - Reprogram Additional Remotes (Optional)
Repeat steps 2–4 for any other remotes you wish to sync. Most openers support up to five remotes.
Brand-Specific Variations and What to Watch For
While the general method applies broadly, certain brands have unique behaviors or requirements. Knowing these distinctions prevents confusion during setup.
| Brand | Learn Button Color | Programming Signal | Special Notes |
|---|---|---|---|
| Chamberlain / LiftMaster | Purple or Orange | LED flashes rapidly | Some newer models require Wi-Fi app confirmation |
| Genie | Red or Green | Light turns off then back on | May require holding remote button for 3+ seconds |
| Craftsman | Orange | Blinking light stabilizes | Compatible with older dip-switch models only via adapter |
| Sears (older models) | N/A – Dip Switches | Manual switch alignment | Not programmable; match internal switches on remote and unit |
Troubleshooting Common Reprogramming Issues
Even when following instructions precisely, some obstacles may arise. Here’s how to address them efficiently:
- Remote still doesn’t work after programming: Replace the battery first. A weak charge can prevent proper signal transmission even if the remote appears functional.
- Only one remote works at a time: You may have hit the limit on stored codes. Erase all remotes by pressing the Learn button for 6 seconds, then reprogram each one.
- Door opens but won’t close via remote: Check safety sensors. Misaligned infrared beams disable closing functions as a safety measure.
- Intermittent response: Electrical interference from LED bulbs, routers, or new appliances can disrupt signals. Try replacing garage lighting with incandescent or garage-rated LEDs.
Mini Case Study: Restoring Access After a Power Surge
Sarah Thompson in Austin, Texas, returned from vacation to find her garage remote unresponsive. The opener worked from the wall switch, ruling out mechanical issues. She replaced the remote battery, but it still failed. Recalling a thunderstorm during her absence, she suspected a power surge had reset the opener’s memory. Following the standard reprogramming steps, she pressed the Learn button, synced her remote within 20 seconds, and restored full functionality. “I spent more time searching online than actually fixing it,” she said. “It took under two minutes once I knew what to do.”
Essential Checklist Before You Begin
Ensure success by preparing in advance. Use this checklist to avoid common oversights:
- ✔ Check that the garage door opener is receiving power (lights on motor unit are active)
- ✔ Replace the remote battery with a fresh one (typically CR2032 or AAA)
- ✔ Confirm you’re using a compatible remote model
- ✔ Clear obstructions near safety sensors (clean lenses, realign if needed)
- ✔ Have a ladder ready to safely reach the motor unit
- ✔ Note the model number of your opener (usually on a label on the motor)
Frequently Asked Questions
Can I reprogram my garage remote without a ladder?
No—access to the “Learn” button on the motor unit is essential. Since most units are mounted on the ceiling, a stable step ladder is required for safe and accurate operation.
How many remotes can I program to one opener?
Most modern systems support 4 to 5 remotes. Some high-end models allow up to 8. Exceeding the limit causes older remotes to de-register automatically.
Do I need to reprogram after changing the opener’s battery?
No. Garage door openers don’t use backup batteries. However, a power outage may require reprogramming if the opener reset completely—this depends on the model’s firmware retention capability.
Final Tips for Long-Term Remote Reliability
Once your remote is working again, take steps to maintain its performance. Store remotes away from extreme heat or moisture, such as in a car glove compartment during summer. Clean the buttons periodically with a dry cloth to prevent grime buildup that interferes with conductivity. Consider keeping one programmed remote in a secure indoor location as a backup in case others fail.
Conclusion
Reprogramming your garage remote isn’t a technical challenge—it’s a straightforward process designed for homeowners. With the right steps and a few minutes of attention, you can restore reliable access and avoid unnecessary service calls. Don’t let a silent click turn into prolonged inconvenience. Take action today: test your remotes, refresh their programming if needed, and enjoy the seamless entry you’ve come to expect. Knowledge is the best key—keep it handy, and your garage will always open when you need it.


 浙公网安备
33010002000092号
浙公网安备
33010002000092号 浙B2-20120091-4
Comments
No comments yet. Why don't you start the discussion?