
Smartphones today are equipped with cameras that rival professional-grade equipment from just a few years ago. With the right techniques and tools, you can produce polished, engaging YouTube content entirely from your phone—no bulky gear required. Whether you're launching a vlog, tutorial series, or product review channel, mastering mobile video production is faster, cheaper, and more accessible than ever.
1. Prepare Your Phone for High-Quality Filming
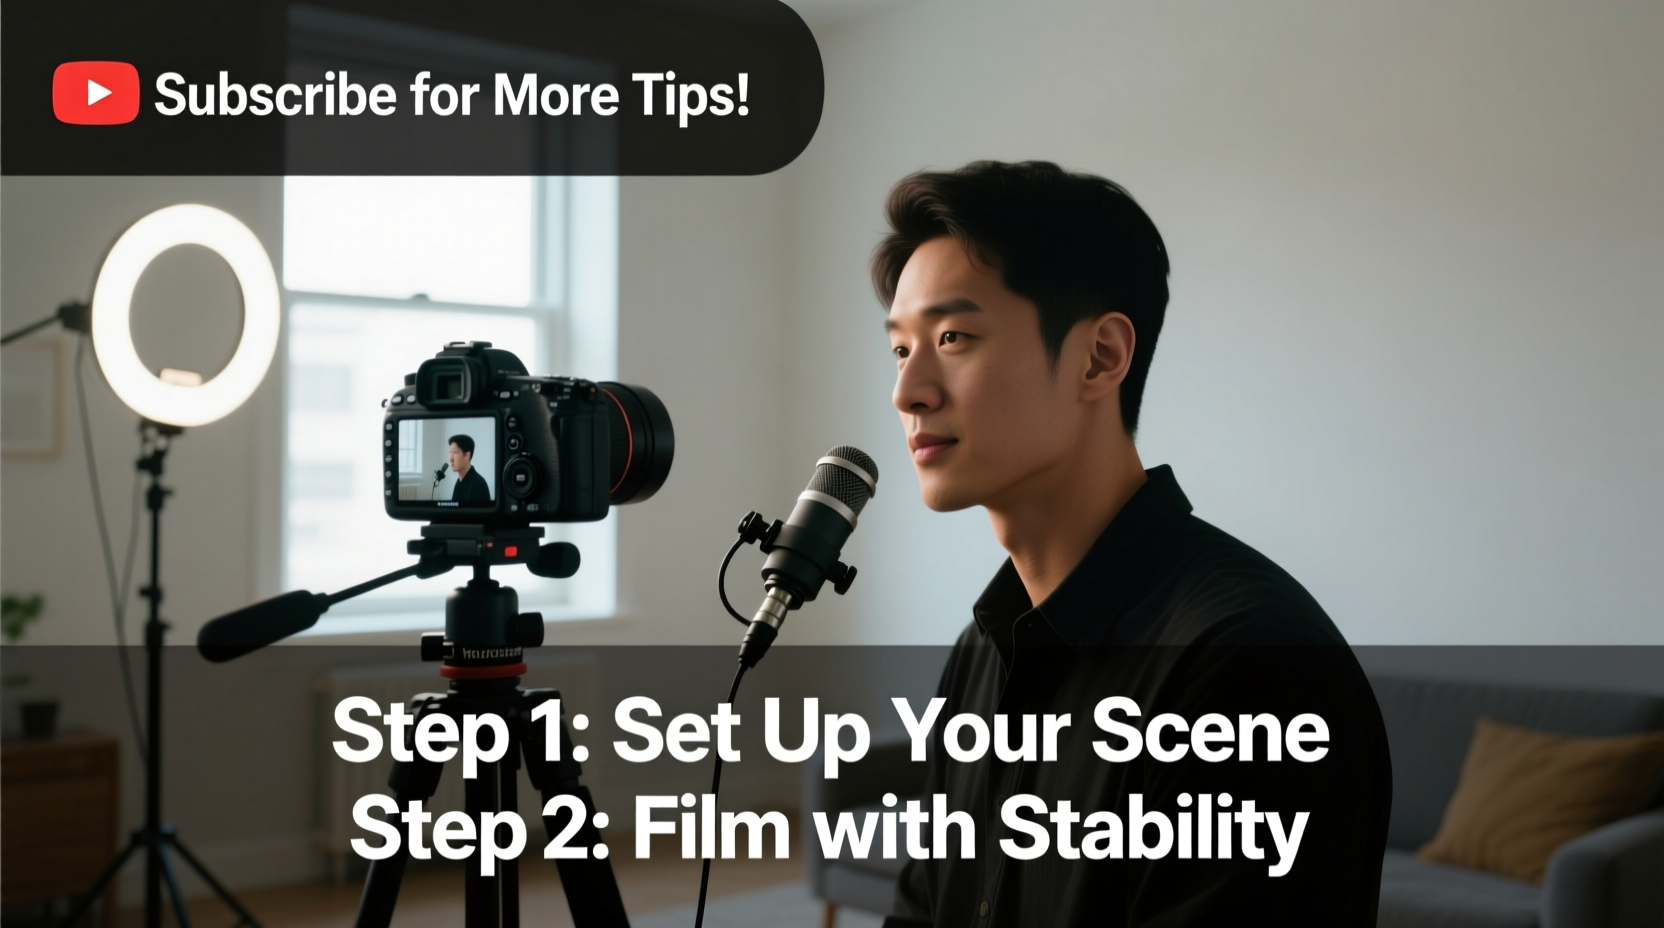
Before hitting record, optimize your device’s settings and environment. The hardware matters less than how you use it. Start by cleaning your lens with a microfiber cloth—smudges drastically reduce clarity. Then, ensure your phone has enough storage space and battery life. Close background apps to prevent overheating or crashes during long recordings.
Use your phone’s native camera app or download a third-party option like Filmic Pro or ProCam, which offer manual control over focus, exposure, white balance, and frame rate. For most YouTube content, shoot in 1080p at 30fps or 60fps if capturing motion. Avoid digital zoom—it degrades quality. Instead, physically move closer to your subject.
2. Optimize Lighting and Audio
No amount of post-processing can fix poor lighting or muffled audio. Natural light remains the best option. Film near a large window during daylight hours, positioning yourself so light falls evenly on your face. Avoid backlighting (e.g., sitting with a bright window behind you), as it creates silhouettes.
If natural light isn’t available, invest in an affordable ring light or softbox panel. These provide consistent illumination and eliminate harsh shadows. Even a desk lamp with a daylight-balanced bulb can make a noticeable difference.
Audio is equally critical. Built-in microphones pick up ambient noise and lack depth. Use an external lavalier mic connected via USB-C or Lightning port. Options like the Rode SmartLav+ or Comica CVMic-1 deliver broadcast-level sound without breaking the bank. Record a short test clip to check levels—your voice should be clear but not peaking into distortion.
“Great video grabs attention, but great audio keeps viewers watching.” — Mark Rober, Engineer and Top-Tier YouTuber
3. Frame Your Shot Like a Pro
Composition influences professionalism more than resolution. Hold your phone in landscape mode unless you’re creating vertical shorts—YouTube favors 16:9 aspect ratios for main content. Use the rule of thirds: enable grid lines in your camera settings and position your eyes along the top horizontal line.
Keep the background clean and relevant. A cluttered room distracts viewers. Add subtle personality with books, plants, or artwork—but avoid busy patterns. Maintain eye-level alignment; prop your phone on stacked books or a small tripod to avoid unflattering low or high angles.
| Do | Don't |
|---|---|
| Use a tripod or stabilizer | Hold the phone freehand for long takes |
| Position light source in front or slightly to the side | Shoot under fluorescent overhead lights |
| Maintain 3-6 feet distance from camera | Get too close, causing lens distortion |
| Dress in solid colors that contrast with background | Wear busy prints or all-white outfits |
4. Capture Smooth Footage with Minimal Gear
Shaky footage undermines credibility. While gimbals like the DJI OM 6 offer stabilization for dynamic shots, they aren’t essential for static content. For talking-head videos, a $10 tabletop tripod suffices. When moving, walk slowly and keep elbows tucked in. Use two hands to minimize wobble.
Record multiple takes. Even seasoned creators flub lines. Leave a 3-second pause before and after speaking to give editing flexibility. If filming B-roll—supplementary visuals like hands typing or coffee pouring—shoot longer clips (10–15 seconds) from different angles to add visual interest.
5. Edit Professionally Using Mobile Apps
Editing transforms raw clips into compelling stories. CapCut, InShot, and Adobe Premiere Rush are powerful mobile editors with intuitive interfaces. Download one and import your footage. Begin by trimming dead space and arranging clips in narrative order. Add smooth transitions like crossfades or dips to black—avoid flashy effects that distract.
Incorporate text overlays for emphasis or context. Use sans-serif fonts in high-contrast colors (white with black outline works well). Keep captions brief and time them to appear only when relevant. Background music enhances mood but should stay below -18 dB to avoid drowning speech. Free royalty-free tracks are available on YouTube Audio Library or Pixabay.
Color correction elevates production value. Most apps include filters or manual adjustment sliders. Aim for natural skin tones, balanced whites, and moderate contrast. Don’t oversaturate—realism builds trust.
Mobile Editing Checklist
- Trim unnecessary pauses and mistakes
- Adjust audio levels (voice at -6dB, music at -18dB)
- Add subtitles for accessibility and retention
- Apply color correction for consistent tone
- Include end screen with subscribe prompt
- Export in 1080p H.264 format, bitrate ~12 Mbps
Real Example: From Idea to Upload in One Afternoon
Sophia, a freelance designer in Portland, wanted to share productivity tips without investing in expensive gear. She used her iPhone 13, a $20 lavalier mic, and a ring light clipped to her desk. Over two hours, she filmed three segments: intro, tip demonstration, and outro. She recorded each twice, choosing the clearest audio take.
Using CapCut, she trimmed pauses, added animated text for key points, and layered a soft piano track beneath her voice. She included a quick B-roll clip of her notebook and keyboard. After exporting, she uploaded directly to YouTube, adding a custom thumbnail made in Canva. Her video gained 5,000 views in the first week, with comments praising the \"clean, professional look.\"
FAQ
Can I film YouTube videos in portrait mode?
You can, but it's not recommended for main content. Portrait videos display with black bars on the sides on desktops, reducing visible area. Reserve vertical format for YouTube Shorts or social media snippets.
How long should my videos be?
There’s no fixed rule. Focus on delivering value efficiently. Tutorials may need 8–12 minutes; quick tips can be under 3. Analyze audience retention in YouTube Analytics to find your ideal length.
Do I need to credit music in my videos?
If the track is labeled as royalty-free and doesn’t require attribution, you don’t need to credit it. However, crediting artists in the description is good practice and supports the creative community.
Final Steps Before Publishing
After editing, preview your video on both phone and desktop. Check for audio spikes, misaligned subtitles, or awkward cuts. Save a backup copy before uploading. On YouTube, write a descriptive title with keywords, craft a detailed description with timestamps and links, and choose a custom thumbnail that stands out.
Consistency matters more than perfection. Posting regularly builds algorithmic favor and viewer loyalty. Schedule uploads weekly or biweekly based on your capacity.


 浙公网安备
33010002000092号
浙公网安备
33010002000092号 浙B2-20120091-4
Comments
No comments yet. Why don't you start the discussion?