
Every network-enabled device, including your Dell laptop, has a unique identifier called a MAC (Media Access Control) address. This 12-digit hexadecimal number is assigned to your network interface card and is essential for communication within local networks. Whether you're troubleshooting connectivity issues, setting up parental controls, or registering your device on a restricted network like a university or office system, knowing how to locate your MAC address is crucial.
Unlike IP addresses, which can change depending on your network, the MAC address is hard-coded into your hardware and remains constant. While it might sound technical, retrieving it on a Dell laptop is straightforward once you know where to look. This guide walks you through several reliable methods—using built-in Windows tools, physical labels, and command-line utilities—so you can find your MAC address quickly and confidently.
Understanding the MAC Address: What It Is and Why You Need It
The MAC address is a unique identifier formatted as six pairs of two hexadecimal digits, separated by colons or hyphens (e.g., 00:1A:2B:3C:4D:5E). It operates at the data link layer of the networking model and ensures that data packets reach the correct device on a local network.
Common scenarios where you might need your MAC address include:
- Registering your laptop on a school or corporate network
- Configuring router-level device restrictions or access control lists
- Troubleshooting Wi-Fi connection problems
- Setting up port forwarding or static DHCP assignments
- Verifying hardware authenticity during diagnostics
“Knowing your device’s MAC address gives you greater control over network access and security settings.” — Dr. Alan Reyes, Network Security Consultant
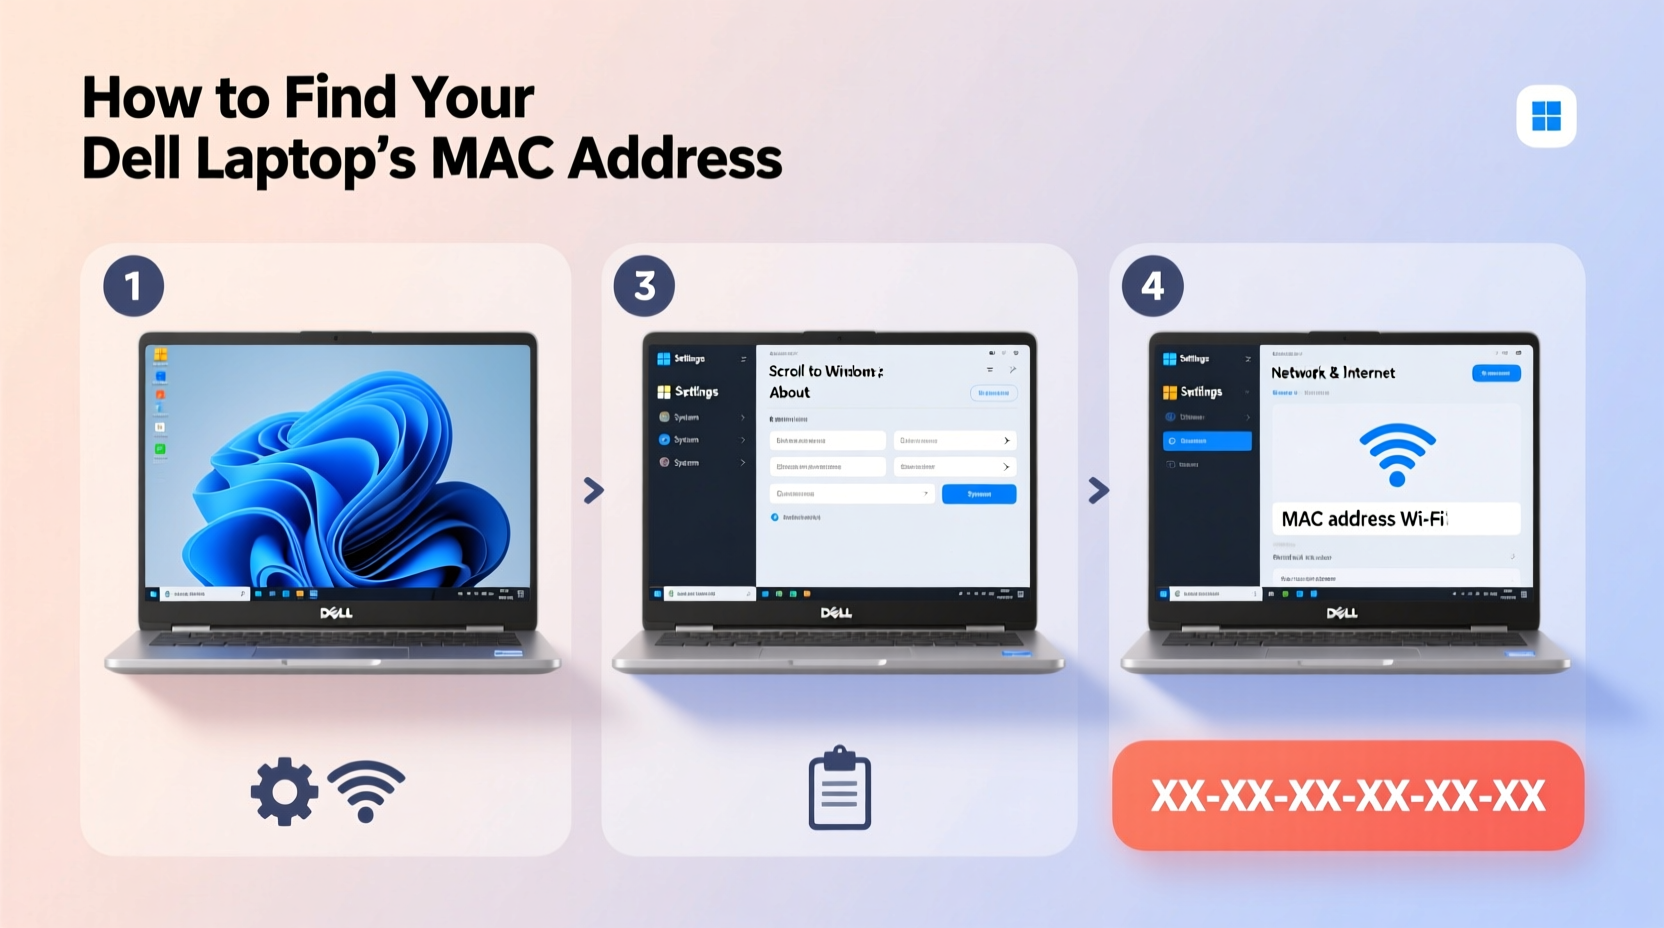
Method 1: Using Windows Settings (Graphical Interface)
This is the most user-friendly approach, ideal for those who prefer visual navigation over command-line tools.
- Click the Start menu and select Settings (the gear icon).
- Navigate to Network & Internet.
- Depending on your connection type:
- If using Wi-Fi: Click Wi-Fi, then select the network you're connected to.
- If using Ethernet: Click Ethernet, then choose your active connection.
- Scroll down to the Properties section.
- Look for Physical address (MAC). The value listed here is your MAC address.
Method 2: Using Command Prompt (ipconfig /all)
For more detailed network information, including all active adapters, Command Prompt provides a comprehensive view.
- Press Windows + R to open the Run dialog box.
- Type
cmdand press Enter. - In the black window, type the following command and press Enter:
ipconfig /all - Scroll through the output until you find your active network adapter (e.g., \"Wireless LAN adapter Wi-Fi\").
- Look for the line labeled Physical Address. The value next to it is your MAC address.
Note: Some virtual adapters (like Hyper-V or VPN clients) may also display MAC addresses. Focus on the one associated with your real hardware—typically named “Intel,” “Realtek,” or “Qualcomm Atheros.”
Method 3: Using PowerShell (Get-NetAdapter)
PowerShell offers a modern alternative to Command Prompt with cleaner output formatting.
- Press Windows, type PowerShell, and open it.
- Enter the following command:
Get-NetAdapter | Select Name, MacAddress - Press Enter.
- The result will list all network adapters and their corresponding MAC addresses.
- Identify the active adapter—usually labeled “Wi-Fi” or “Ethernet”—and note its MAC address.
If no MAC address appears for an adapter, it may be disabled or disconnected. Enable it via Device Manager or reconnect to a network.
Method 4: Checking the Physical Label on Your Dell Laptop
Dell often prints the MAC address directly on the device, especially on business-grade models like Latitude, Precision, or OptiPlex series.
To locate it:
- Turn off your laptop and unplug it.
- Flip it over and examine the bottom panel.
- Look for a small label containing regulatory information and serial numbers.
- Find entries labeled WLAN MAC, Wi-Fi MAC, or simply MAC.
This method is useful when the operating system won’t boot or if you need the address before installing Windows.
| Method | Difficulty Level | Best For | Requires OS Access? |
|---|---|---|---|
| Windows Settings | Beginner | Quick lookup while online | Yes |
| Command Prompt | Intermediate | Detailed network diagnostics | Yes |
| PowerShell | Intermediate | Scripting or automation | Yes |
| Physical Label | Beginner | Non-booting systems or pre-installation | No |
Mini Case Study: Gaining Campus Network Access
Sophia, a first-year engineering student at Midtown University, couldn't connect her new Dell Inspiron 15 to the campus Wi-Fi. After speaking with IT support, she learned that all devices must register their MAC addresses in the portal before gaining internet access.
Unfamiliar with technical terms, Sophia initially felt overwhelmed. She followed the university’s PDF guide but got stuck interpreting the steps. Instead, she searched for “how to find MAC address on Dell laptop” and found this article.
Using the Windows Settings method, she located her Wi-Fi adapter’s physical address in under two minutes. She entered it into the registration portal, waited 10 minutes for approval, and successfully connected to the secure network—all without visiting the help desk.
This experience taught her that understanding basic network identifiers empowers users to solve real-world tech challenges independently.
Tips for Accuracy and Security
- Copy-paste the address when possible to prevent errors.
- If using a docking station or USB Ethernet adapter, check the external device’s MAC, not the laptop’s internal one.
- Some Dell laptops have separate MAC addresses for Wi-Fi and Bluetooth—even though they share a module.
FAQ: Common Questions About MAC Addresses on Dell Laptops
Can a MAC address be changed?
While the original MAC address is permanently embedded in the hardware, it can be temporarily spoofed or overridden through software settings in Windows or BIOS. However, this should only be done for specific network compatibility reasons and reverted afterward.
Why are there multiple MAC addresses on my laptop?
Your Dell laptop may show several MAC addresses because each network interface has its own. For example:
- One for built-in Wi-Fi
- One for Ethernet (if available)
- Possible entries for Bluetooth, virtual machines, or third-party drivers
Does resetting Windows affect the MAC address?
No. Resetting or reinstalling Windows does not alter the MAC address, as it is tied to the physical network adapter, not the operating system.
Final Checklist: How to Find Your MAC Address – Quick Reference
- ✅ Determine your connection type:
- Wi-Fi or Ethernet?
- ✅ Open Windows Settings > Network & Internet:
- Check Properties for the Physical Address.
- ✅ Or use Command Prompt:
-
Run
ipconfig /alland locate “Physical Address” under your adapter. - ✅ Prefer PowerShell?
-
Use
Get-NetAdapter | Select Name, MacAddress. - ✅ No OS access?
- Inspect the bottom label for “WLAN MAC” or similar.
- ✅ Verify accuracy:
- Double-check spelling and format before submitting.
Conclusion: Take Control of Your Network Identity
Finding the MAC address on your Dell laptop doesn’t require advanced technical knowledge—just the right steps. Whether you’re registering for a secure network, configuring advanced router settings, or simply verifying your device details, these methods provide fast, accurate results across different scenarios.
With tools like Windows Settings, Command Prompt, PowerShell, and physical inspection, you now have multiple pathways to retrieve this essential identifier. The key is knowing which method suits your situation best.


 浙公网安备
33010002000092号
浙公网安备
33010002000092号 浙B2-20120091-4
Comments
No comments yet. Why don't you start the discussion?