
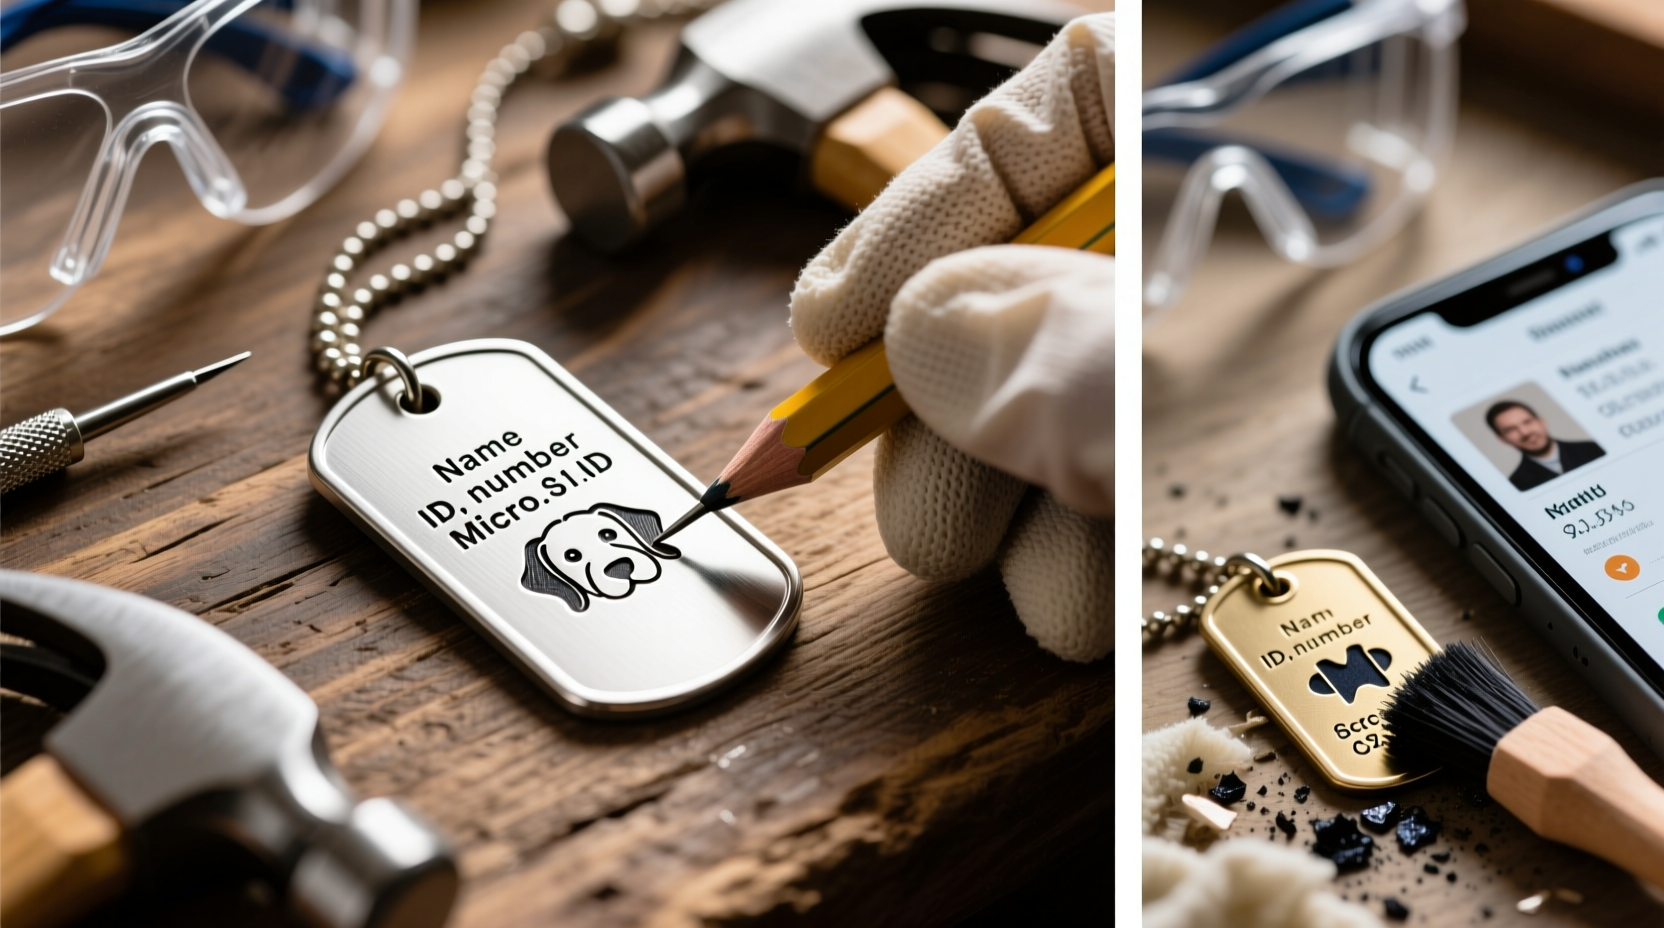
Personalized dog tags serve both functional and sentimental purposes. Beyond identifying your pet in case they get lost, a hand-etched tag carries a unique charm that mass-produced versions can’t replicate. With the right tools and technique, you can create a durable, legible, and meaningful identification tag entirely by hand. This guide walks you through every stage of the process—from selecting materials to applying a protective finish—ensuring your handcrafted tag is as practical as it is personal.
Why Hand Etch Dog Tags?
Mechanically stamped or laser-engraved tags are common, but hand etching offers unmatched customization and craftsmanship. It allows for finer details, curved lettering, artistic flourishes, and complete control over depth and texture. Unlike stamping, which requires significant force and precision alignment, hand etching is forgiving and accessible to beginners. Whether you're making a tag for your own pet, a gift, or even custom military-style tags, the hand-etched result feels intentional and enduring.
“Hand etching transforms metal into a canvas of identity. The deliberate strokes carry more weight than any machine imprint.” — Daniel Reyes, Metal Artisan & Engraver
Materials and Tools You’ll Need
Before beginning, gather all necessary supplies. Most items are available at hardware stores, craft shops, or online retailers specializing in engraving tools.
| Item | Purpose | Recommended Type |
|---|---|---|
| Dog Tag Blank | Base for etching | Stainless steel, brass, or aluminum (30–35mm wide) |
| Etching Tool | Cutting lines into metal | Diamond-tipped scribe or carbide burin |
| Masking Tape | Protect surrounding areas | Fine painter’s tape |
| Permanent Marker | Guide layout visibility | Black fine-tip industrial marker |
| Ruler & Compass | Layout accuracy | Metal-safe measuring tools |
| Safety Glasses | Eye protection | ANSI-approved |
| Clear Nail Polish or Lacquer | Finish protection | Non-yellowing formula |
Step-by-Step Process: Creating Your Etched Dog Tag
- Clean the Metal Surface
Wipe the dog tag blank with rubbing alcohol to remove oils, dust, or residues. A clean surface ensures better visibility and consistent etching. - Plan the Layout
Use a ruler and light pencil marks (or a silver gel pen for dark metals) to divide the tag into sections. Typically, include:- Pet’s name (top center)
- Your phone number (middle)
- Optional: address, microchip ID, or “Reward if Found”
- Trace the Design
Go over the pencil layout with a permanent marker. This makes the lines easier to follow during etching. Allow the ink to dry completely. - Secure the Tag
Place the tag on a non-slip surface like a rubber pad or clamp it gently in a soft-jaw vise. Avoid bending or warping the metal. - Begin Etching
Holding the etching tool at a 45-degree angle, apply steady, even pressure to score along the marked lines. Start with letters, then add borders or decorative elements. Keep strokes shallow but consistent—deep cuts can weaken thin metal. - Deepen and Clean Lines
After initial passes, go back over each line to deepen them slightly. Wipe away debris with a lint-free cloth to monitor progress. - Remove Guide Marks
Once etching is complete, use rubbing alcohol to erase any remaining marker residue. Do not scrub aggressively to avoid damaging fresh grooves. - Apply Protective Coating
Seal the etched areas with clear nail polish or jewelry lacquer. This prevents oxidation and keeps dirt from accumulating in the grooves. Let dry for at least two hours. - Attach to Collar
Thread a stainless steel split ring through the tag’s hole and secure it to your pet’s collar. Ensure the ring is closed tightly to prevent loss.
Tips for Clear, Durable Lettering
Legibility is crucial—especially in emergency situations. Follow these best practices to ensure your engraved text remains readable for years.
- Use block capital letters; they’re easier to read at small sizes.
- Maintain consistent spacing between characters—crowded text becomes indecipherable.
- Avoid overly intricate fonts; simplicity enhances durability.
- Practice on paper or scrap metal before working on the final tag.
- Work under bright, direct lighting to see fine details clearly.
Real Example: A Custom Tag for Max, the Rescue Dog
Sarah, a dog trainer in Portland, wanted a special tag for her rescue border collie, Max. Instead of buying one, she decided to hand-etch a brass tag with his name, her cell number, and the phrase “Trained – Call for Help.” She used a diamond scribe and took about 25 minutes to complete the work. After sealing it with UV-resistant lacquer, the tag survived months of hiking, rain, and mud without fading. Neighbors noticed its handmade quality, and Sarah now creates tags for clients as part of her pet care business.
Common Mistakes to Avoid
| Mistake | Why It’s a Problem | Solution |
|---|---|---|
| Etching too deeply | Weakens metal, risks cracking | Use light, repeated strokes instead of forcing the tool |
| Skipping layout planning | Uneven or crooked text | Always sketch first with guidelines |
| Using regular paint instead of sealant | Peels or flakes quickly | Use clear, flexible nail polish or jeweler’s varnish |
| Working on an unstable surface | Slippage causes jagged lines | Clamp or pad the tag securely |
FAQ
Can I etch aluminum dog tags the same way as steel?
Yes, aluminum is softer and easier to etch, requiring less pressure. However, it’s more prone to scratching over time. A protective coating is especially important for aluminum.
How long do hand-etched tags last?
With proper sealing and care, a well-etched stainless steel or brass tag can remain legible for 5–10 years, even with daily wear. Reapply sealant annually for maximum longevity.
Is hand etching safe for beginners?
Absolutely. Unlike power tools, hand etching involves minimal risk when safety glasses are worn. The process is low-speed and controllable, making it ideal for those new to metalwork.
Final Checklist Before You Begin
- ☐ Gather all tools and materials
- Ensure you have the tag, scribe, tape, marker, and sealant ready.
- ☐ Choose a quiet, well-lit workspace
- Vibration and poor lighting increase errors.
- ☐ Practice lettering on paper
- Build muscle memory for consistent stroke pressure.
- ☐ Confirm contact information
- Double-check phone numbers and spelling before etching.
- ☐ Clean and prep the tag
- No grease or smudges should remain on the surface.
Conclusion
Creating a hand-etched dog tag is more than a DIY project—it’s a gesture of care. Each groove you carve represents attention to detail and a commitment to your pet’s safety. With patience and the right approach, you can produce a tag that’s not only functional but also a small work of art. These skills extend beyond pet tags; they open doors to personalized gifts, memorial pieces, or even a niche craft business.


 浙公网安备
33010002000092号
浙公网安备
33010002000092号 浙B2-20120091-4
Comments
No comments yet. Why don't you start the discussion?