
Installing a dog door in your wall can give your pet the freedom to enjoy the backyard while minimizing disruptions to your daily routine. Unlike flap-style doors mounted on existing walls or sliding glass doors, a wall-mounted dog door integrates directly into your home’s structure. When done correctly, it enhances convenience without sacrificing energy efficiency or security. However, improper installation can lead to air leaks, water intrusion, or structural damage. This guide walks you through every phase—from planning and measuring to sealing and final inspection—with professional-level precision.
Assessing Your Wall Type and Location
Before any tools come out, evaluate the type of wall where you plan to install the dog door. Most exterior walls are framed with wood or metal studs and covered with siding, brick, stucco, or vinyl. Interior load-bearing walls may not be suitable for this project due to plumbing, electrical wiring, or HVAC ducts running through them.
The ideal location is on an exterior wall that leads directly to a secure, fenced yard. Avoid placing the door near stairs, pools, or street-facing areas where your dog could wander into danger. Choose a spot low enough for your pet to access easily but high enough to avoid ground moisture.
Common Wall Types and Considerations
| Wall Type | Installation Difficulty | Special Tools Needed |
|---|---|---|
| Wood Framed (Vinyl/Siding) | Easy to Moderate | Circular saw, jigsaw, drill |
| Brick or Stone | Difficult | Masonry bit, angle grinder, chisel |
| Stucco | Moderate | Reciprocating saw, drywall knife |
| Concrete Block | Difficult | Hollow-core drill bit, masonry anchors |
“Many homeowners underestimate what’s behind their walls. A thermal imaging scan can reveal hidden obstructions and prevent costly mistakes.” — Daniel Reyes, Residential Construction Consultant
Selecting the Right Dog Door Model
Dog doors vary widely in size, insulation rating, and locking mechanisms. Measure your pet from the ground to the bottom of their chest to determine the minimum height. The flap width should allow comfortable passage without excess gaps. For example, a medium-sized Labrador typically needs a door at least 10 inches wide and 14 inches tall.
Choose models with double-flap designs and magnetic seals for better weather resistance. Energy-efficient units often include insulated frames and draft-blocking features—critical if you live in extreme climates.
Do’s and Don’ts When Choosing a Dog Door
| Do | Don't |
|---|---|
| Measure your dog’s girth and height accurately | Select based solely on breed averages |
| Opt for a model with a removable lock panel | Ignore local wildlife risks (e.g., raccoons, stray animals) |
| Pick one with UV-resistant flaps | Use interior-only models outdoors |
| Check warranty and replacement part availability | Overlook ease of cleaning and maintenance |
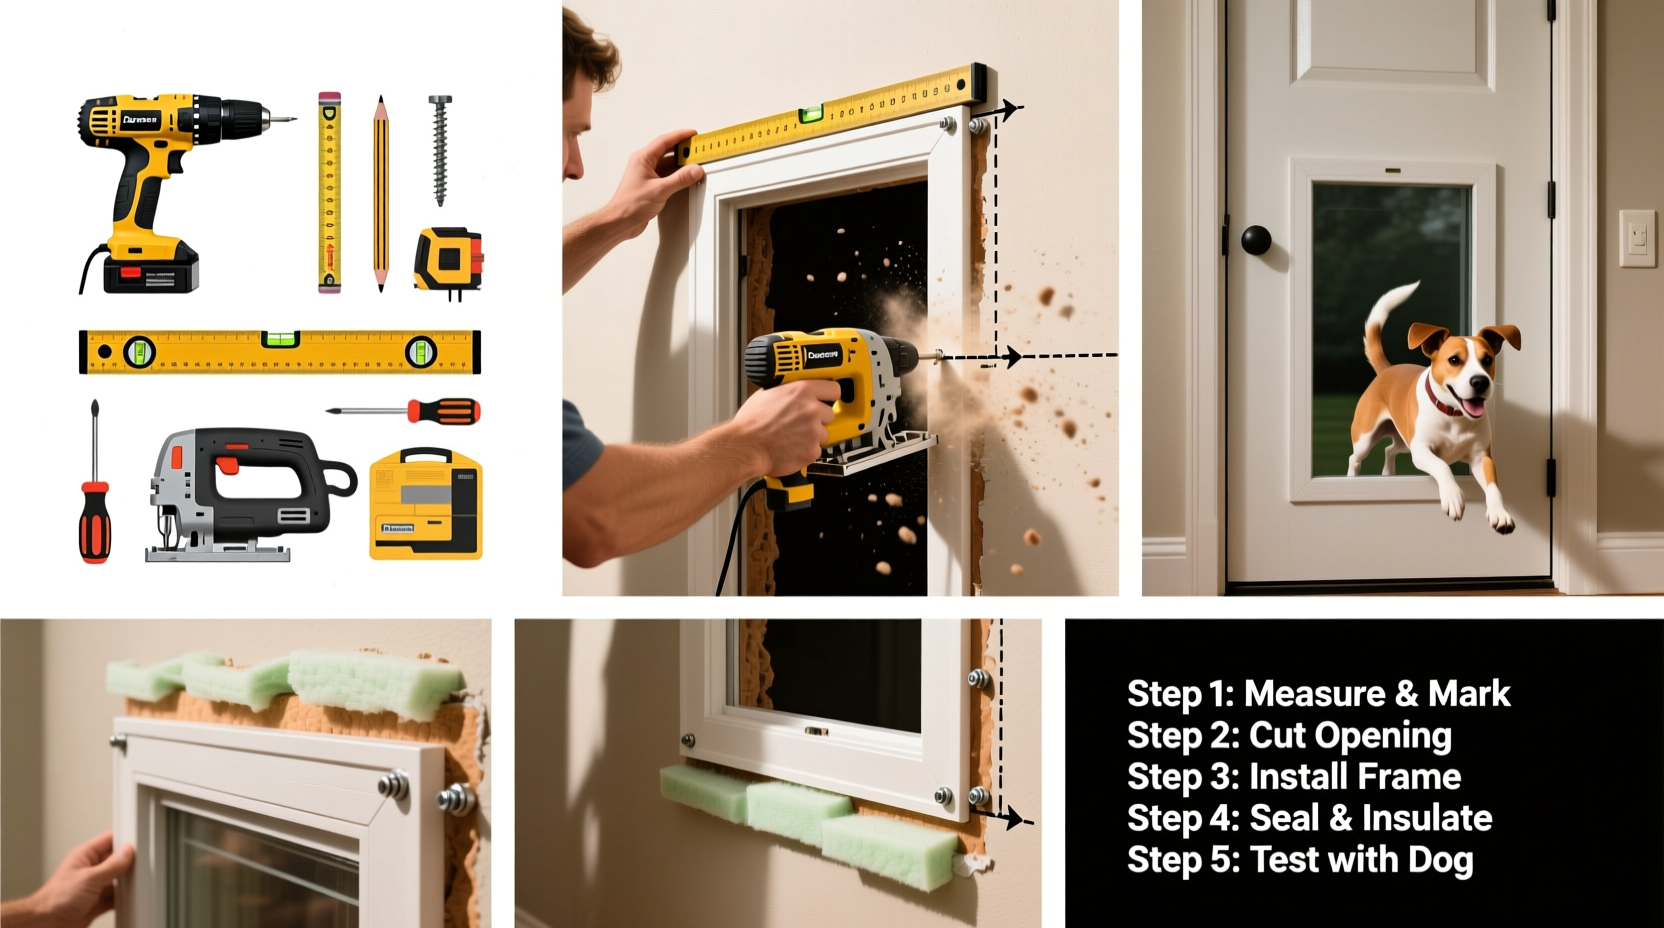
Step-by-Step Installation Process
With materials gathered and location confirmed, follow these steps carefully to ensure a safe, secure, and weatherproof installation.
- Mark the Cutout Template: Use the manufacturer’s template or create one using the frame dimensions. Tape it to the wall at standing height for your dog.
- Locate Studs and Utilities: Confirm no electrical, plumbing, or gas lines run through the area using a stud finder with AC detection.
- Drill Starter Holes: At each corner of the outline, drill a ½-inch hole to allow jigsaw blade insertion.
- Cut the Opening: Carefully cut along the lines with a jigsaw (for wood/drywall) or angle grinder (for masonry). Work slowly to maintain control.
- Dry-Fit the Frame: Insert the outer and inner frame halves to verify fit. Adjust as needed.
- Seal the Exterior Flange: Apply waterproof silicone caulk around the outside edge before securing.
- Secure the Frame: Fasten with provided screws into the wall framing. Do not overtighten.
- Insulate Gaps: Use spray foam or fiberglass insulation around the frame within the wall cavity.
- Install Trim and Flaps: Attach interior and exterior trim plates. Install flaps and locking cover.
- Weatherproof: Seal all exterior joints with paintable acrylic caulk. Add flashing if under siding.
Post-Installation Inspection Checklist
- ✅ No visible gaps between frame and wall
- ✅ Flap opens and closes smoothly
- ✅ Locking mechanism functions properly
- ✅ Interior and exterior seals are intact
- ✅ No drafts felt when hand is passed around edges
- ✅ Pet uses the door confidently after brief acclimation
A Real-World Example: Installing in a Vinyl-Sided Home
Sarah from Portland, Oregon, wanted her Border Collie, Max, to access the yard independently during long workdays. She chose a mid-size, double-flap dog door rated for cold climates. After confirming no utilities were in the path, she marked the opening just above a window well to avoid moisture pooling.
Using a jigsaw with a fine-tooth blade, she cut through the siding and sheathing. She installed the unit with extra attention to sealing—adding Z-flashing over the top edge to direct rainwater away. Inside, she used acoustic sealant to reduce noise and improve insulation. Within two days, Max was using the door confidently. Six months later, there were no signs of leaks or drafts, even during heavy winter rains.
Frequently Asked Questions
Can I install a dog door in a brick wall?
Yes, but it requires specialized tools like a masonry bit and angle grinder. It’s also wise to consult a mason if you're unfamiliar with cutting through brick. Always check for internal steel reinforcements or weep channels.
How do I keep other animals out?
Choose a model with a lockable flap or electronic sensor that only opens for your pet’s RFID collar tag. Motion-activated lights near the door can also deter nocturnal intruders.
Will this affect my home’s energy efficiency?
A poorly sealed dog door can increase heating and cooling costs. Opt for a fully insulated model with dual flaps and tight seals. Proper installation—including insulating the gap within the wall—is essential for maintaining R-value.
Final Tips for Long-Term Success
After installation, monitor the door seasonally. Check caulk lines for cracking, especially in regions with freeze-thaw cycles. Clean the flaps monthly with mild soap and water to prevent stiffness. In high-wind areas, consider adding a secondary rigid cover for storms.
Train your dog gradually if they’re hesitant. Use treats and positive reinforcement to build confidence. Never force them through—it should feel like a safe choice.
“A well-installed dog door shouldn’t compromise your home’s integrity. It should blend function, safety, and durability seamlessly.” — Lila Nguyen, Certified Pet Home Designer
Take Action Today
With careful planning and attention to detail, installing a dog door in your wall is a manageable weekend project that pays off in convenience and pet happiness. You’ve got the knowledge—now gather your tools, measure twice, and make the cut. Your dog will thank you every time they trot outside on their own terms.


 浙公网安备
33010002000092号
浙公网安备
33010002000092号 浙B2-20120091-4
Comments
No comments yet. Why don't you start the discussion?