
Earphones are among the most frequently used personal electronics, yet they’re also one of the easiest items to misplace. Whether tossed into a bag, left on a desk, or dropped during a commute, losing your earphones—or worse, their case—can be both inconvenient and costly. One simple but effective solution? Attach a keyring to your earphone case. This small upgrade enhances portability, reduces loss, and keeps your gear secure. This guide walks you through the process with precision, offering practical advice, tools, and real-world insights to help you make the most of this smart modification.
Why Add a Keyring to Your Earphone Case?
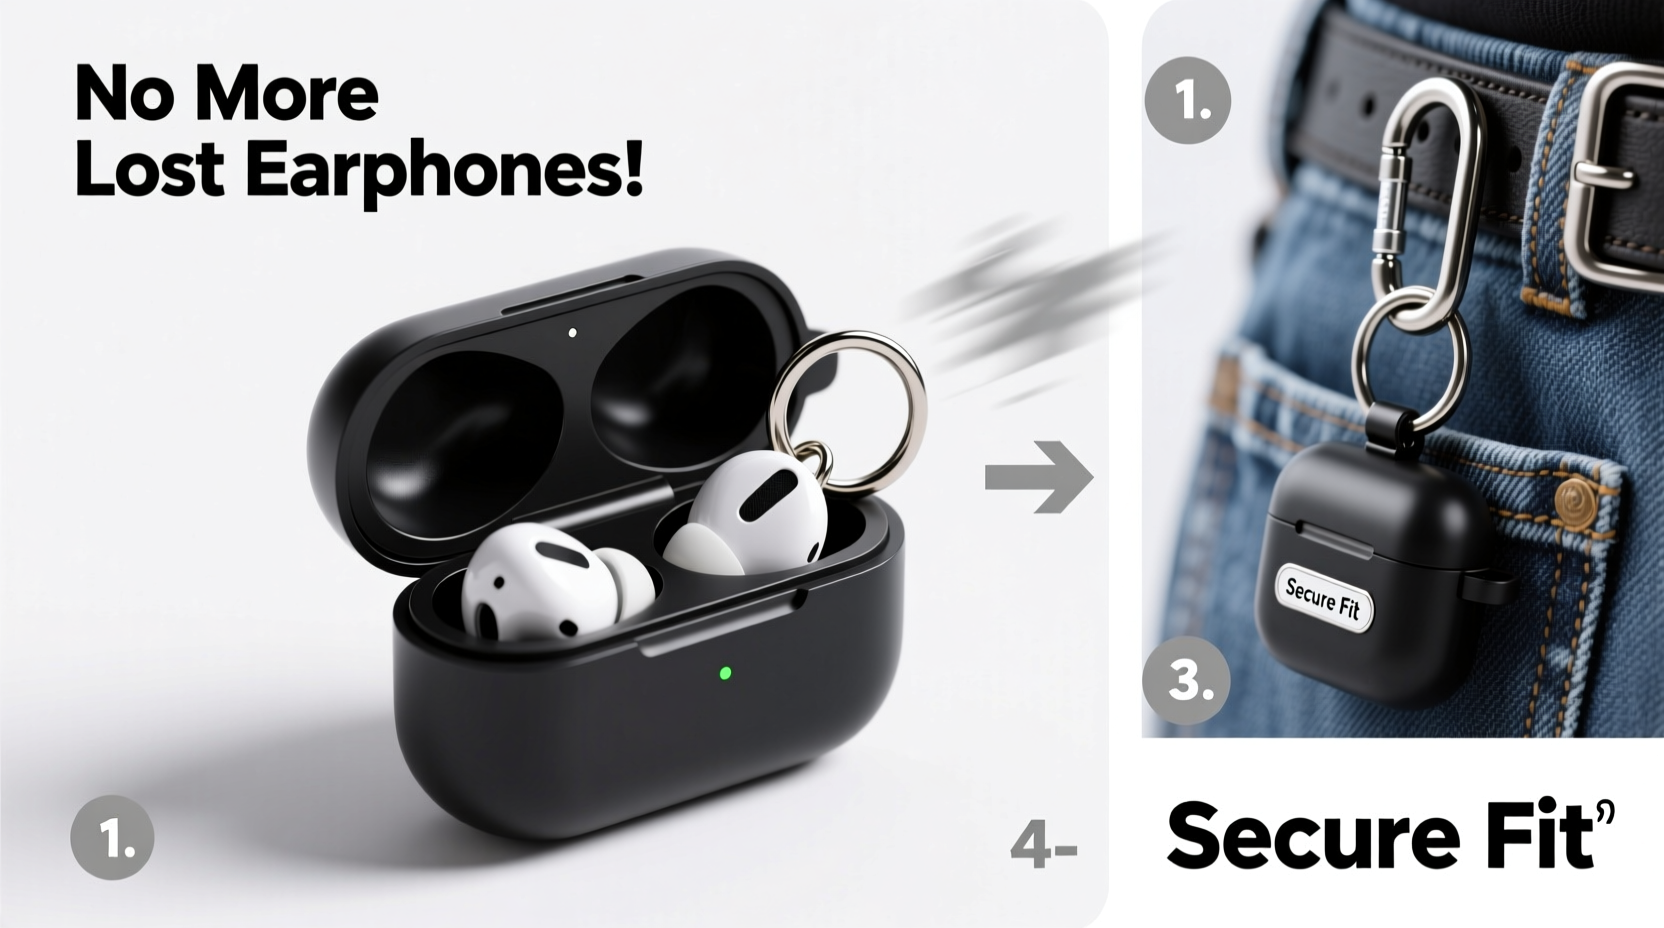
Modern earphone cases are compact and smooth, making them prone to slipping out of pockets or bags. A keyring transforms the case into something that can be clipped directly to a backpack, belt loop, or set of keys—dramatically reducing the chance of misplacement. Beyond utility, attaching a keyring adds a personalized touch, allowing you to use stylish or durable rings that reflect your taste.
The benefits go beyond convenience:
- Improved Security: Reduces risk of loss in crowded spaces or during travel.
- Quick Access: Keeps earphones within reach at all times.
- Durability: Prevents loose tossing that can damage hinges or charging ports.
- Organization: Consolidates essentials—keys, earphones, and even a small flashlight or USB drive—on one ring.
Tools and Materials You’ll Need
Before starting, gather the right supplies. The success of this project depends on using appropriate materials that won’t damage your earphone case or compromise its function.
| Item | Purpose | Recommended Type |
|---|---|---|
| Keyring | To attach case to keys or clips | Stainless steel split ring or rotating swivel clasp |
| Drill or Hole Punch Tool | Create an opening in the case | Mini hand drill with 3mm bit or leather hole punch |
| Sandpaper (fine grit) | Smooth rough edges after drilling | 220–400 grit |
| Masking Tape | Prevent plastic cracking during drilling | Standard adhesive tape |
| Measuring Tool | Ensure precise placement | Ruler or caliper |
| Marker or Pen | Mark drilling spot | Fine-tip permanent marker |
“Adding a keyring point to small electronics is a minimalist upgrade with maximum impact on daily usability.” — Jordan Lee, Product Design Consultant
Step-by-Step Installation Guide
Follow these steps carefully to install a keyring on your earphone case without damaging it. This method works best with hard-shell plastic or silicone cases. Avoid attempting this on sealed wireless charging cases unless you're certain about structural integrity.
- Choose the Right Location
Select a spot on the top or side of the case near the edge—preferably where there’s no internal circuitry. For most cases, the upper back corner is ideal. Ensure the hole won’t interfere with the lid opening or charging port. - Clean and Prepare the Surface
Wipe the case with a dry cloth. Remove dust or grease that could affect drilling accuracy. Place a small piece of masking tape over the intended drill site to reduce slippage and cracking. - Mark the Drilling Point
Use a fine-tip marker to make a clear dot where the hole will go. Double-check alignment from multiple angles to ensure symmetry. - Drill the Hole
Secure the case on a stable surface. If using a hand drill, apply gentle, steady pressure. Use a 3mm bit for standard keyrings. Drill slowly to avoid melting plastic. Stop once the bit passes through. - Smooth the Edges
Use fine-grit sandpaper to gently file around the hole. Remove any burrs or sharp fragments. This prevents fraying if using a fabric strap and improves aesthetics. - Attach the Keyring
Open the split ring slightly using pliers or your fingers. Slide it through the hole and close securely. Test movement to ensure it rotates freely without wobbling. - Final Inspection
Check that the case still closes properly and that the keyring doesn’t press against the earbuds inside. Confirm the ring holds firm under light tension.
Alternative Methods (No Drilling Required)
Not everyone feels comfortable modifying their earphone case permanently. Fortunately, several non-invasive options deliver similar results.
- Adhesive Keyring Clips: Small plastic or metal clips with strong 3M adhesive backing. Stick to the case and hold a standard keyring.
- Silicone Sleeves with Loops: Custom-fit covers that include built-in loops for attaching rings or carabiners.
- Elastic Cord Tethers: A stretchable cord with a clip on one end and a loop on the other. Wrap around the case and connect to keys.
- Magnetic Attachments: For metal-backed cases, use a magnetic key fob connector. Provides quick detachment when needed.
While these alternatives are safer, they may not be as durable over time. Adhesives weaken with heat and moisture, and elastic bands can degrade. Drilled installations remain the most reliable long-term solution.
Real-World Example: How a Commuter Reduced Loss with a Keyring Fix
Maya, a graphic designer in Chicago, used to lose her earphones every few months. She’d place them in her tote bag alongside her laptop, only to realize they were missing after transit. After reading about keyring modifications, she decided to try it herself using a mini drill and a stainless steel split ring.
She installed the ring on her AirPods Pro case and attached it to her keychain, which she always kept on a carabiner clipped to her backpack. Over the next year, she never misplaced her earphones—even during busy subway rides or coffee shop work sessions. “It sounds minor,” she said, “but having them literally tethered to my keys changed everything. I don’t even think about it anymore.”
Do’s and Don’ts of Modifying Your Earphone Case
| Do’s | Don’ts |
|---|---|
| Use masking tape to prevent cracking | Drill near the hinge or charging port |
| Test fit the keyring before finalizing | Use excessive force while drilling |
| Opt for corrosion-resistant metal rings | Attach heavy items that strain the ring |
| Inspect the interior after drilling | Modify a warranty-covered device without backup |
| Carry spare split rings for replacements | Ignore signs of case weakening over time |
Frequently Asked Questions
Will drilling a hole void my earphone warranty?
Yes, physically altering the case may void the manufacturer’s warranty, especially if damage occurs internally. Consider this modification only if the device is out of warranty or if convenience outweighs warranty protection.
Can I use any size keyring?
Stick to small-to-medium split rings (20–25mm diameter). Oversized rings add bulk and may snag on fabrics. Rotating swivel clasps offer smoother movement and are better for frequent access.
Is this safe for wireless charging?
As long as the modification is limited to the outer shell and doesn’t involve internal components, wireless charging remains unaffected. Always ensure the case closes fully and aligns properly on the charging pad.
Final Checklist Before You Begin
- Confirm your earphone case material is drill-safe (hard plastic, silicone, or metal).
- Gather all necessary tools: drill, 3mm bit, sandpaper, masking tape, keyring.
- Choose a non-critical location for the hole—away from hinges and electronics.
- Apply masking tape to the drilling site.
- Mark the spot precisely with a fine-tip marker.
- Drill slowly and steadily; do not rush.
- Sand the hole edges to remove sharpness.
- Attach the keyring and test durability.
- Verify that the case still functions normally.
Make Your Gear Work for You
Small adjustments often yield the greatest improvements in daily life. Installing a keyring on your earphone case is more than a DIY fix—it’s a commitment to smarter organization and personal efficiency. Whether you opt for a permanent drilled solution or a removable adhesive alternative, the goal remains the same: keeping your essentials secure and accessible.


 浙公网安备
33010002000092号
浙公网安备
33010002000092号 浙B2-20120091-4
Comments
No comments yet. Why don't you start the discussion?