
Upgrading your Apple Watch with a metal elastic bracelet combines durability, style, and comfort. Unlike traditional bands, metal elastic models use flexible links or spring-loaded mechanisms that conform to your wrist while maintaining a sleek profile. However, improper installation can lead to discomfort, poor alignment, or even damage to the watch or band. This comprehensive guide walks you through every phase of attaching a metal elastic bracelet correctly—ensuring a secure, balanced, and personalized fit.
Understanding Your Metal Elastic Bracelet
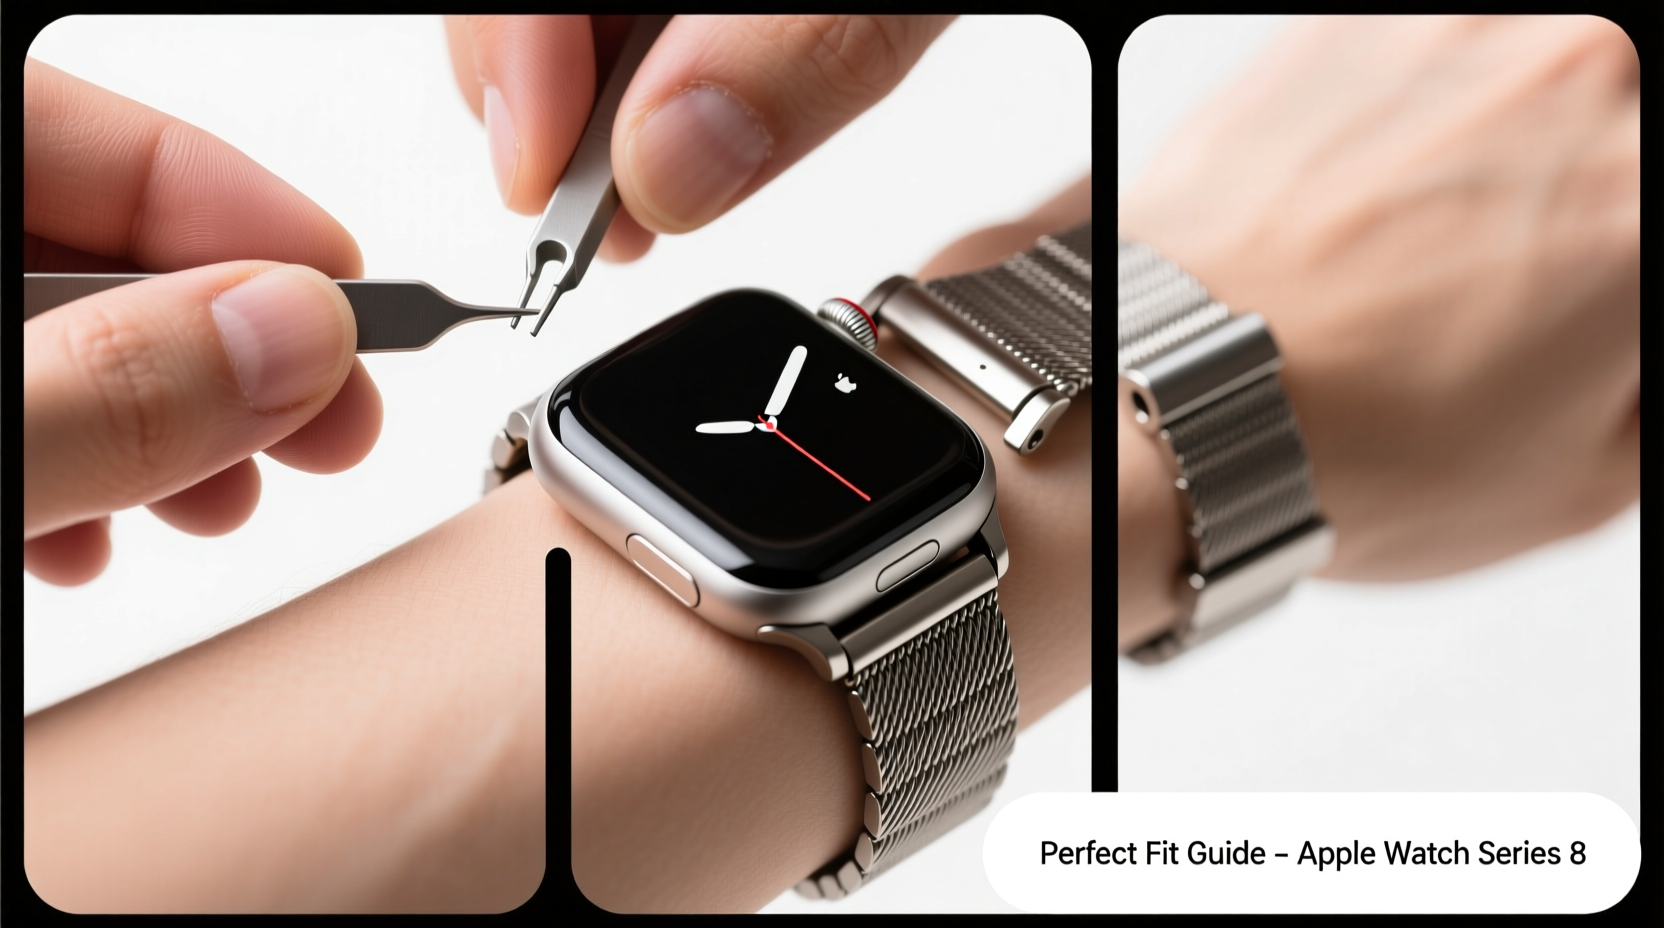
Metal elastic bracelets for the Apple Watch typically feature interlocking stainless steel or titanium links connected by internal springs or flexible joints. These allow the band to expand and contract gently around the wrist without clasps or buckles. They are designed specifically for Apple’s proprietary pin system, which secures the band to the watch case via spring bars.
Before beginning installation, identify the components of your bracelet:
- Two band ends: Each end has a spring bar mechanism that fits into the watch lugs.
- Spring bars: Small metal pins inside each band end that compress to slide into the watch’s attachment points.
- Adjustment zones: Some models have micro-adjustable links or sliding tracks for fine-tuning fit.
“Precision in alignment during installation prevents long-term wear issues like uneven stress or link deformation.” — Jordan Lee, Wearable Design Engineer at ChronoLume
Tools You’ll Need
You don’t need specialized tools for most metal elastic bracelets, but having the right items makes the process smoother and safer:
| Tool | Purpose |
|---|---|
| Clean microfiber cloth | To protect the watch face and clean surfaces before assembly |
| Fine-tipped tweezers (optional) | For guiding spring bars into tight spaces |
| Soft surface workspace | Prevents scratches when placing the watch down |
| Good lighting | Essential for seeing small mechanisms clearly |
Avoid using screwdrivers or sharp objects unless explicitly recommended by the manufacturer. The delicate finish on both the watch and bracelet can be easily marred.
Step-by-Step Installation Process
Follow this precise sequence to attach your metal elastic bracelet securely and symmetrically.
- Power off your Apple Watch
While not strictly necessary, turning off the device reduces accidental screen activation and protects internal components from static discharge. - Lay the watch face-down on a soft cloth
Ensure the display is fully protected. Use a non-abrasive surface like a towel or padded mat. - Locate the release button on the current band (if attached)
Press the quick-release lever near the watch case until the band detaches. Remove both sides carefully. - Align the new bracelet’s spring bar with the lug hole
Hold one end of the bracelet so the spring bar is compressed slightly and angled toward the lower lug opening. Gently push until it clicks into place. - Attach the second end with equal pressure
Repeat on the opposite side, ensuring the band sits flush against the case. Do not force it—if resistance occurs, recheck alignment. - Test mobility and symmetry
Lift the watch gently and rotate the band. It should move smoothly and sit evenly on both sides without tilting. - Try it on and adjust if needed
Slide the bracelet onto your wrist. Most metal elastic bands self-adjust within a range, but some offer manual track adjustments via tiny screws or sliders.
Common Mistakes to Avoid
Even experienced users make errors when installing third-party bands. Awareness helps prevent costly or damaging oversights.
| Mistake | Why It’s Problematic | How to Prevent |
|---|---|---|
| Forcing the spring bar | Can bend the pin or damage the lug | Apply steady, gentle pressure only after proper alignment |
| Installing only one side first and leaving the other hanging | Creates imbalance and increases risk of dropping | Support the watch throughout; keep both hands engaged |
| Ignoring directional markings | Some bands have “top” indicators; reversing affects fit and aesthetics | Check manufacturer labels before attaching |
| Skipping post-installation checks | May miss instability or uneven tension | Wiggle test: lightly shake the band to confirm firm attachment |
Real Example: Sarah’s First-Time Fit Challenge
Sarah purchased a premium brushed titanium elastic band online and excitedly installed it herself. She managed to attach one side easily but struggled with the second, applying excessive pressure with a paperclip. The spring bar snapped, and the band slipped, causing a minor scratch on her desk. After contacting customer support, she learned the correct angle for insertion and received a replacement. With better lighting and patience, her second attempt succeeded—now she prefers the metal band over all others.
This scenario underscores the importance of patience and technique over brute force.
Post-Installation Care and Adjustment
Once installed, monitor how the band behaves during daily use. A well-fitted metal elastic bracelet should:
- Hug the wrist snugly without pinching
- Allow room for a finger between the band and skin
- Stay level and centered on the watch face
- Not rattle or shift excessively during movement
If adjustments are possible, follow the manufacturer’s instructions precisely. Some high-end models include micro-tools for tightening expansion tracks. Others rely on heat-reactive alloys that mold slightly over time to your wrist shape.
“The ideal fit isn’t just about comfort—it’s about preserving sensor accuracy. A loose band can interfere with heart rate monitoring.” — Dr. Lena Torres, Biomedical Device Specialist
FAQ
Can I install a metal elastic bracelet on any Apple Watch model?
Yes, as long as the bracelet is designed for your specific watch size (e.g., 41mm, 45mm). The attachment mechanism is standardized across Series 1 and later, but always verify compatibility before purchase.
Is it safe to wear the metal band while swimming?
Most stainless steel elastic bands are water-resistant and suitable for showers or swimming, but saltwater and chlorine may accelerate corrosion over time. Rinse with fresh water afterward and dry thoroughly.
What if the band feels too tight after installation?
Do not stretch it manually. Instead, consult the user manual—some models have expansion settings or require temporary compression to relax the spring tension. If no adjustment exists, contact the manufacturer.
Final Checklist Before Wearing
✅ Band is centered and aligned with the watch face ✅ Both spring bars are fully seated and click securely ✅ No visible gaps between lugs and band ends ✅ Watch rotates freely but without wobble ✅ Comfortable on wrist with natural movementConclusion
A properly installed metal elastic bracelet enhances both the functionality and aesthetic of your Apple Watch. By following these detailed steps, avoiding common pitfalls, and respecting the precision engineering involved, you ensure a flawless fit that lasts. Whether upgrading for style, durability, or comfort, taking the time to install the band correctly pays off in daily wearability and device longevity.


 浙公网安备
33010002000092号
浙公网安备
33010002000092号 浙B2-20120091-4
Comments
No comments yet. Why don't you start the discussion?