
One of the most common complaints among Galaxy Watch users is the persistent gap between the watch case and the band. This small space may seem trivial, but it can lead to discomfort, reduced skin contact for health sensors, and an unrefined look. The solution? A no gap band—specifically designed to sit flush against the watch body. Installing one correctly ensures not only a sleeker profile but also improved functionality and comfort during daily wear. This guide walks you through everything you need to know, from selecting the right band to securing it flawlessly.
Understanding the Gap: Why It Matters
The standard bands that come with Samsung Galaxy Watches often leave a visible and tactile gap between the watch head and the strap. This occurs due to the design of the quick-release spring bars and the curvature of the original band attachments. While functional, this gap allows dust and moisture to accumulate and reduces sensor accuracy by increasing distance from the skin. More importantly, it disrupts the aesthetic continuity of the device.
No gap bands are engineered with a contoured end piece that extends slightly under the watch face, eliminating this space entirely. When installed properly, they create a seamless transition from case to strap, enhancing both comfort and appearance.
“Eliminating the gap isn’t just cosmetic—it improves heart rate monitoring and makes the watch feel more like an extension of your wrist.” — Jordan Lee, Wearable Tech Analyst at GadgetWear Insights
Choosing the Right No Gap Band
Not all no gap bands are created equal. Compatibility depends on your Galaxy Watch model (e.g., Watch 4, 5, 6, or Classic variants), lug width, and preferred material. Before purchasing, verify the following:
- Model Specificity: Bands for Galaxy Watch 6 may not fit older models perfectly due to subtle changes in casing dimensions.
- Lug Width: Most Galaxy Watches use 20mm or 22mm lugs; check your device settings or manual for confirmation.
- Material Options: Silicone, nylon, leather, and metal each offer different benefits in breathability, durability, and style.
- Clasp Type: Pin-and-tuck, butterfly, or magnetic closures affect ease of use and tightness.
Tools You’ll Need for Installation
Installing a no gap band doesn’t require specialized tools, but having the right ones simplifies the process and prevents damage. Here’s what to prepare:
| Tool | Purpose | Alternative |
|---|---|---|
| Spring Bar Removal Tool | Pushes out pins connecting band to watch | Paperclip (bent into L-shape) |
| Microfiber Cloth | Protects watch surface during handling | Cotton T-shirt (non-abrasive) |
| Tweezers (optional) | Helps reinsert stubborn spring bars | Fine-tipped pliers |
| Well-lit Workspace | Ensures visibility of small components | N/A |
Step-by-Step Installation Process
Follow these steps carefully to install your no gap band without damaging your Galaxy Watch or the new strap.
- Power Down Your Watch (Optional): While not required, turning off the watch minimizes accidental touches and protects internal systems.
- Place Watch Face-Down on Microfiber Cloth: This prevents scratches and stabilizes the device during removal.
- Locate the Spring Bar: Identify the metal pin near the top or bottom of the current band attachment point.
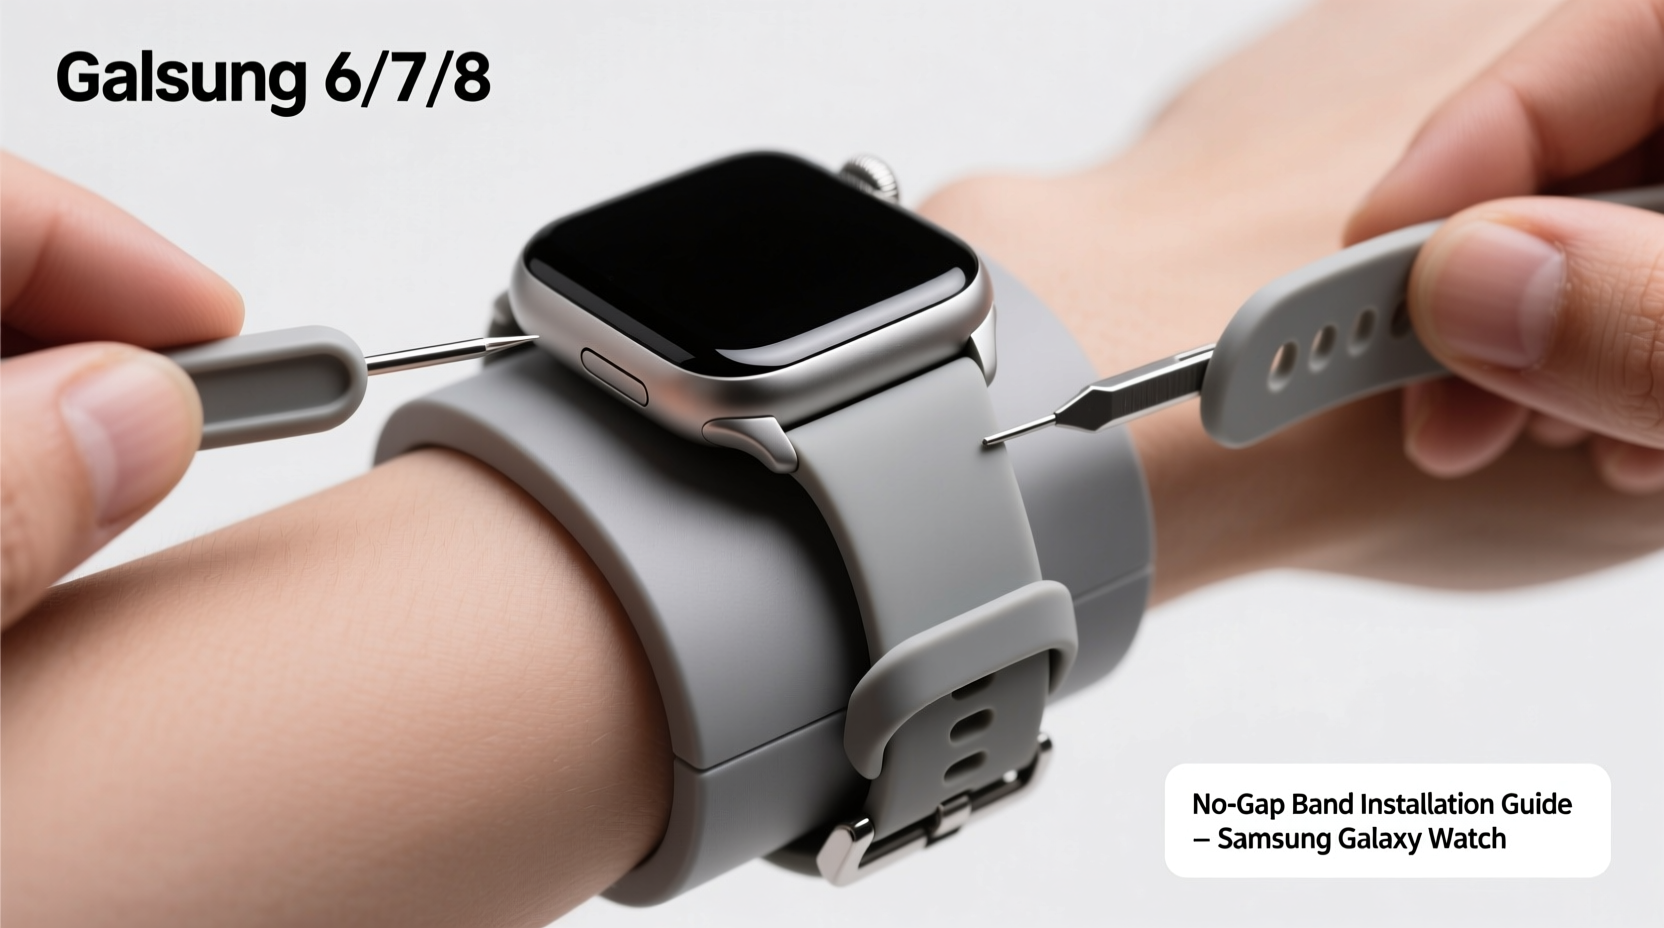
- Insert the Removal Tool: Slide the forked end of the spring bar tool into the gap between the band and watch case, aligning it with the pin.
- Push and Hold the Pin: Apply gentle inward pressure to compress the spring bar. You should feel it give slightly as the ends retract into the watch housing.
- Slide Out the Old Band: While holding the pin compressed, pull the band away from the watch. Repeat for the second side.
- Align the New No Gap Band: Take the replacement band and position its connector end so the protruding tab fits snugly beneath the watch edge—this is the key feature that eliminates the gap.
- Insert One Side First: Slide one end of the new band into place until the hole aligns with the spring bar slot. Insert the spring bar at an angle, then press it fully into position using the tool.
- Attach the Second Side: Compress the other end of the spring bar and slide the remaining band arm into place. Release slowly to ensure secure locking.
- Test Stability: Gently tug on the band to confirm it doesn’t wobble or detach easily. There should be minimal lateral movement.
Mini Case Study: From Annoyance to Seamless Wear
Sarah, a fitness instructor and long-time Galaxy Watch 5 user, initially dismissed the gap as a minor design flaw. However, after months of tracking workouts, she noticed inconsistent heart rate readings during high-intensity intervals. She also found sweat accumulating in the space between the band and watch, causing irritation. After researching solutions, she purchased a silicone no gap band compatible with her model. Following the installation steps above, she achieved a tight, flush fit. Within days, her sensor accuracy improved significantly, and she reported greater comfort during extended wear—even during sweaty classes. “It feels like I’m wearing nothing,” she said. “And my sleep tracking finally matches how I actually feel in the morning.”
Common Mistakes to Avoid
Even experienced users can make errors when switching bands. Be mindful of these pitfalls:
- Using Excessive Force: Never hammer or pry components. Delicate mechanisms inside the lugs can be damaged permanently.
- Mixing Mismatched Sizes: A 22mm band forced onto a 20mm lug will strain the spring bar and compromise safety.
- Ignoring the Contour Direction: No gap bands have a specific orientation—the curved underside must face upward toward the watch body.
- Leaving Tools Near Magnets: Some spring bar tools are magnetic and could interfere with the compass or charging system if stored improperly.
FAQ
Can I reuse the original spring bars with a no gap band?
Yes, provided they are undamaged and match the correct length (typically 18mm or 20mm). However, many no gap bands come with reinforced or shorter pins designed for tighter tolerances, which are preferable for long-term reliability.
Do no gap bands affect wireless charging?
No. As long as the band does not cover the back sensors or extend over the charging contacts, charging performance remains unaffected. Most quality no gap designs preserve full access to the rear panel.
Are no gap bands compatible with third-party apps and watch faces?
Absolutely. Band type has no impact on software functionality. All health tracking, notifications, and app integrations continue working normally once the device is secured.
Final Checklist Before Wearing
📋 Installation Verification Checklist:- ✅ Both sides of the band are securely attached
- ✅ No visible gap between watch and band base
- ✅ Watch sits flat against the wrist without tilting
- ✅ Sensors maintain consistent skin contact
- ✅ Band moves smoothly with wrist motion, not independently
Conclusion
Switching to a no gap band transforms the way your Galaxy Watch feels and functions. What begins as a simple accessory upgrade delivers tangible improvements in comfort, hygiene, and biometric accuracy. With the right tools, attention to detail, and proper technique, anyone can achieve a professional-quality installation at home. Whether you're upgrading for aesthetics or performance, taking control of your wearable's fit empowers a better experience every day.


 浙公网安备
33010002000092号
浙公网安备
33010002000092号 浙B2-20120091-4
Comments
No comments yet. Why don't you start the discussion?