
Upgrading your Apple Watch Series 10 with a Refi strap is one of the easiest ways to refresh your look while maintaining comfort and durability. Refi straps have gained popularity for their minimalist design, premium materials, and eco-conscious production. Whether you're switching from the original band or replacing a worn-out strap, the installation process is intuitive—but doing it correctly ensures both safety and longevity. This comprehensive guide walks you through every detail, from preparation to final fit, so you can complete the swap confidently and flawlessly.
Why Choose a Refi Strap?
Refi straps are designed with simplicity and sustainability in mind. Made from recycled stainless steel, FSC-certified leather, or vegan alternatives, they offer a refined aesthetic without compromising ethics. Their quick-release mechanism aligns perfectly with Apple’s built-in system, making them fully compatible with the Series 10. Beyond aesthetics, Refi straps distribute weight evenly across the wrist, reducing pressure points during extended wear—ideal for fitness tracking or all-day use.
“Refi has redefined accessory sustainability without sacrificing form or function. Their precision engineering makes installation seamless.” — Jordan Lee, Wearable Tech Analyst at GadgetTrend
What You’ll Need Before Starting
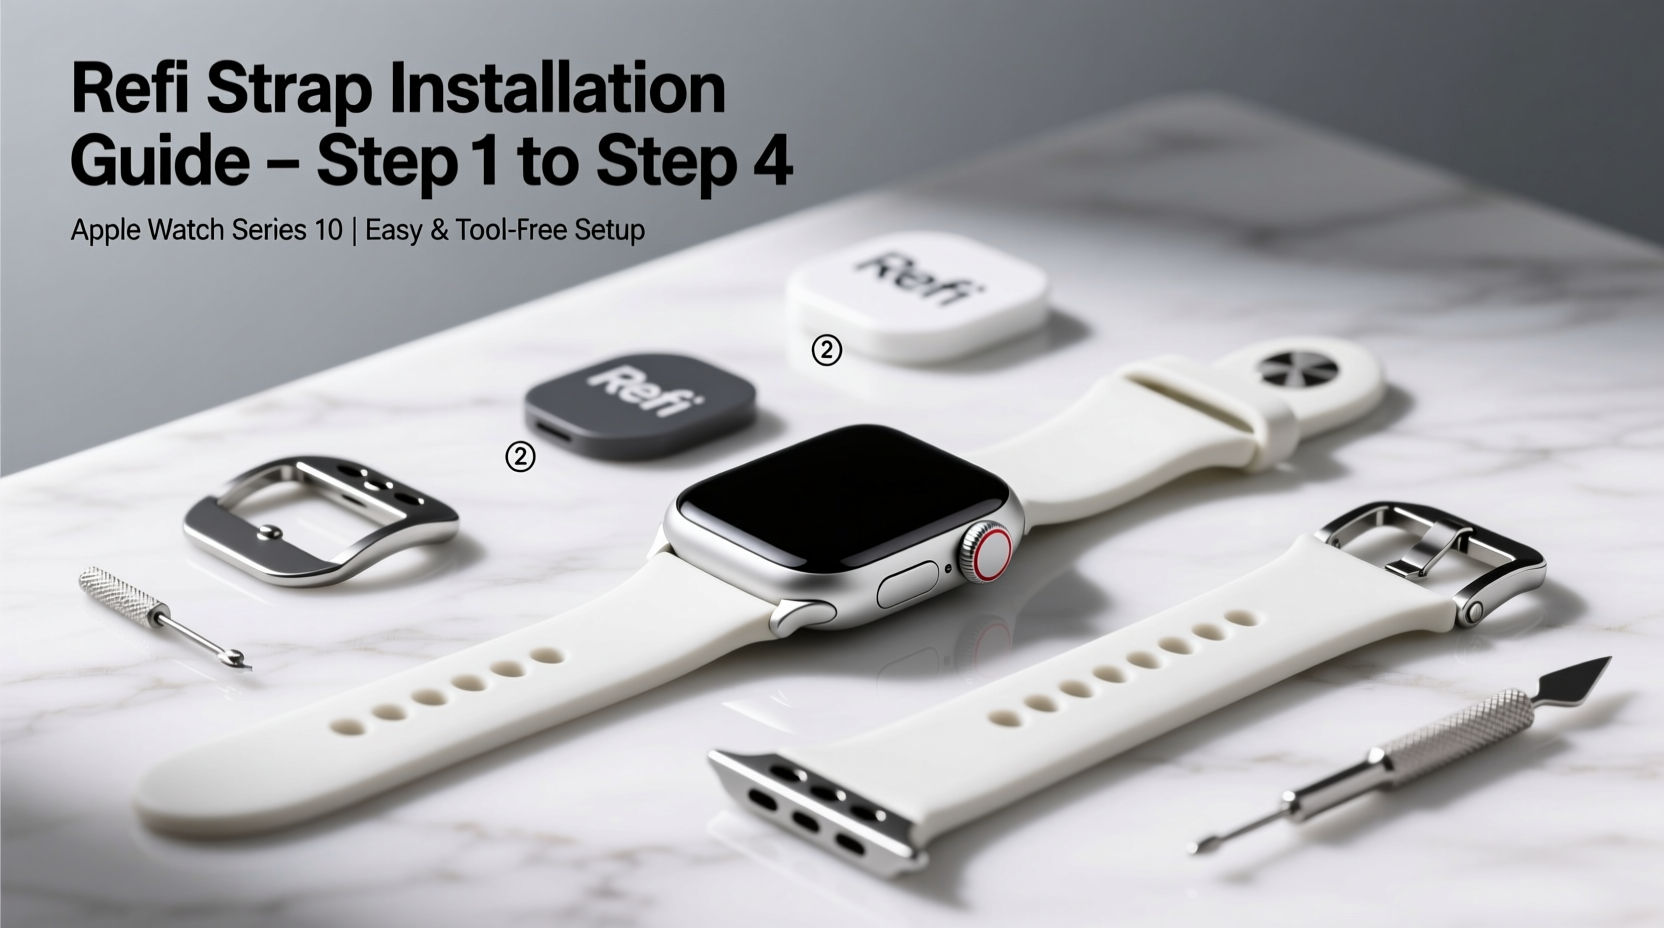
No special tools are required, but having a clean workspace and understanding the components will streamline the process. Here's what to prepare:
- Your Apple Watch Series 10 (charged and unlocked)
- New Refi strap (ensure both spring bars are intact)
- Soft microfiber cloth (to protect the watch face)
- Well-lit, clutter-free surface
Avoid working on carpeted floors or near open windows where small parts could be lost. The entire process takes less than five minutes once you’re familiar with the steps.
Step-by-Step Installation Process
Follow this precise sequence to attach your Refi strap safely and securely.
- Power down your Apple Watch (optional but recommended): While not required, turning off the device prevents accidental touches during handling. Press and hold the side button, then slide to power off.
- Lay your watch face-down on the microfiber cloth: This protects the display from scratches and provides stability.
- Locate the release button on the current strap: On the underside of the watch case, near where the band connects, you’ll see a small pinhole. Press it gently with a paperclip or fingertip—this releases the spring bar.
- Detach the existing strap: As you press the release, slide the strap outward. Repeat on the other side. Set the old band aside carefully.
- Align the Refi strap’s spring bar with the lug slot: Hold the new Refi strap at a slight upward angle and insert one end into the watch lug. Ensure the spring bar clicks into place flush with the case.
- Engage the locking mechanism: Once partially inserted, press the release button again and slide the strap fully in until you hear a soft click. This confirms secure attachment.
- Repeat on the opposite side: Connect the second end using the same method. Do not force the connection—if resistance occurs, double-check alignment.
- Inspect both connections: Gently tug each side of the strap to verify it doesn’t loosen. There should be minimal lateral movement, only natural hinge flexibility.
- Turn your Apple Watch back on: Long-press the side button to restart. Confirm normal operation before wearing.
Installation Checklist
Use this checklist to ensure a successful setup:
- ✅ Watch placed on soft surface, screen protected
- ✅ Old strap removed completely from both sides
- ✅ Refi strap oriented correctly (buckle side down if applicable)
- ✅ Spring bars fully engaged and clicking into lugs
- ✅ No visible gaps between strap and watch case
- ✅ Secure fit confirmed with gentle pull test
- ✅ Device powered back on and functioning normally
Common Mistakes and How to Avoid Them
Even simple installations can go wrong if proper attention isn’t paid. Below is a comparison of best practices versus common errors.
| Do’s | Don’ts |
|---|---|
| Press the release button fully before sliding the strap out | Don’t yank the strap without releasing the pin—it can damage internal mechanisms |
| Insert the Refi strap at a 30–45 degree angle for smoother engagement | Don’t insert the strap straight-on; misalignment may bend the spring bar |
| Double-check that the buckle or clasp faces inward (toward your wrist) | Don’t install the strap upside down—it affects comfort and appearance |
| Clean the lug area with a dry cotton swab if dust is present | Don’t use liquids near the connection points—moisture can harm electronics |
Real-World Example: Sarah’s Seamless Upgrade
Sarah, a digital marketing manager in Seattle, upgraded her Apple Watch Series 10 ahead of a business trip. She’d been using the sport band daily for over a year and wanted something more professional for client meetings. After ordering a brushed titanium Refi link bracelet, she followed the steps above during her lunch break. “I was nervous about breaking the watch,” she said, “but the process took less than three minutes. Now I get compliments every time I check my notifications.” Her only regret? Not upgrading sooner.
Frequently Asked Questions
Can I reuse my old Apple Watch strap after removing it?
Yes, as long as the spring bar and connectors are undamaged. Most OEM and third-party straps can be reinstalled multiple times without issue. Inspect for bent pins or frayed material before reuse.
Is the Refi strap waterproof?
The Refi strap itself does not hold water, but its materials vary. Stainless steel and silicone versions are sweat- and splash-resistant, ideal for workouts. Leather variants should be kept dry to prevent staining or warping. Always refer to the manufacturer’s care guide for specifics.
Will changing the strap affect my heart rate readings?
No. Sensor performance depends on the watch module, not the strap. However, ensure the new strap fits snugly—too loose, and motion artifacts may interfere with accuracy during exercise.
Final Tips for Long-Term Use
Once installed, maintain your Refi strap with routine care. Wipe metal links weekly with a dry cloth to remove oils and debris. For leather options, condition every 6–8 weeks using a product approved for vegetable-tanned hides. Avoid exposing any strap to extreme temperatures or prolonged UV light, which can degrade adhesives and finishes over time.
Conclusion
Installing a Refi strap on your Apple Watch Series 10 is a quick, satisfying upgrade that enhances both style and sustainability. With no tools required and a foolproof mechanism, anyone can do it in under five minutes. By following these detailed steps, avoiding common pitfalls, and caring for your new band, you’ll enjoy a sleek, personalized look that lasts. Your Apple Watch evolves with you—make sure its accessories do too.


 浙公网安备
33010002000092号
浙公网安备
33010002000092号 浙B2-20120091-4
Comments
No comments yet. Why don't you start the discussion?